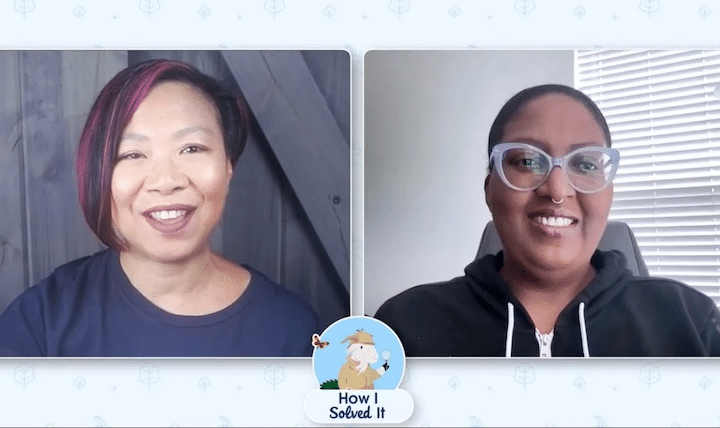
Automate This! with Jennifer Lee, Rebecca Glasser and Diana Jaffe

Automate This! — A Trailblazer’s Insights from Migrating Workflow Rules to Flow

By

Welcome to another “Automate This!” In this live-streamed video series, we cover all things automation, from use cases and best practices to showcasing solutions built by #AwesomeAdmin Trailblazers like you. Automation allows you to remove manual tasks, drive efficiency, and eliminate friction and redundancy. In this episode, let’s see how Rebecca Glasser migrates and consolidates workflows into flows in two Salesforce orgs.


I support two different Salesforce orgs. One org uses Sales Cloud and Service Cloud, and the other org uses Service Cloud and Experience Cloud. We worked through the workflows on the Sales/Service Cloud org first. In this org, there were 25 workflows that we needed to convert to flows. We deactivated four workflows and converted the rest into 15 flows. In the Service/Experience Cloud org, we had 41 workflows. We deactivated two workflows and converted the rest into 36 flows.

As part of this conversion, we had three goals:

  1. Migrate all of the workflows over to flows.
  2. Consolidate multiple workflows into one flow, wherever possible.
  3. Make as many flows Before Save as possible.

Before Save flows are faster and use less resources because they run before the record is saved to Salesforce. This is more efficient because a save causes other things to run, such as custom validation rules, duplicate rules, auto-response rules, and processes.

My workflow rules to flow migration strategy

We started out by making a list of workflows and setting up a tracking spreadsheet. We created a separate sandbox just for the flow conversion. I had a contractor assist me on the migration. She used the Salesforce Migrate to Flow tool, and then we’d work together to optimize the flow. She documented, tested the flow, and moved it into our general dev org, where I reviewed and tested it. Once it passed my testing, I moved it up our full sandbox where our team’s business analyst (BA) performed the final test. After the flows passed this final test, they were ready to move to Production.

Because we had so many flows to move, we moved several flows together into each environment. When the flows were ready to move to Production, we scheduled the deployments in multiple releases in the event.

What worked well/lessons learned

It took us some trial and error to figure out the best process. Moving flows up to our general dev org once a week rather than piecemeal throughout the week really helped. The tracking spreadsheet was also essential. We included the testing status, release number, and any notes (such as what could be decommissioned, what was still needed, and what we might need to update on a flow we were working on). Our tracking spreadsheet was on a Microsoft Teams site where my contractor, the BA, and I collaborated on it. This way we could keep track of where things were in the pipeline, who was doing what, and in which sandbox. Having three people look at these flows proved to be beneficial. The BA made some great catches when he did the final testing due to his familiarity with the data, or in certain cases, specific aspects of the functionality.

Here’s an example of the tracking spreadsheet we used:

An Excel spreadsheet is shown, with these columns: Workflow, Flow, Status, Documentation, Move to Dev Sandbox, Move to Full Sandbox, and Release #.

The values in the Workflow column are the names of both workflows; the value in the Flow column is the name of the new flow. The values in the Status and Documentation columns show the status of the new flow and the accompanying documentation. The values in the columns Move to Dev Sandbox and Move to Full Sandbox show that the flow has been moved to both sandboxes. Finally, there’s a column for the Release #. Because we had so many flows to move to Production we moved them up in batches. This flow was part of release four. It may also be helpful to have a Notes column so that if something comes up with a flow you’re working on or testing, you can write your notes in the associated column.

The other big thing is that we’re still learning about flows, so I already have changes I want to go back and make. It’s good enough for now but I have a list ready for when I have time.

Finally, if you use the formula for Set Entry Conditions, make it as readable as possible. If you use the workflow converter, you’ll need to adjust this. I like to copy what’s in the formula box into Notepad++ so I can easily adjust it and then copy it back into the formula box. This makes it easier down the road when I’m trying to review the entry conditions.

Gotchas/things to be mindful of

We did find out a few things that might be helpful to other admins:

  1. Before Save flows may run before validation rules. While we had three people testing the flows, we were all testing as system admins. When we moved this to Production, one of our users encountered an issue because there was a flow running before the validation rule, and the validation rule had excluded system admins. This shows the importance of testing as other users to ensure that there won’t be any issues in Production. Luckily, it was a quick fix—I just needed to change the flow to an After Save flow. See Salesforce Order of Execution Visualized by Anup Jadhav for a good order of execution graphic. In our case, there were no multi line items created so the system went from 2C to 3. Validation rules weren’t run until 5A.
  2. To anyone who knows the order of execution well, this won’t be a surprise. We have a few workflows that put data into specific fields on an object. We found that those typically need to be After Save flows; otherwise the data in those fields would be blank or wrong.
  3. Be mindful of looping in flows. There’s an “executed element” limit that you can quickly hit, especially if you have integrations with other systems that are mass loading data regularly. See The Ultimate Guide to Flow Best Practices and Standards and scroll down to the “Being careless when looping” section for more information.

An example of workflow rules migrated to flow

Here are two workflow rules we converted into one flow. We used the workflow migration tool to migrate the workflow with an email alert, and then manually had to add in the logic for the workflow with a task. This is because the workflow migration tool doesn’t work on workflows with tasks. We have users who are in the Service Cloud all the time and users who are in the Service Cloud sporadically. We created a checkbox field called Field User on the User object for the users who are in the Service Cloud sporadically. If the Field User field is checked, it means this user needs email notifications so they can be notified when certain edits are made to cases they own. We use this logic on several of our notifications; the workflows below are examples of two of them.

This first workflow creates a task for the case owner when someone other than the case owner emails into the case. The task is assigned to the case owner and associated to the specific case. This workflow is for users who are in the system all the time.

Workflow Rule Detail page, showing for users who are in the system regularly; a task is then created when an email is sent into the case.

This second workflow sends an email to the case owner when someone other than the case owner sends an email into the case. This is for field users (users who are in the system sporadically).

Workflow Rule Detail page, showing for users who are not in the system regularly; when an email is sent into the case, the case owner receives an email notifying them.

The resulting flow is below:

Two workflows have been combined into one resulting flow with a decision point.

The resulting flow runs on the Case object and is triggered when a record is created or updated. I used a formula here and used Notepad++ to format it so it’s easier to read. The flow is triggered if all of the following in the formula are true:

  1. We have another flow (formerly workflow) that runs on the EmailMessage object and puts the date the email was created in the system in the field Last Email Date on the Case object when an email is sent into the case. This is used by multiple flows, including this flow, which helps us determine when a new email has been sent into the case.
  2. The same flow that runs for #1 also puts the email address the email was sent from into the field Email Owner Address on the case. This helps us ensure that case owners receive notifications only when someone else is emailing the case, because case owners forward documentation to their cases quite frequently.
  3. The final part of the formula ensures that this flow is not run when the case is in a queue. We need emails sent out or tasks created only when the case is owned by a person.

Here is the formula:

AND
(
ISCHANGED({!$Record.Last_Email_Date__c}),
{!$Record.Owner:User.Email} <> {!$Record.Email_Owner_Address__c},
NOT BEGINS({!$Record.OwnerId}, '00G')
)
Formula criteria for the flow to run

This flow is an After Save flow for a couple of reasons:

  1. It requires input from another flow that’s also a record-triggered After Save flow due to working on related records.
  2. This flow performs actions, such as creating a task and sending an email.

The flow has to make a decision—is the case owner a field user or not? If the case owner is a field user, it goes through the first outcome and then sends an email alert. This is the same criteria that exists on the first workflow.

The first outcome, which requires that the case owner is a field user.

There are a couple of ways to send an email alert from a flow, but in this case we’re using the already existing email alert. In the screenshot below, there’s a reference to {!Record.Id}. The email alert we’re using has several merge fields, so this reference pulls the information for those fields from the record the flow is currently working on into the email alert.

The screen for editing an email alert in a flow.

If the case owner isn’t a field user, then the flow goes through the second outcome and then creates a task. This is the same criteria that exists on the second workflow.

The second outcome, which requires that the case owner is not a field user.

The screenshot below shows the input values for the new task.

The input values for the new task.

We created a formula within the flow for the Due Date to take the value from the Last Email Date field on the case and add 1 day:

{!$Record.Last_Email_Date__c}+1

We created a formula within the flow for the Due Date to take the value from the Last Email Date field on the case and add 1 day: {!$Record.Last_Email_Date__c}+1

Testing and deployment considerations

Let’s talk a bit about testing. We all know it’s important to test in a sandbox before we move things to Production. But how do we test all of these flows?

First, we needed to ensure that the correct flows were activated and the correct workflows were deactivated in the test environment and when you deploy into Production. (It is really easy to forget to do this.) Once this was complete, I tested each flow to ensure not only that it worked (a positive test), but that it didn’t do something it wasn’t supposed to do (a negative test). For example, the flow we’ve been talking about should send an email or create a task when someone other than the case owner sends an email into the case. My BA and I tested this together. I would mark my user record as a field user and create a case using myself as the case contact. He would then send an email into the case. Since I was a field user, I should then receive an email letting me know that a new email was received on the case. Then I unchecked the field user checkbox on my user record, and he sent another email into the case. This time a task should be created with the pertinent information filled out. If you don’t have someone else to help with testing, you can create an email account using Gmail and use that for testing instead.

How do we test to ensure that this flow isn’t doing something it’s not supposed to do? In this case, as the case owner, I sent an email into the case. I didn’t receive an email or have a new task created, which means this test passed.

Flows also have a debug feature. I need to work more with the feature in the future. Because I’m so used to working with Process Builder I forgot about this feature and turned to it just when a flow wasn’t working properly. I’ve seen others use the debug feature after they’ve gotten the flow setup but before they’ve even started testing, so that’s what I’m going to try to do in the future.

When should we delete the workflows? Good question. I don’t have a good answer to that. Even with all the testing we did, we still had a couple of small issues we’ve had to tweak. I’m one of those people who holds onto things for far too long so it will be a while before I delete out the workflows. I recommend that you delete the workflows from Production when you’re confident your flow is working as expected and you won't need to switch back to the workflow rules.

Resources

Want to see more good stuff? Subscribe to our channel!

SUBSCRIBE TODAY
Automate This! Enhance Screen Flows with Reactive Components

Automate This! — Enhance Screen Flows with Reactive Components

Welcome to another “Automate This!” In this live-streamed video series, we cover all things automation, from use cases and best practices to showcasing solutions built by #AwesomeAdmin Trailblazers like you. With automation, you can remove manual tasks, drive efficiency, and eliminate friction and redundancy. In this episode, let’s see how Michelle Hansen uses reactive screen […]

READ MORE
Headshot of Kristi Brown next to text that says, "Automate This! — Power Up Your Einstein Bot with Flow."

Automate This! — Power Up Your Einstein Bot with Flow

Welcome to another Automate This! In this live-streamed video series, we cover all things automation, from use cases and best practices to showcasing solutions built by #AwesomeAdmin Trailblazers like you. With automation, you can remove manual tasks, drive efficiency, and eliminate friction and redundancy. In this episode, let’s see how Kristi Brown tackles some everyday […]

READ MORE
Headshot of Eric Smith and text that says, "Automate This! — Make A Field Pop on a Record Page."

Automate This! — How to Make a Field POP on a Record Page

Welcome to another “Automate This!” In this live-streamed video series, we cover all things automation, from use cases and best practices to showcasing solutions built by #AwesomeAdmin Trailblazers like you. Automation allows you to remove manual tasks, drive efficiency, and eliminate friction and redundancy. In this episode, let’s see how Eric Smith used a custom […]

READ MORE