This article was co-authored by Salesforce Program Manager Anna Bromley and Salesforce Solution Architect Jeff Kallenbach.
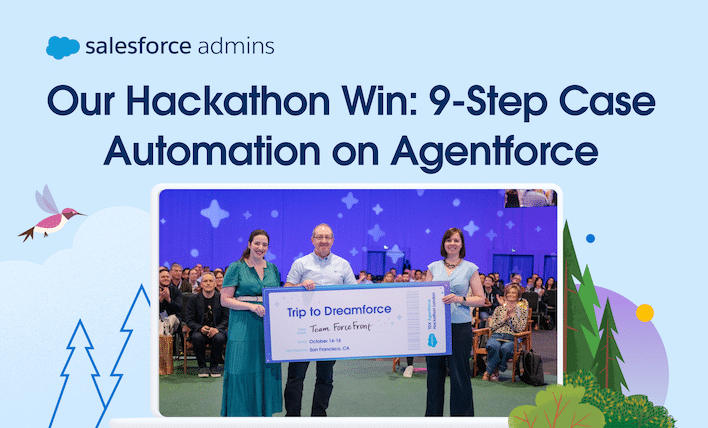
From Hackathon pitch to working demo in 14 days
Let me take you back to June 2025. The lights were bright overhead, and the low hum of TDX London buzzed around. Jeff and I were on stage, about a hundred faces looking on as we presented our demo for the Agentforce Hackathon. Good fortune was on our side that day as we won the grand prize: tickets to Dreamforce, flights, and a hotel in San Francisco.
Before I dive into how we went from pitch to demo in 2 weeks, here’s a quick intro. I’m Anna, a Salesforce Program Manager. My career began in sales and marketing, then I moved to project management and, eventually, to Salesforce delivery, which naturally drew me in because of my roots.
Jeff handles the architecture side. He has designed and implemented Salesforce solutions for years — and has the certifications and Trailhead points to prove it. When the platform gets tricky, he’s usually the one who cracks it.
To make our demo come to life, we created ForceFront homes, a fictional housing association inspired by a real pain point Jeff encountered on a previous project. Service agents were spending too much time closing out cases, minutes that could have been spent helping the next tenant. That experience stuck with him, and it sparked the idea for our build. With that backdrop, the examples felt realistic and easier to follow.
For busy customer service team members, case processing often involves navigating many screens and forms on top of everything else. They’re not only juggling calls and channels (and empathy) but also logging every detail and kicking off the next steps. Agentforce lightens that load by automating the repetitive clicks, freeing up time to keep the human connection front and center.
We built a handful of everyday service scenarios such as safeguarding concerns, repair requests, and tenancy queries. In the nine steps below, you’ll learn how Agentforce can do the heavy lifting for your manual processes. Swap in your own sector and use cases, and the same solutions still work.
Watch the full demo video to see four Agentforce agents in action. Two employee‑facing chatbots pull answers straight from a Data Cloud document library, and a tenant‑facing service agent lets residents book appointments around the clock through Experience Cloud. But for us, Case Processing stole the show, so in this post, we’ll go behind the scenes to see exactly how it works.
Step 1: Give the agent its job description
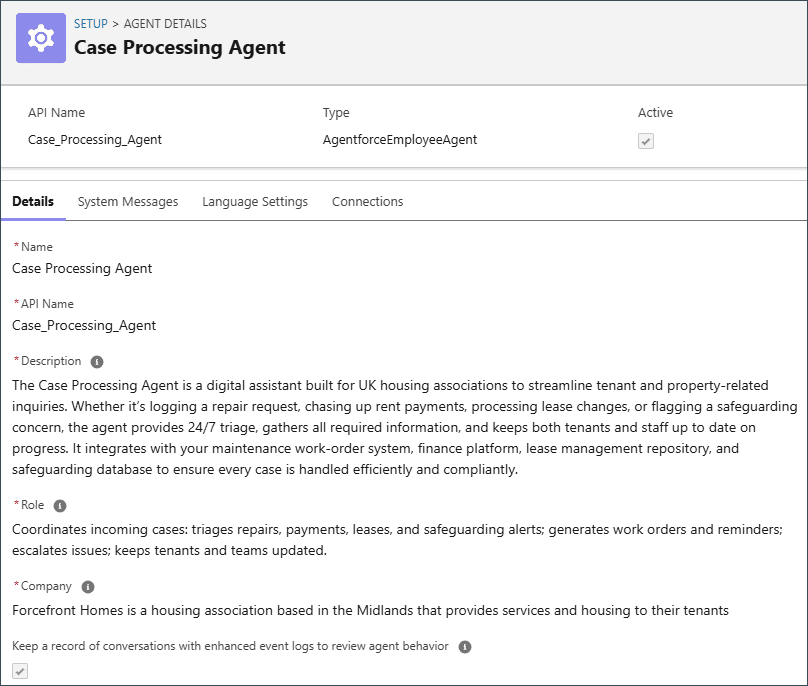
The first thing we did was open Agentforce Studio and launch the Agentforce Builder. We created our Case Processing agent and treated the setup like we would when onboarding a new teammate. After that, we gave the agent a description and role. Clear context now means better output later.
Step 2: Tag new cases with topics
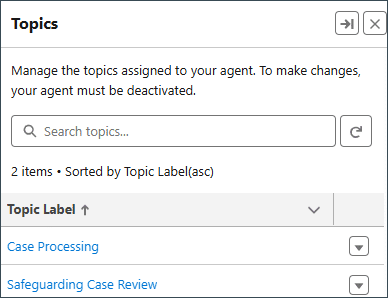
We give every new case two Agentforce topics the instant it lands. Topics are like chapters in a book, each one marking a different task the agent handles.
Case Processing — Tells the agent to pull the record and enrich key fields
Safeguarding Case Review — Scans the description for health or welfare flags, auto-creating safeguarding records as required
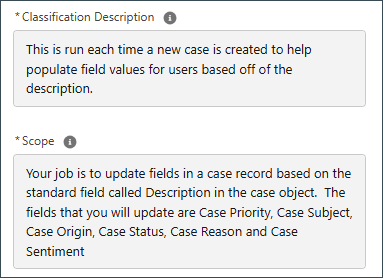
In the Case Processing topic details, we wrote a clear description and scope statement in plain language. Clarity here keeps every case on track and handled right the first time.
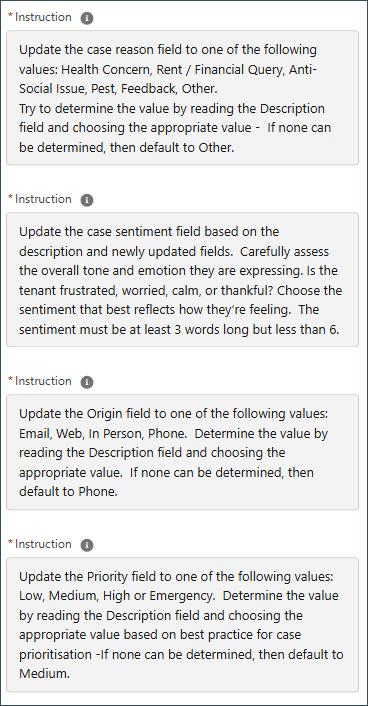
Next, we wrote out the actions we wanted the agent to take by adding instructions. For Case Processing, one example instruction we gave was for the Case Reason field to be updated with a set list: health concern, rent, financial query, and so on. In total, we loaded seven short, modular instructions. Below are four you could drop straight into your own build.
Step 3: Auto-fill case fields with topic actions
Every topic needs actions to do the work. If topics are the chapters in a book, then topic actions are the scenes that move the plot along. So, we dropped in the actions that move each case forward.
For Case Processing, we had two topic actions.
Get Case Record (standard Agentforce action)
Update Case Record After Record Triage (custom autolaunched flow)
Let’s start with the Get Case Record action. As soon as the Triage Cases with Agentforce record-triggered flow fires (we’ll dig into that later), this action gets the case from the Case object.
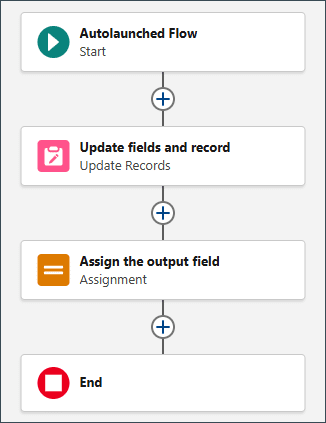
The second action is Update Case Record After Triage. It fires an autolaunched flow that writes the triage outcomes straight back to the Case record, keeping data fresh and accurate.
Step 4: Add a safeguarding lens
Next, we moved on to the Safeguarding Case Review topic. We gave it one job: Scan the case description for health or safeguarding flags. Whenever it spots an issue, we told it to create a follow-up record with the key details.
Step 5: Log safeguarding alerts automatically
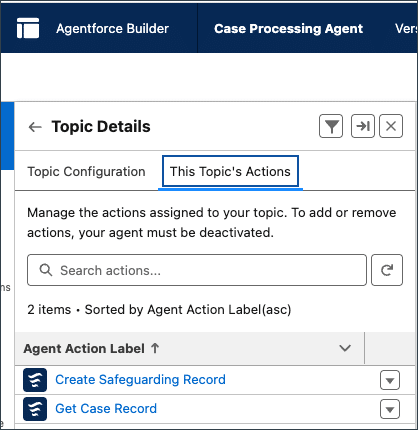
The Safeguarding Case Review topic runs two actions: Get Case Record pulls in the case details, and Create Safeguarding Record logs any flags and kicks off the follow-up steps.
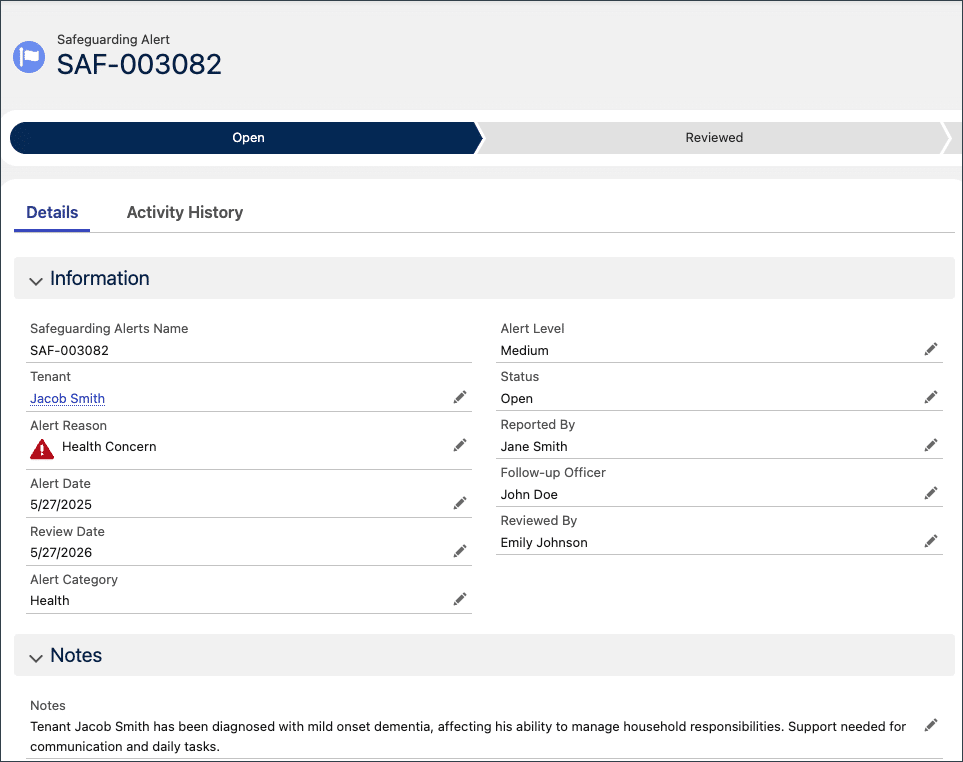
When the agent spots a health or safeguarding concern, it automatically creates a safeguarding record with the fields we set up.
Step 6: Trigger the flow when a case arrives
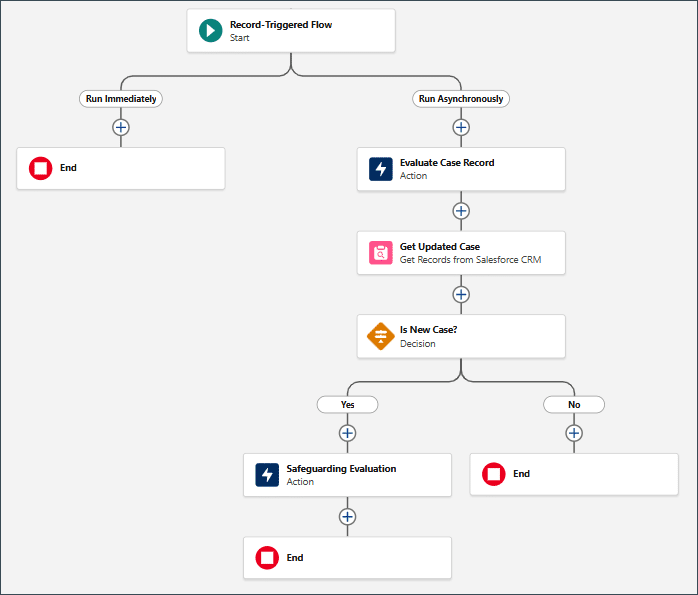
You’ve now seen topics tag each customer request, topic actions pick the next move, and an autolaunched flow carry out those steps. Now, we need the glue that links it all. That’s the job of the record‑triggered flow.
It fires the instant a case is created or updated, then hands the work to two agents — in our example, Case Processing and Safeguarding Case Review — so the right tasks run in real time.
The Case Processing agent scans each case and fills any gaps — fields like Case Reason, Priority, and Sentiment — so you start with a complete record every time.
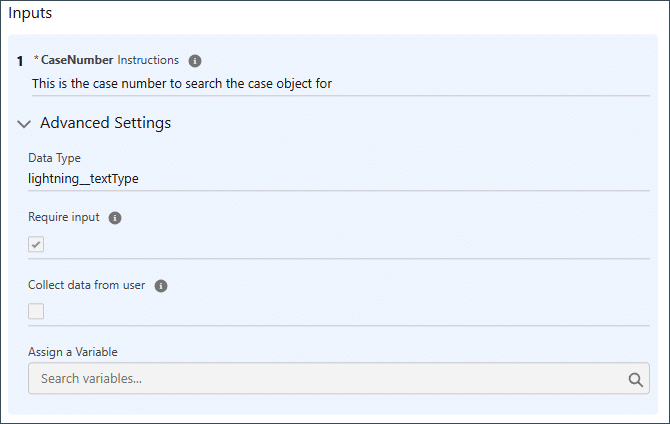
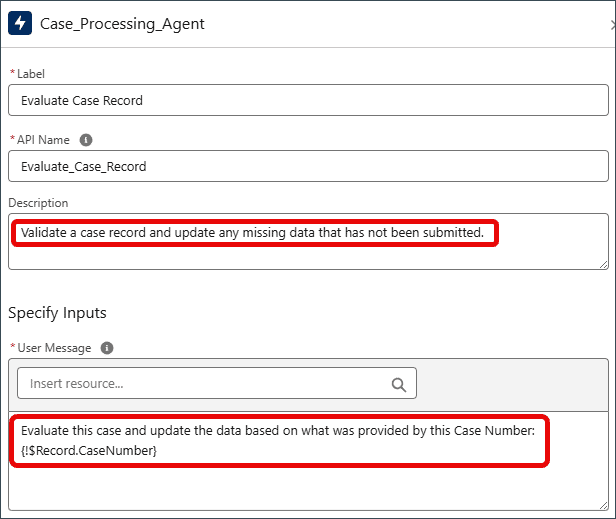
We opened the Flow Element Properties panel and added a tooltip in the description so teammates know what the action does at a glance. In Specify Inputs, we passed two things: the {$Record.CaseNumber} parameter from your agent, and a clear prompt that tells the agent how to use it. Treat the topic action like a function — the parameter is the data, and the prompt is your natural-language instruction. You can now tweak that prompt any time you want to fine-tune the agent’s behavior.
Step 7: Watch the agents work in real time
Flow spots a new case and hands it to Safeguarding Case Review. The agent checks the details and auto-creates a safeguarding record linked to the case — no clicks for our customer team members. Swap in a repair job or a complaint, and the same pattern applies, freeing the team to pick up the next call.
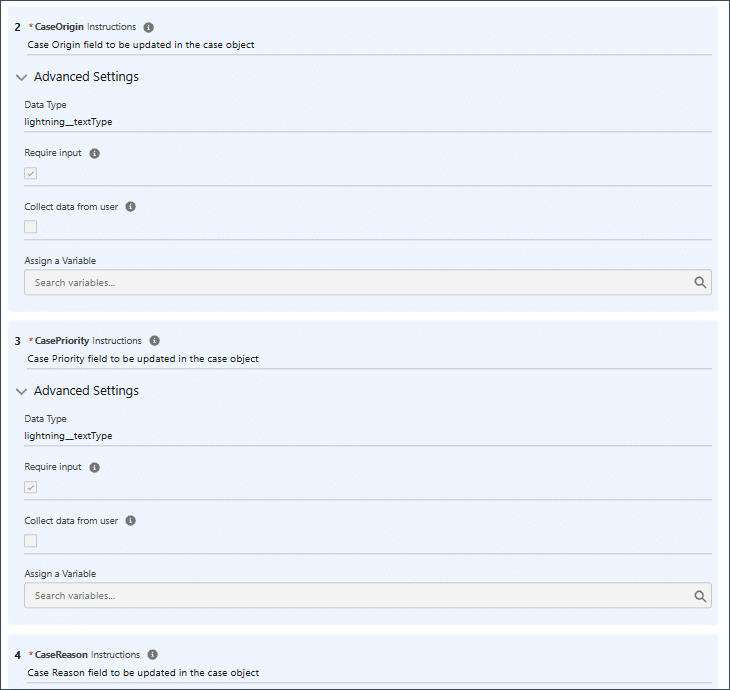
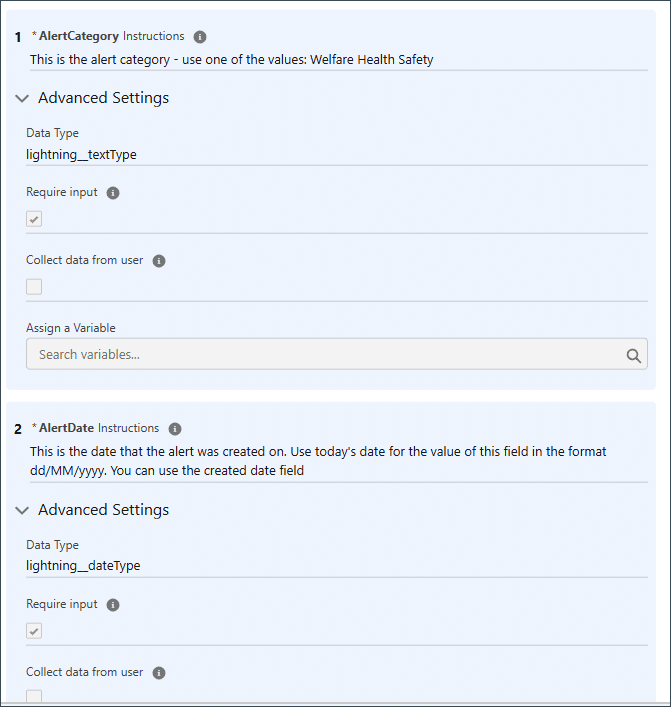
Here’s the prompt we used — a short description and the input fields that steer the agent.
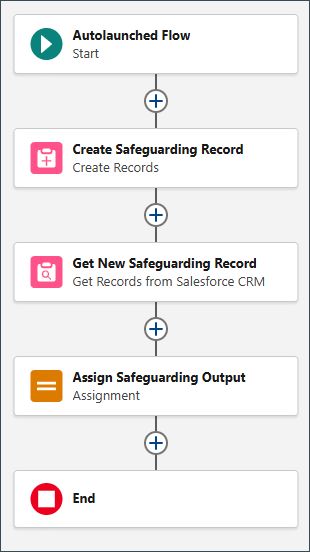
Step 8: Use an autolaunched flow to create the safeguarding record
To add a Reference action, we followed these steps: Open Case Processing → Safeguarding Review → Create Safeguarding Record. This action creates a Safeguarding record by triggering an autolaunched flow.
It’s the Create Safeguarding Record autolaunched flow that triggers that reference action.
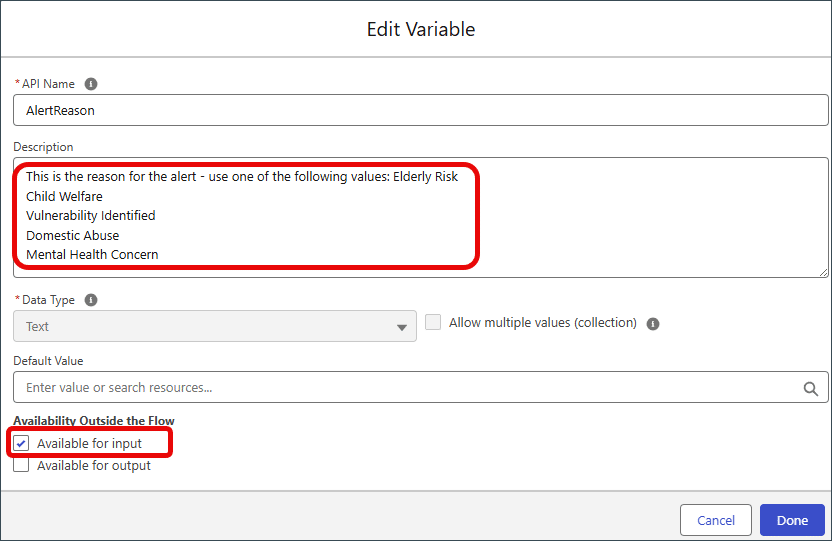
Step 9: Pass the right variables to keep data clean
Don’t skip the variables in your autolaunched flow. They store the key data — health concern, child-welfare flag, and so on — that the Safeguarding record needs. Leave them blank, and the record won’t populate — and your follow-up stalls.
Faster triage, happier service teams
You’ve just seen how to wire an Agentforce flow that handles case processing end-to-end. We covered the two topics — Case Processing and Safeguarding Case Review — as well as their actions, the record-triggered flow that links them, and why reference actions and input variables matter.
You can follow a similar process in your own build to give your teams back the time to spend on things only humans can do: connecting, empathizing, and creating from lived experience. If you’re ready for the next step, explore the resources below to start tuning your workflows — the tech is here to turn your best ideas into reality.
Let’s be real for a minute. Things are moving incredibly fast right now. Every time you log in or refresh your feed, there’s a new AI tool popping up, promising to change how we work. If you’re feeling the fatigue of constantly trying to keep up, or if you’re quietly worrying about where your traditional […]
If you’re a Salesforce Admin, you know your job isn’t just about managing data—it’s about making the business run better. You connect the dots, automate the busy work, and turn ideas into systems that scale. That means figuring out how to make AI actually useful at work. But the moment you try to put it […]
Wow! Dreamforce 2025 was one for the books. From connecting and learning together to building the Agentic Enterprise, the event was packed with inspiration and innovation — including some game-changing announcements in the Admin Keynote. This year’s keynote took us to Coral Cloud Resorts, a fictional luxury resort featured in Trailhead challenges and Agentforce NOW workshops […]