Get your #buildspiration from the Summer ’19 release! We are sharing five of our favorite release features for Admins (and Developers) as part of the The MOAR You Know learning journey. Get the release highlights as curated and published by our evangelists. Complete the trailmix by July 31, 2019, to get a special community badge, and unlock a contribution of $10 to FIRST.
Communication is the #1 core skill that employers look for in an #AwesomeAdmin. One of the most important types of communication for Admins is with our users. We need to reach our users with the right messages at the right time and in the right place in order to help them get their jobs done. As resourceful Admins we can do this in a myriad of ways: email, Chatter, phone calls, meetings, maybe even carrier pigeons. But one of the most simple ways to get a user’s attention is to use in-app notifications. That little red button on the alert icon on desktop or on my mobile device always makes me click on it to look. How great would it be to customize those notifications?
With Summer ’19, we now have Notification Builder so we can do exactly that! Until now, we weren’t able to customize in-app notifications, which meant some of us created workarounds like using Chatter groups to notify users about changes on a record. But now, we have the ability to create our own custom in-app notifications and use Process Builder to configure when those notifications get triggered and who gets them. We can also customize the text inside the notification, and it works for both desktop and mobile.
Want to try it out?
Let’s say you’d like the sales management team to get notified when someone closes a deal. Here’s how you could use Notification Builder to set this up:
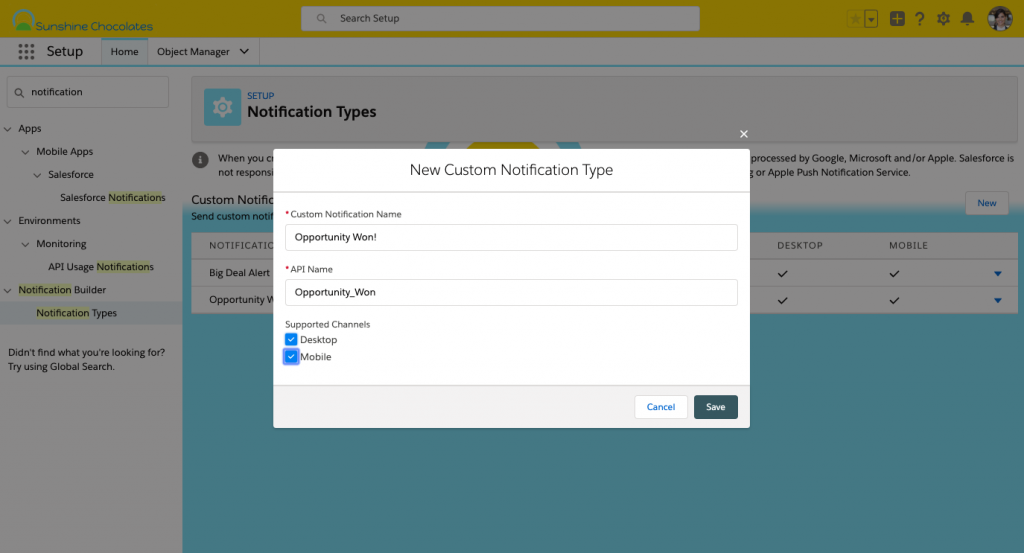
1) Go to Setup | Notification Builder | Notification Types and select Create New. Title the notification and check both desktop and mobile.
2) Then go to Setup | Process Builder | New and create a new process on the Opportunity object that takes place when a record is created or updated with the Status as Closed Won.
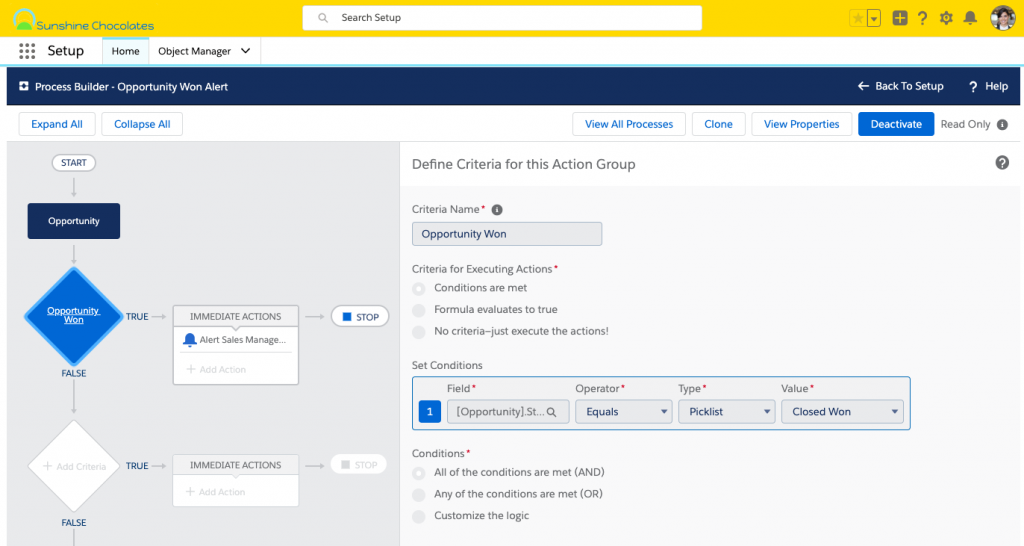
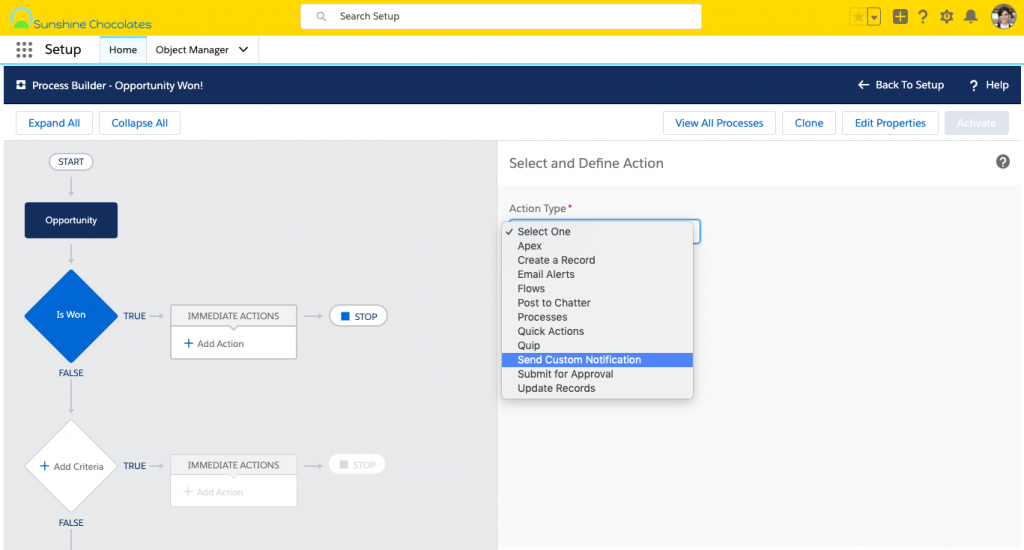
3) Then select Send Custom Notification for the Action Type, and choose your Opportunity Won! notification type you created in Step 1.
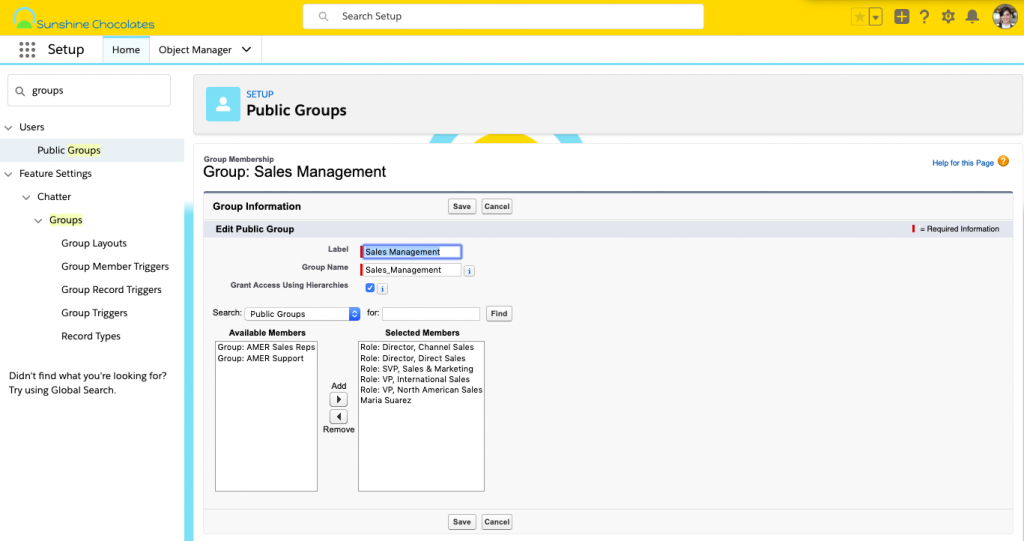
4) Who do you want to receive your notification? Since we are targeting sales management, we can use a Public Group that includes all of the sales managers. You can create a public group by going into Setup | Users | Public Groups and adding the appropriate roles and users to the group. Then when you are setting up your process in Process Builder, you can select Group and the Notification Recipient and choose the sales management group you set up.
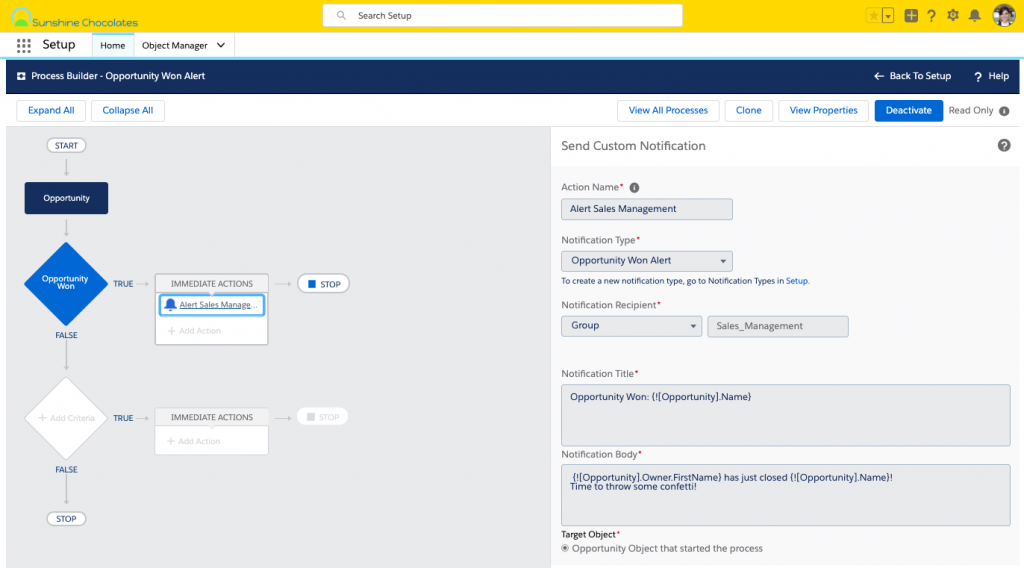
5) Now you can customize your notification! Create a catchy, clear title and body that is succinct and has relevant information. This is a great place to use merge fields to customize each notice and enable users to click into the record from the notification.
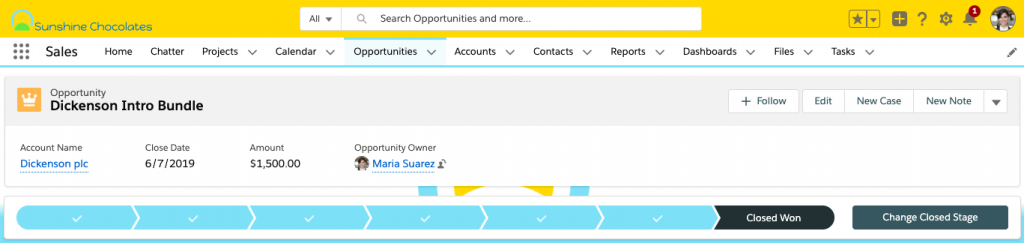
6) Activate the process and that’s it! To test it, update an Opportunity to Closed Won. Do you see the little red dot on the alert icon on desktop and on the app in mobile? Congrats! You created your first custom in-app notification!
Share your #Buildspiration
This is a really cool feature and I can’t wait to see all of you put it to good use! Please share your Notification Builder screenshots with us using the #buildspiration hashtag!
Find more information about custom notifications in this fantastic post from Heather Dykstra on the Salesforce Developers blog. And read more about Notification Builder in the release notes.