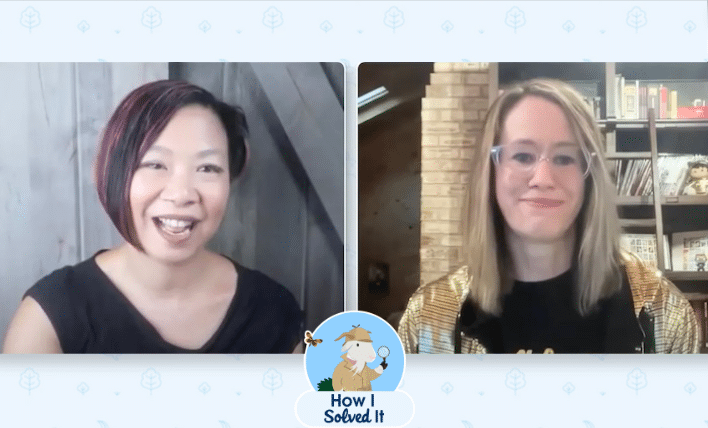
Welcome to another “How I Solved This.” In this series, we do a deep dive into a specific business problem and share how one #AwesomeAdmin chose to solve it. Once you learn how they solved their specific problem, you’ll be inspired to try their solution yourself! Watch how Mary Tagler uses Flow and Slack to drive user collaboration, and then read all the details in the post below.
Key business problem
When a Lead is converted, I want to move data — not available through the Lead mapping process — over to my Account record and set some default field values. Requiring users to manually transfer data after a Lead converts is inefficient and prone to human error. Additionally, when Leads are qualified and converted, the business wants a collaborative way to notify key individuals, even if they don’t have a Salesforce license.
Background
Relativity is a software company that provides legal and compliance solutions. My example, adapted for Dreamforce’s Admin Main Show, The Future of Admin Success, combines two problems Relativity needed to solve.
First, as part of our sales process, we wanted to move away from a paper process that requires sales reps to take partner interactions and manually input key details into Salesforce. To do this, we’re using Flow to create a custom object record on Lead conversion that’s populated with key data points captured on the Lead record and exposed to internal and partner users.
Second, we rolled out a custom object called Product Feedback a few years ago with the intention that any customer interaction that generated product feedback would be entered into Salesforce for review by the product management team. The feedback we heard from the product management team was that other stakeholders wanted to be involved in the feedback process sooner and a consistent way to collaborate on feedback received. The team and the company were already avid Slack users, so it was important to bring the conversation to where their stakeholders were. This was critical since not all stakeholders were licensed Salesforce users. To fully meet their needs, we needed to be able to direct the feedback posts to each product team’s Slack channel, whether public or private.
To boil that down, we needed to enhance the Lead conversion process and create Slack posts with custom messages based on defined business triggers.
How I solved it
I created a flow that runs on a Lead conversion and pushes Lead data to Account fields, and creates a custom Slack post linking back to the Opportunity.
1. Define how, what, when, and who
First, I need to determine what object it will listen to for changes and when. Just like we turn on the lights when we need them, we want to tell our flow to run only when it’s needed. As part of the Lead conversion process, Salesforce automatically populates the ConvertedDate field on the Lead record, so I’m using the condition picklists to define my criteria. I’m also selecting Only when a record is updated to meet the condition requirements so that my flow only runs when the field is first populated.
Next, I need to configure when my flow is triggered and how it will run. I start by asking myself, “how,” “what,” “when,” and sometimes, “who.” Let’s start with our first what: pushing Lead data over to the Account it’s being converted into. We’ve already determined when this should happen: when the Lead is converted. Converting our Lead not only updates the Lead record, but it can trigger the creation of a brand new account, opportunity, or contact. Since we need to use the Account ID created or referenced by the conversion, we want this flow to run after the record is saved. So, I select ActionsandRelated Records (yep, that’s our how).
2. Enhance the Account record on Lead conversion
Flow doesn’t have to be complicated to be effective and can pack a lot of power into one element.
When our Lead converts, I want to do two things that can’t happen with the native Lead Field Mapping process. First, I want to copy the value of Rating from Lead to a custom field on Account (Lead Rating) to preserve the Lead’s rating at the time of conversion. Second, I want to set the value of the Type field on Account to a specific value when a Lead is converted. Let’s get started!
I’m going to use an Update Record element for the Account object. The Account record our Lead mapped to is found using the ConvertedAccountId field on the Lead object. On Lead conversion, the Contact, Account, and Opportunity Ids are stored on the Lead record. I’m also excluding Account records where the custom Lead Rating field is already populated. This can happen when a user converts a Lead into an existing Account record.
You may have noticed that in both lines of our filter criteria, I’m referencing $Record. The $ signifies a global variable or value; when paired with Record, it means that the flow is referencing the record that kicked off the flow (aka the converted Lead). In plain language, my filter criteria is looking for an Account where the Account Id is equal to the Lead’s ConvertedAccountId value and that Account’s Lead Rating field is blank. Similarly, I am updating the Account with the converted Lead’s Rating value and setting the Account’s Type field to Prospect.
Boom! The Account identified in our Lead process has just been updated! But I’m not done yet — I can’t forget about the who: the stakeholders who spend their time in Slack.
3. Let’s get ready to collaborate
I want to ensure all of the right people are being alerted when an Opportunity is created during the Lead conversion process. I could have the flow send an email, but a Slack message would be more collaborative.
To get started, I need to download the Salesforce for Slack app from the AppExchange.
Pro tip: Install the app in a sandbox first to test out your build before installing it into your production org. Also, create test channels for your flow; you can always archive them when you’re done.
Once installed, I went to the Slack Setup tab to configure Slack and Salesforce.
The Setup page will take you step-by-step through the configuration process, and you’ll see guidance for each step on the right side of the page.
System Connection: This connects Salesforce and Slack. Depending on how your Slack instance is configured, you may need to coordinate with your Slack admin to ensure you’re able to install a custom app.
Enable Custom Objects (optional): This step is not needed for our use case. If you intend to connect Slack to a custom Salesforce object, know that it will require a trigger and class to function properly.
Configure Custom Alerts (optional): This step allows your users to subscribe to simple standardized notifications. In our case, I want to push alerts to specific channels and the option to create a custom message.
Org Configuration (optional): Here’s where you can add the Send to Slack and Slack Alerts actions to page and global layouts.
Configure Message Destinations: Here’s where you define the channels you want to send posts to. Once identified, Salesforce creates a record on the Message Destination object and exposes each channel’s Salesforce record ID for easy reference. I’ll talk more about these IDs as I expand my flow.
The app creates a Slack Standard User permission set in your org, which is needed for users to access all of the app’s features.
4. Prep our org for Slack messages
I could write a whole other post about all of the reasons you should avoid hard coding record IDs in Salesforce, but someone beat me to it. I’ll leave it at this — don’t do it! Make it easier on yourself, and the other admins and devs using your org, now and in the future.
For my flow, I created a custom label to store my channel ID. I love naming conventions and use this formula when creating custom labels to store IDs: [Object or App][Record Type or Name]. So, for my Slack channel ID, I’m going to name my label SlackAppFoodChannel, and in the Categories field, I’m going to use two key phrases: Id and Slack. I like this approach for two reasons.
First, by following this naming convention, all labels for a specific object or purpose type are grouped together, which not only makes them easier to find but also helps minimize the likelihood of duplicate labels. Second, categories can be referenced in list views; our team has a whole view devoted to stored IDs. Custom labels are easy and flexible, but I would opt for querying the Message Destination object directly or using a custom metadata type if I wanted to determine my destination dynamically.
5. Find the Opportunity for our Slack post
Collaboration is a top priority for our stakeholders, and in order to post a message to Slack about the Opportunity tied to my Lead conversion, I must tell my flow which record I’m referring to. To do this, I added a Get Records element to my flow and found the Opportunity where the Opportunity Id equals the ConvertedOpportunityId found on my Lead.
I’m opting to “Automatically store all fields” so that I can use any of them for my Slack post. I chose this option because it’s the most scalable. If I add new fields to the object, they will automatically be available for use in my flow. If I call out only those fields I want to use, I must ensure that any time I want to reference an additional field, I must come back to this element and call it out specifically.
6. Create our custom Slack message
There are two ways I can create a custom message for my Slack post: by typing it into either the Post to Slack action itself or within a text template. It’s personal preference, but I find it easier to craft my message using a plain text template. Avoid using rich text templates, as the HTML markup will be displayed when your message hits Slack.
To create my template, I navigate to New Resource and select Text Template. I prepend all of my text template variables with ‘tt’ to make them easier to find when I search for variables. Once I’ve assigned a name to my variable, I change the toggle to “View as Plain Text” and craft my message inserting variables wherever I want to merge in record values. Wrapping words in asterisks (*) will bold text in my post.
6. Adapt our flow for Slack messages
Next, I add the Post to Slack action to my flow.
The action has two required fields: Message Destination Id and Record Id. Message Destination Id refers to the ID of the channel we’re posting to; I’m using the Custom Label I created earlier. The Record Id refers to the Opportunity my flow found in my Get Records element. To add my custom message, I toggle the Message field on and insert the text template variable.
For standard objects, the Slack app will automatically include a link to the record I’m posting about as well as key fields from the record. Currently, the values pushed over to Slack are not customizable for standard objects.
Business results
Implementing this solution allowed our users to seamlessly transfer key data between objects and keep all relevant stakeholders informed and collaborating, regardless of whether or not they have a Salesforce license.
Do try this at home
This particular use case was used as part of the Lead conversion process, but it can easily be adapted to a variety of use cases. A good source of inspiration is to think about scenarios where users manually transfer data between records or where collaboration could be improved by replacing or supplementing an email notification with a Slack post. If you still can’t think of any ideas, shadow a few users and I’m sure you’ll have more than a few use cases.
Want to kick it up a notch? Add some logic to your flow to dynamically set the destination of your posts.
Welcome to another “How I Solved It.” In this series, we do a deep dive into a specific business problem and share how one Awesome Admin chose to solve it. Once you learn how they solved their specific problem, you’ll be inspired to try their solution yourself! Watch how Paolo Sambrano operationalized data collection using […]
Welcome to another “How I Solved It.” In this series, we do a deep dive into a specific business problem and share how one Awesome Admin chose to solve it. Once you learn how they solved their specific problem, you’ll be inspired to try their solution yourself! Learn how Katie Villanueva combines Flow, Prompt Builder, […]
Welcome to a special edition episode of “How I Solved It.” In this series, we do a deep dive into a specific business problem and share how one Awesome Admin chose to solve it. But in this episode, we’ll show you how not one, not two, not three, but FOUR Awesome Admins solved the business […]