There are times when you build a flow that you want to provide a link to a record, but you want this link to be created dynamically. It cannot be static or hard-coded. Now, you know what I think about hard coding things, especially in Flow.
The business problem
Addison Dogster is the system administrator at Hello Mochi, and Mary Markle is the operations manager. When a new contact record is created, Mary wants the confirmation screen to include a link to the newly created record. Can Addison implement this, and how?
The solution
Why yes, it is indeed possible and, added bonus, it can be generated dynamically. Win-win! Addison solves this problem using a formula that dynamically generates the Salesforce URL for the newly created record.
Here’s a demo of the solution.
The automation solution (screen flow) looks like this.
(1) We ask for the contact’s first and last name. (2) Then, we create the new contact record using the input from the screen flow and store the newly created contact record in a variable. (3) Lastly, we create the confirmation screen, letting the user know that we created the contact with a link to the newly created contact record.

Let’s see how Addison creates her screen flow.
In the flow, she configures the following Flow resources.
A. She needs to create a variable resource to store the newly created contact record ID.
Best practice tip: Provide a description so you and other/future admins know what this Flow resource is used for.
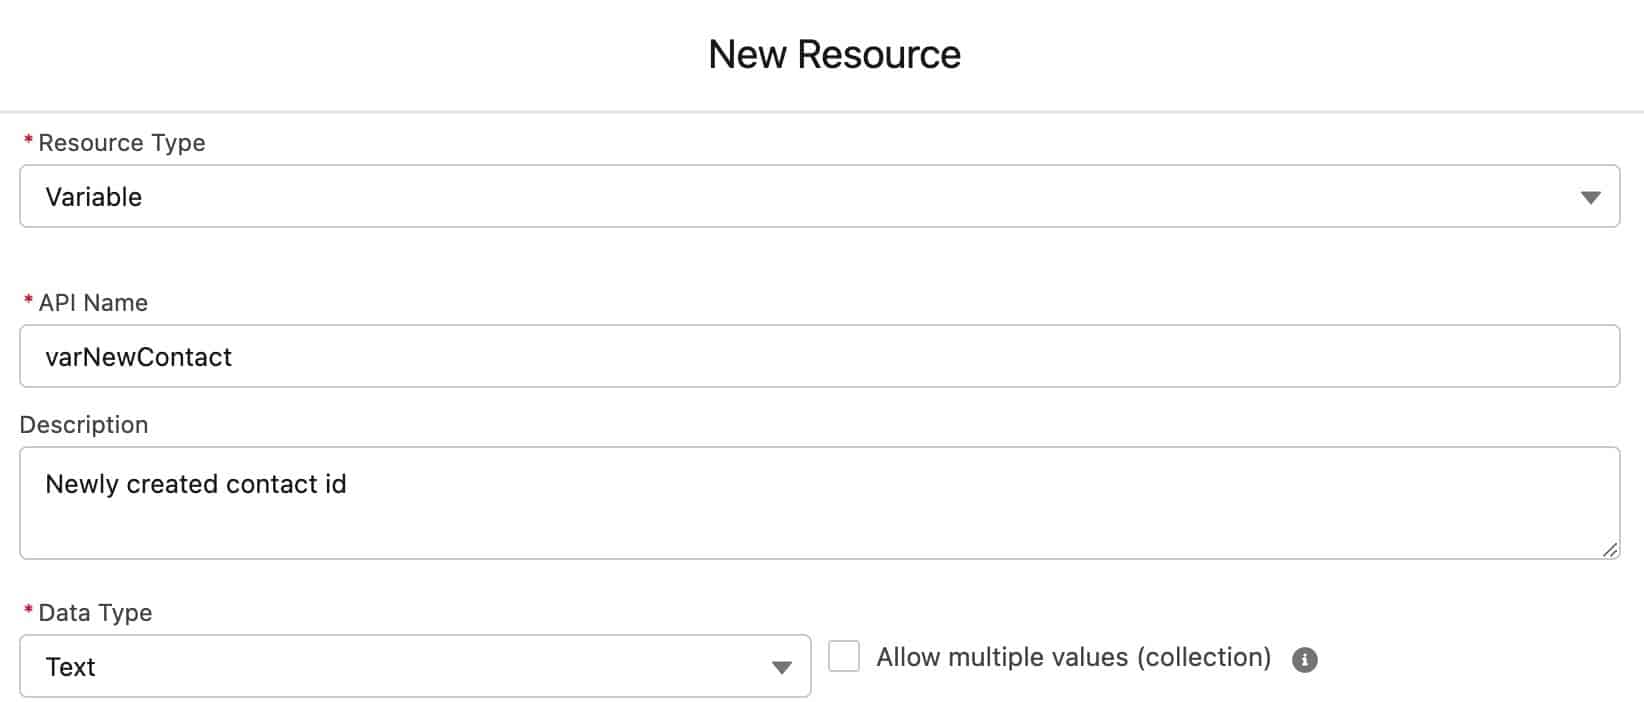
Here’s how Addison configures the variable resource.
- Resource Type: Variable
- API Name: varNewContact
- Data Type: Text
- Availability Outside the Flow:
- Available for input: Unchecked
- Available for output: Unchecked
B. Addison needs to create a formula to store the dynamically generated URL to the contact record. Because the contact record ID does not exist until the record is created, she needs to create the link dynamically. While she could have hard coded the beginning URL, we want the link to work in every environment this is tested in and not just production.
Best practice tip: Provide a description so you and other/future admins know what this Flow resource is used for.
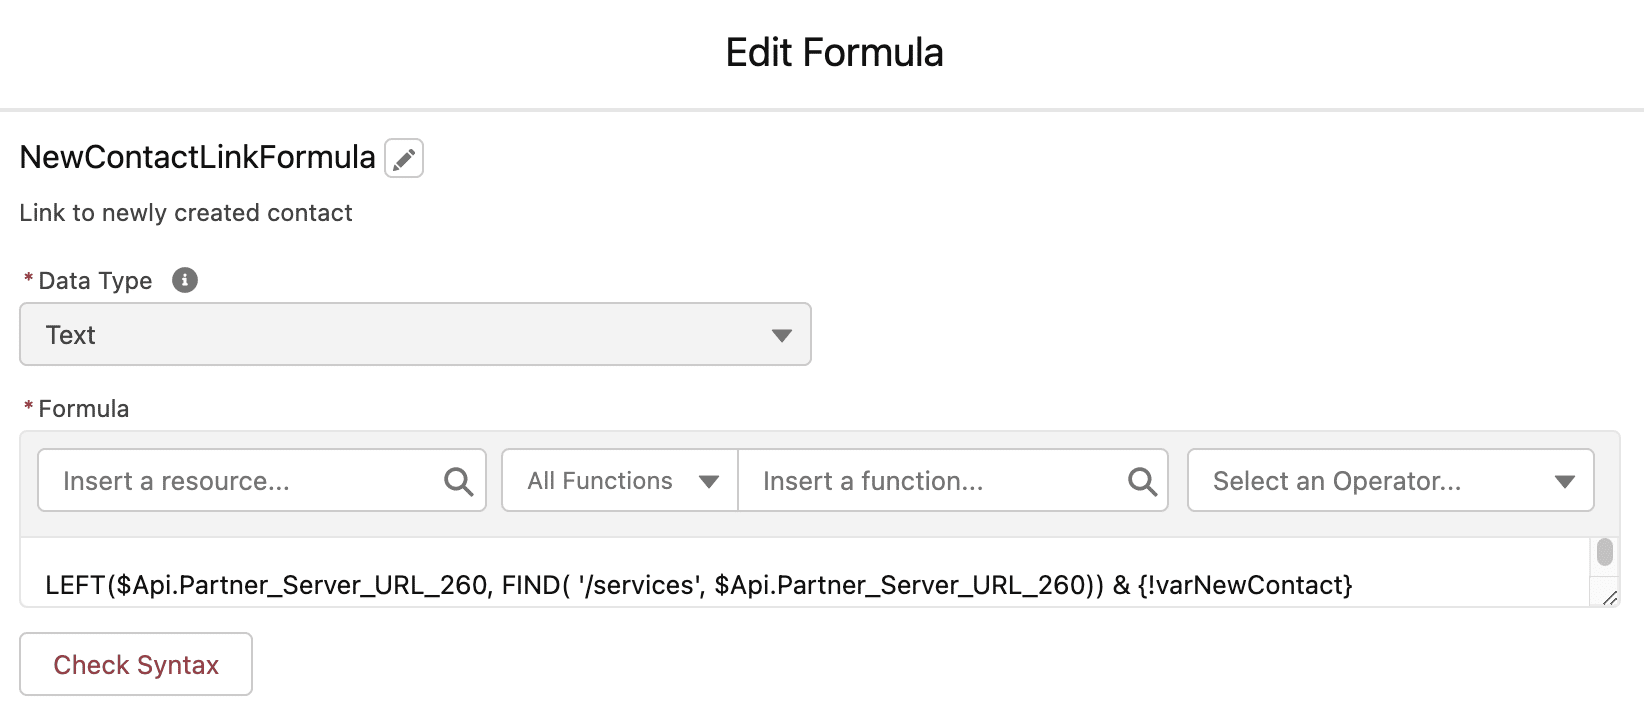
Here’s how Addison configures the formula resource.
This part of the formula, LEFT($Api.Partner_Server_URL_260, FIND( ‘/services’, $Api.Partner_Server_URL_260)), will create the part of the URL before the record ID, such as https://jenwlee-preview-dev-ed.my.salesforce.com.
This part of the formula, & {!varNewContact}, takes the user to the newly created contact record ID.
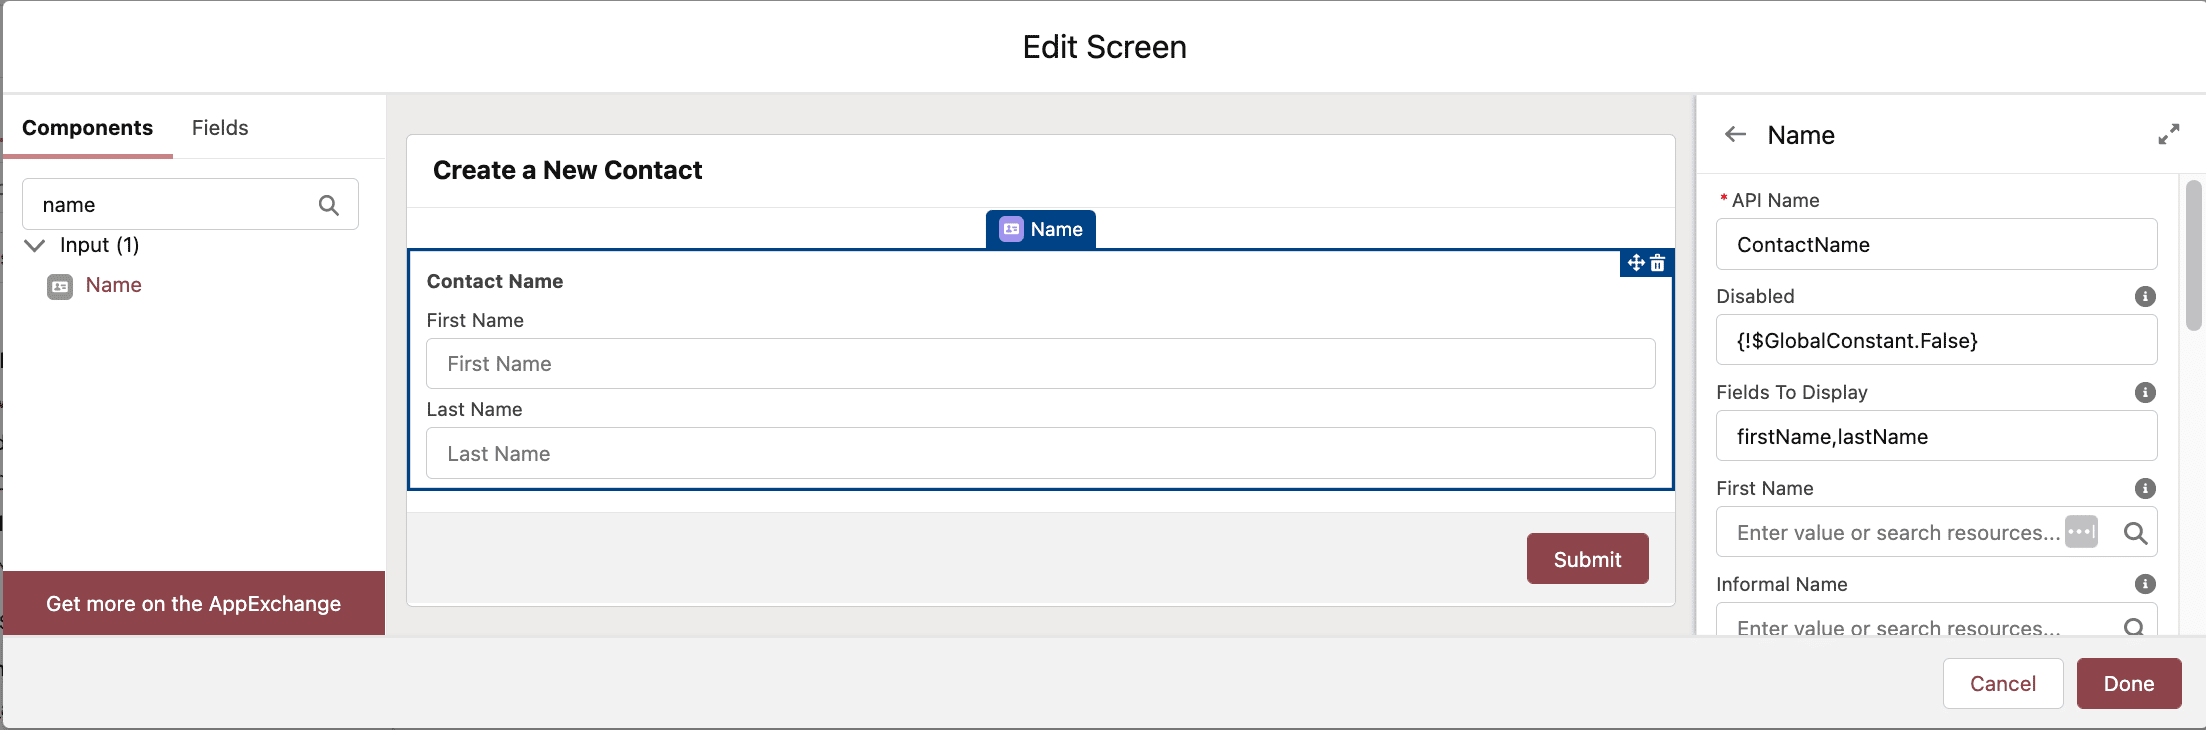
C. First, Addison configures a Screen Flow element called “Create a Contact” to collect the contact’s first and last name. (Note: For simplicity of this blog post, we’re only collecting two pieces of information. In the real world, you would collect much more. Ensure that you’re including fields that are required when creating a new contact in your org.)
Best practice tip: Provide a description so you and other/future admins know what this Flow element is used for.
She configures as follows.
- Screen Properties:
- Show Header
- Show Footer
- Next or Finish Button: Use a custom label
- Next or Finish Button Label: Submit
- Previous Button: Hide Previous
- Pause Button: Hide Pause
- Add a Name Component Text:
- API Name: ContactName
- Fields to Display: firstName,lastName
- Label: Contact Name
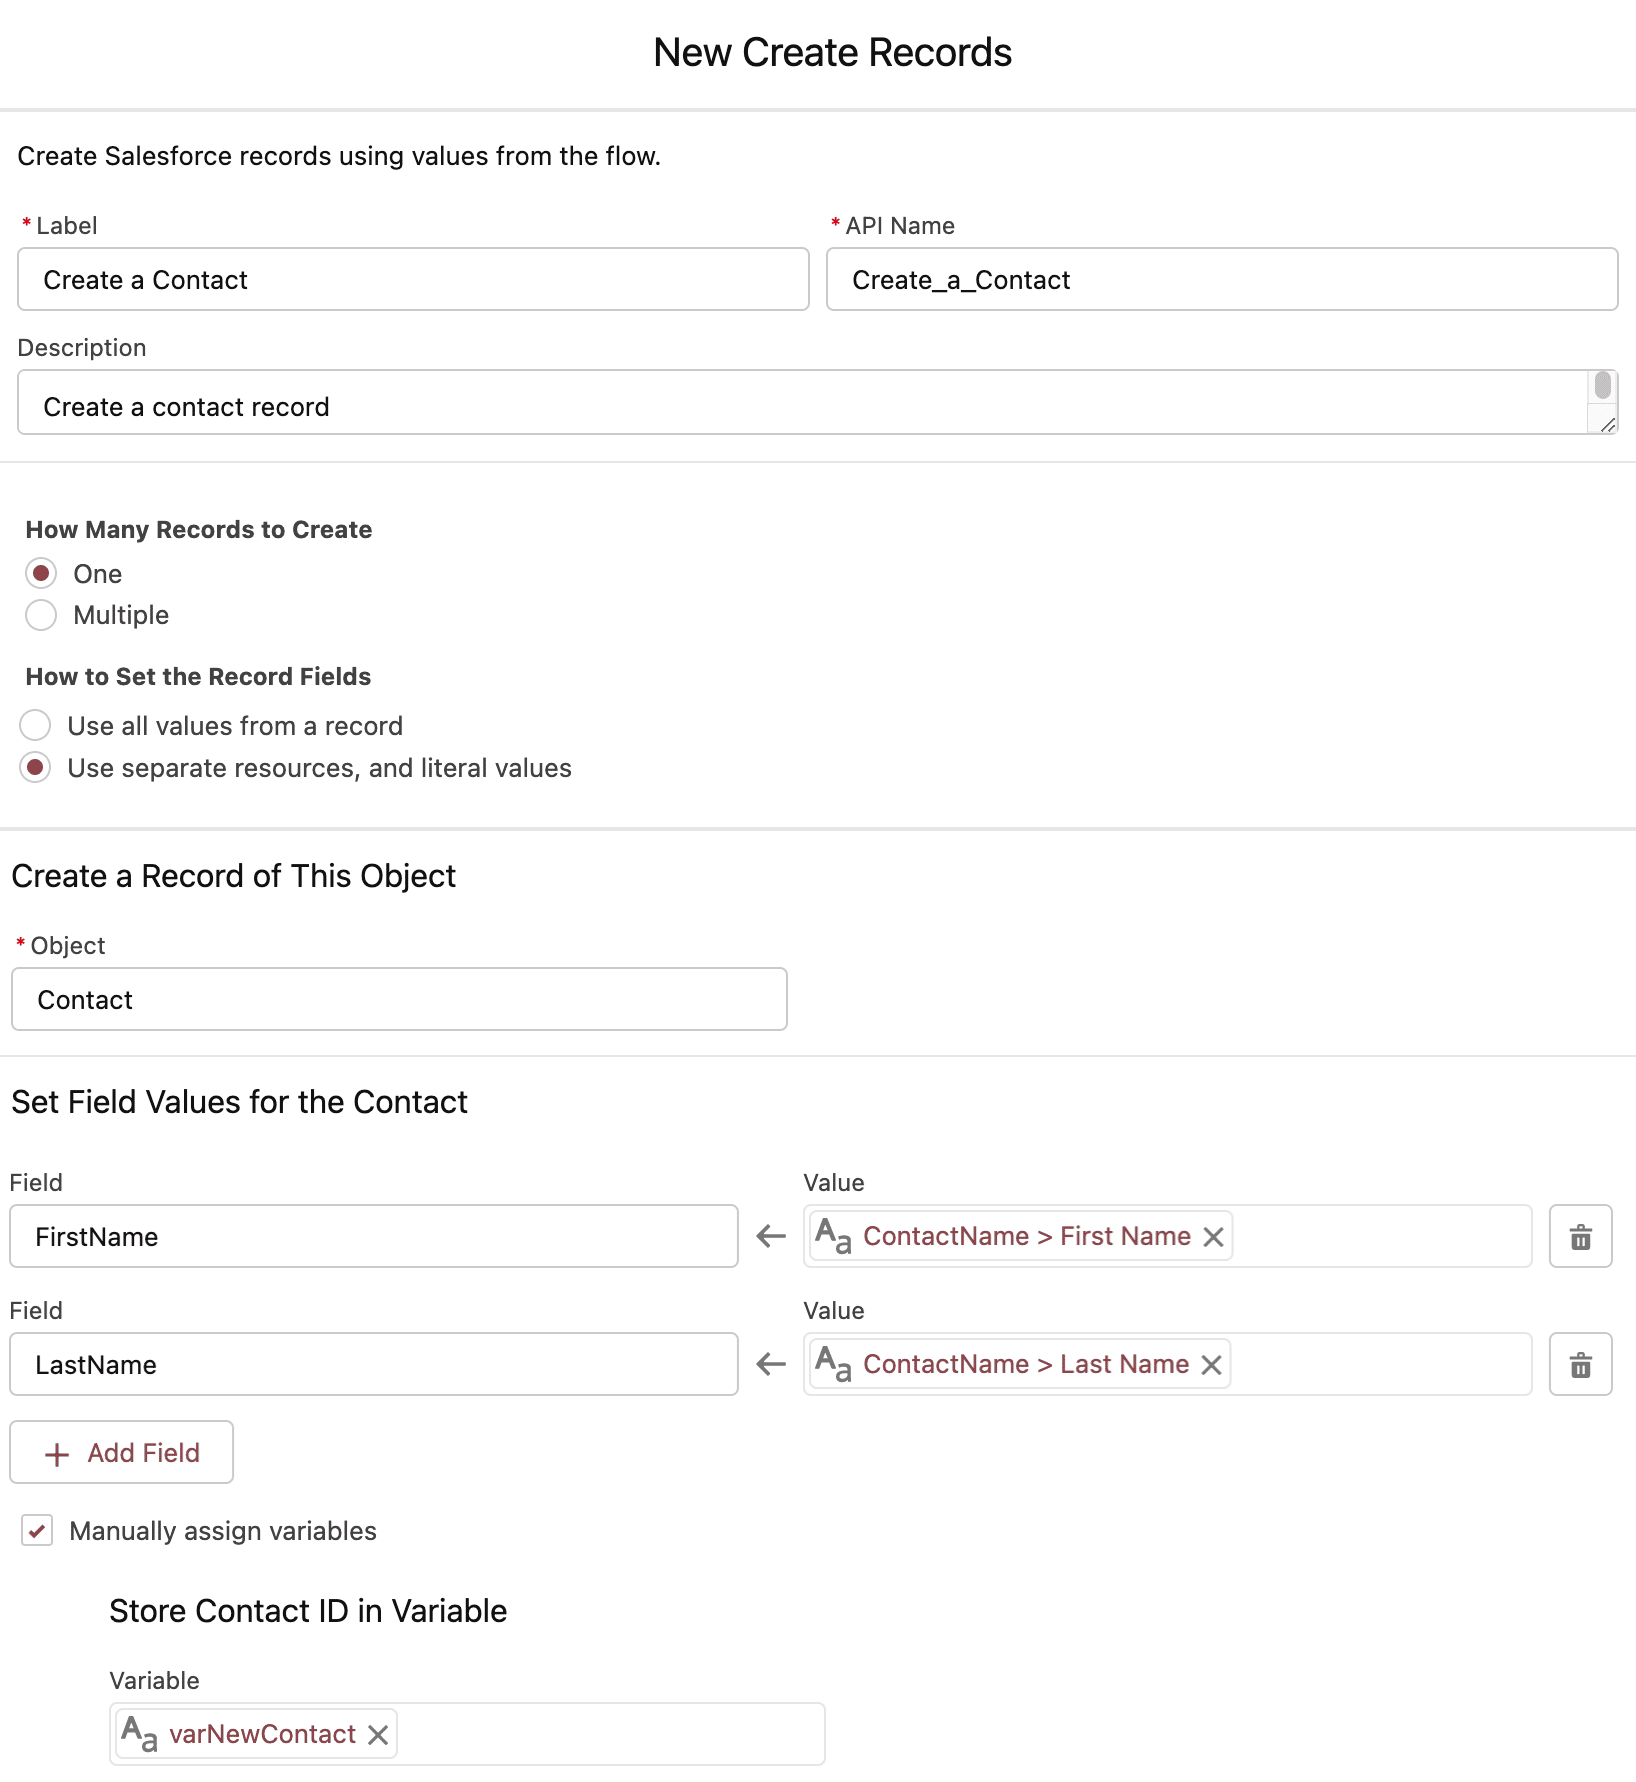
D. Next, she adds a Create Records element called “Create a Contact” where she’ll create a new contact based on the first and last name provided in the screen flow. Then, she stores the newly created ID in the variable varNewContact.
Best practice tip: Provide a description so you and other/future admins know what this Flow element is used for.
She configures as follows.
- How Many Records to Create: One
- How to Set the Record Fields: Use separate resources, and literal values
- Object: Contact
- Set Field Values for the Contact:
- First Name: {!ContactName.firstName}
- Last Name: {!ContactName.lastName}
- Manually assign variables: Checked
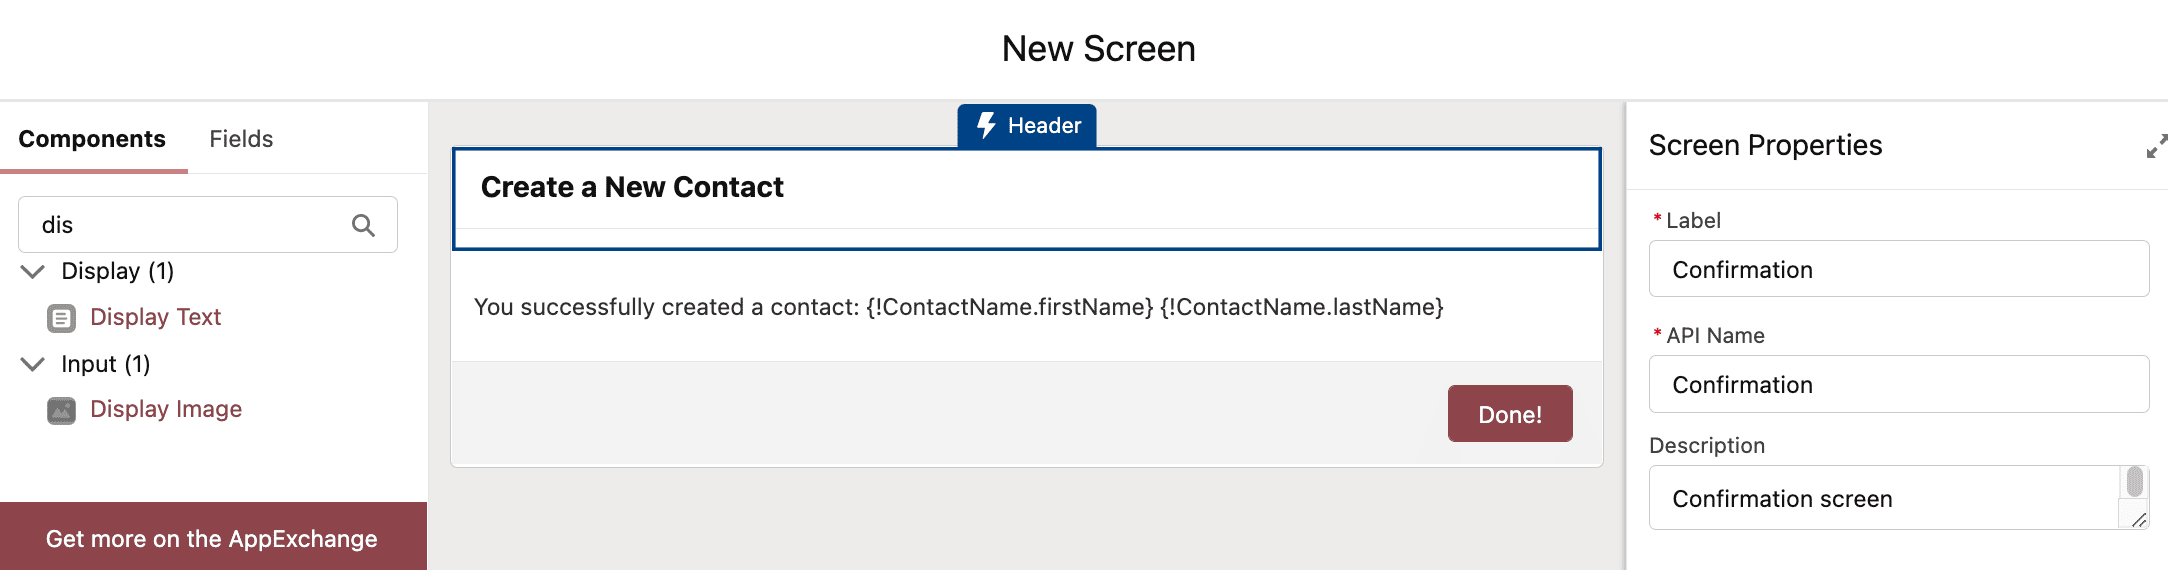
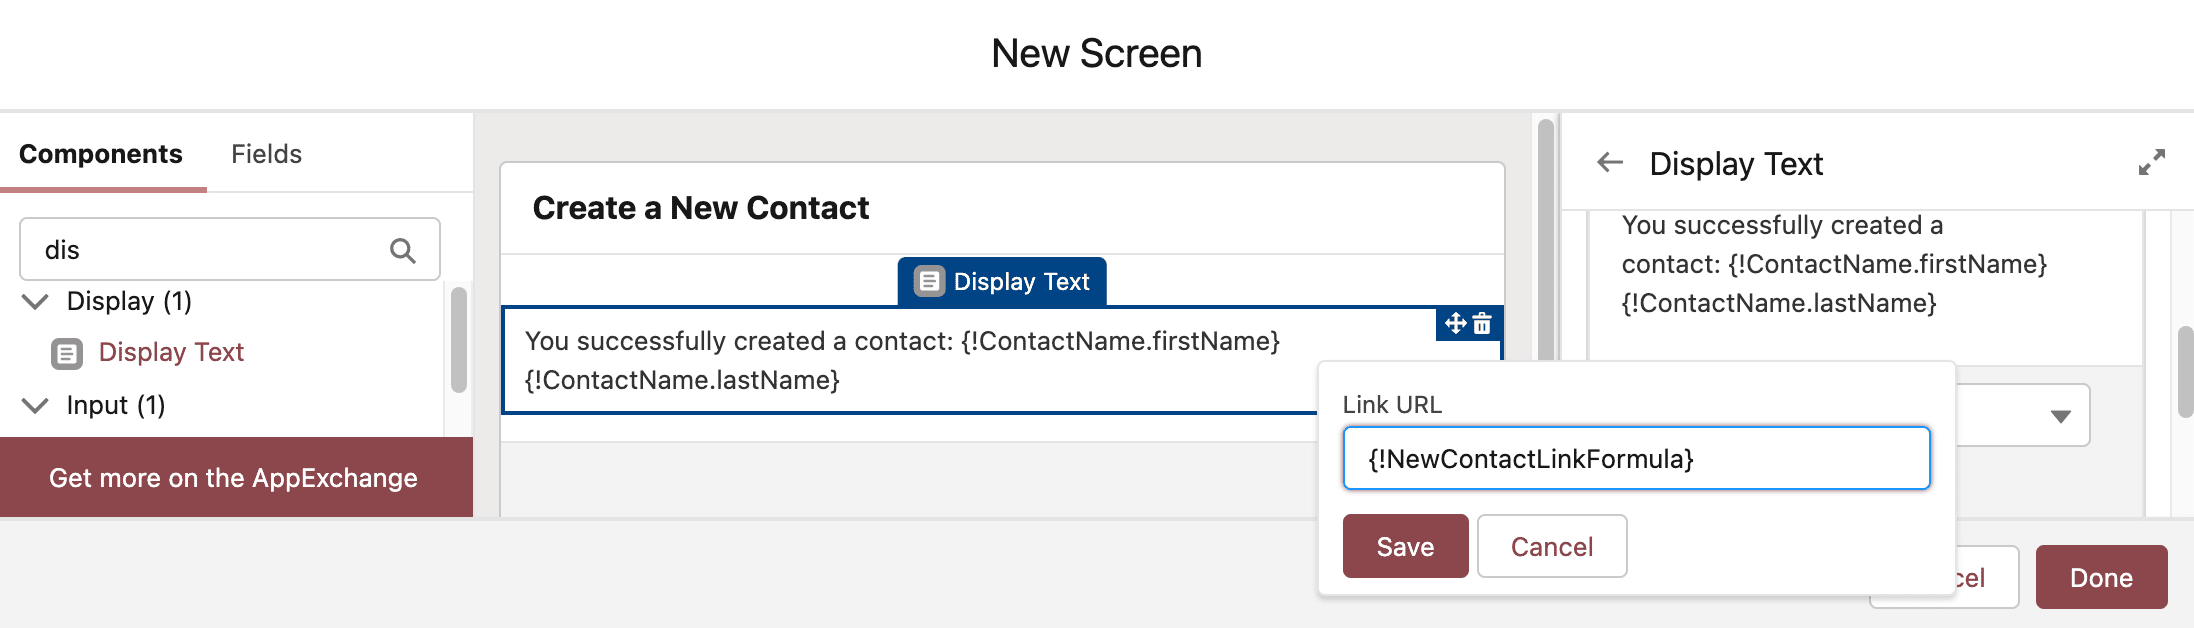
E. Lastly, Addison needs a final Screen Flow element called “Confirmation” to show a confirmation message with a link back to the newly created contact record page. To create a link to the record page, she clicks the hyperlink icon and enters “/{!NewContactLinkFormula}”.
Best practice tip: Provide a description so you and other/future admins know what this Flow element is used for.
She configures as follows.
- Screen Properties:
- Show Header
- Show Footer
- Next or Finish Button: Use a custom label
- Next or Finish Button Label: Done!
- Previous Button: Hide Previous
- Pause Button: Hide Pause
- Add a Display Text Component:
- API Name: ConfirmText
- Text
Addison has successfully created a contact: {!ContactName.firstName} {!ContactName.lastName} [Link: {!NewContactLinkFormula}]
F. She Debugs the flow to ensure it works as expected.
G. She Saves the flow, calling it “Create a New Contact”.
Best practice tip: Provide a description so you and other/future admins know what this flow is for.

H. She Activates the flow.
I. Lastly, Addison needs to determine how users will access the flow Screen and configure the component accordingly.
Now, it’s your turn! Try this solution out to dynamically create a record link in Flow, and share with us your use cases on X by tagging @SalesforceAdmns.
Resources