Welcome to another post in the “How I Solved This” series. In this series, we do a deep dive into a specific business problem and share how one #AwesomeAdmin chose to solve it. Once you learn how they solved their specific problem, you’ll be inspired to try their solution yourself! Let’s take a look at how Gayathri Indiran was able to place custom report links with variable filter values anywhere on the page and control the visibility of them.
Key business problem
I want to be able to place report links that have merge fields at the top of a record detail page and conditionally show them based on criteria identified.
Background
Every administrator gets this request: adding report links to detail pages. Based on the complexity of the requirement—like the placement of the report link on the page layout, merge fields, and controlling visibility—the options to achieve it vary.
When an organization uses peer to peer campaigns, we usually see a hierarchy structure of Peer to Peer campaign> Teams> Fundraisers. We wanted to display the top five teams within a top-level Peer to Peer campaign based on the revenue generated on the Campaign page. We did not want the link to be displayed for Teams or Fundraiser campaigns. The Type field on the campaign is used to differentiate between Team, Fundraiser, and the master Peer to Peer campaign.
The usual way of adding report links that have merge fields (variable values passed) on detail pages is by creating a Custom Link (Buttons, Links and Action>Detail Page Link). The custom links can only be displayed in the Custom Links section on the detail page. In addition, you cannot control visibility of the links based on the values of a field.
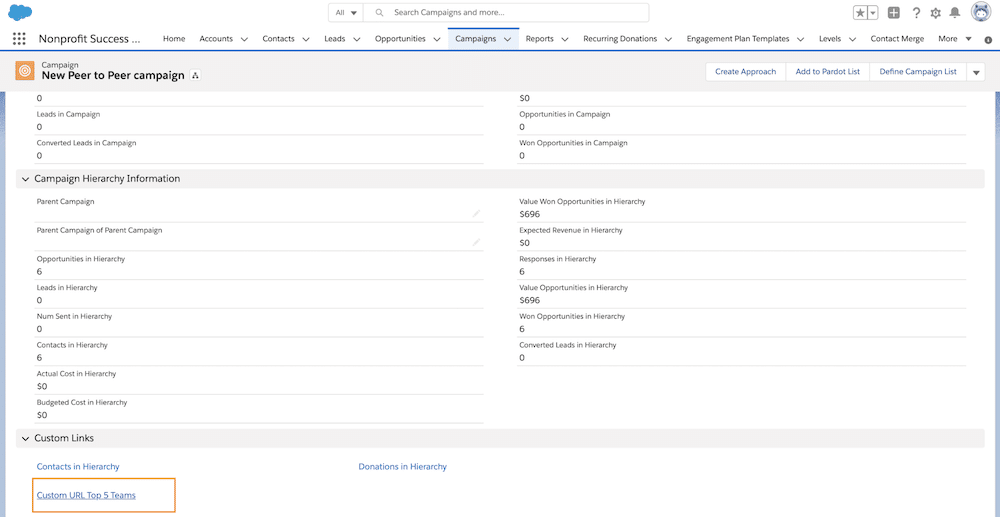
As shown below, a custom link URL can only be placed in the Custom Links section. This section is part of the page layout and cannot be placed outside of the Record Detail component in a Lightning record page. Also, we cannot control the display of the URL based on the campaign type. If the link is visible on the Team and Fundraiser campaigns, the report will be empty.
Formula fields of type hyperlink holding the report link are another option. Here, again, you cannot control the visibility of this field based on criteria.
How I solved it
Today, with the capabilities of flows, you can place the link anywhere on the page, control the visibility of the report link, and pass the values for the merge field. I’ve created a solution using a simple screen flow (that only has a Display element) and a standard Flow component on the Lightning record page for that object. It took five minutes to build with clicks and no code involved. I’m sure it will be useful for other admins.
1. Prepare the report URL
Frame the report URL the same way you would for creating a custom URL link for your report. Refer to the Resources section at the end of this post for a video on how to create a custom URL link for reports passing filter values.
We needed a report that provides a list of Top 5 Teams within a top-level peer to peer campaign. Peer to peer campaigns are handled with a specific record type. The resulting URL is as shown below with fv1 = Campaign whose teams are to be reported on. The filters fv0 = record type and fv1 = ‘Teams’ which are constant filter values. Placing the link on the Peer to Peer (parent campaign) would give a list of Top 5 Teams within that campaign.

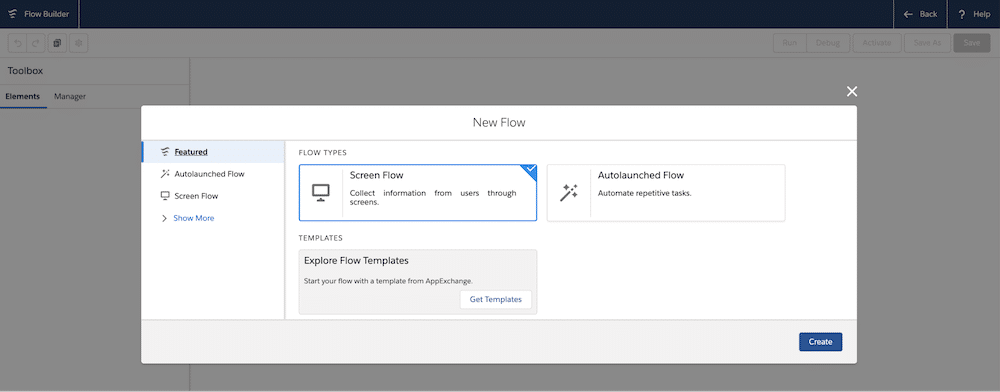
2. Create a screen flow
Once we have the report URL ready, we can set up the screen flow with a Display Text component to display the report URL.
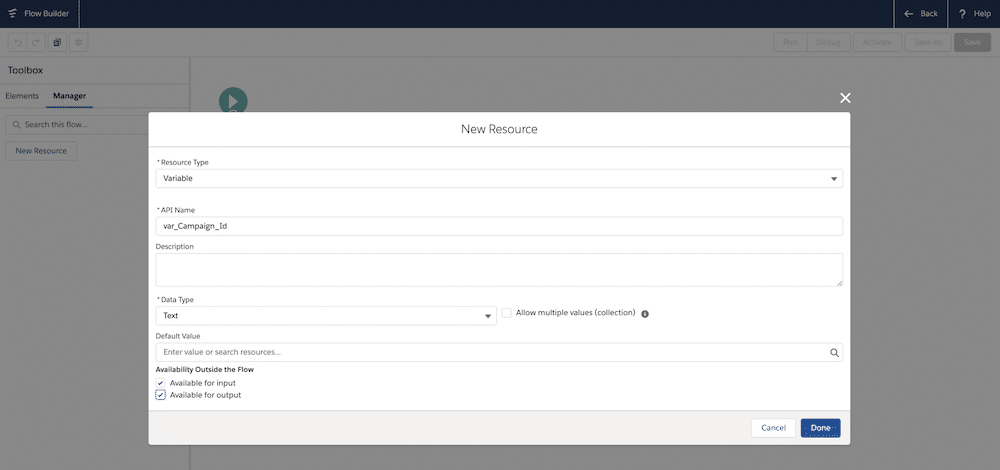
Access the Manager tab on the left panel of the Flow Builder, and click the New Resource button to create a variable to hold the Campaign record Id being passed to the report URL.
Prepare the report URL with the variable created in this step. Replace the {!Campaign.Id} with {!var_Campaign_Id}.
Resulting link:
https://demo–imaginecrm.lightning.force.com/lightning/r/Report/00O2M000009RyhVUAS/view?fv1={!var_Campaign_Id}
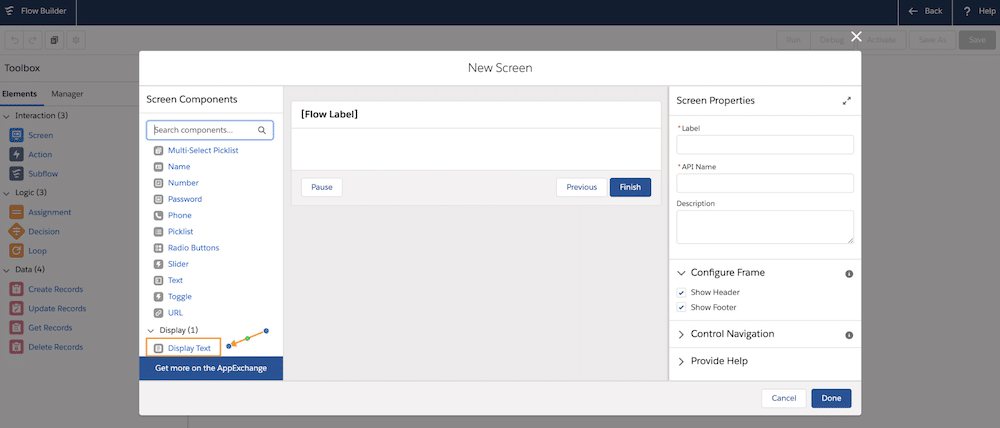
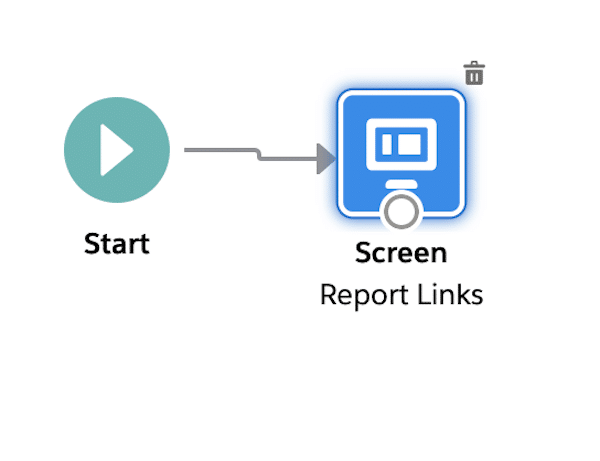
Next, drag and drop the Screen element.
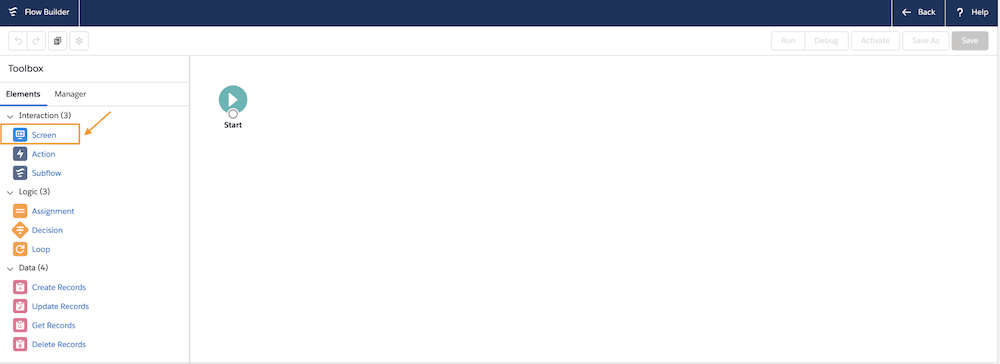
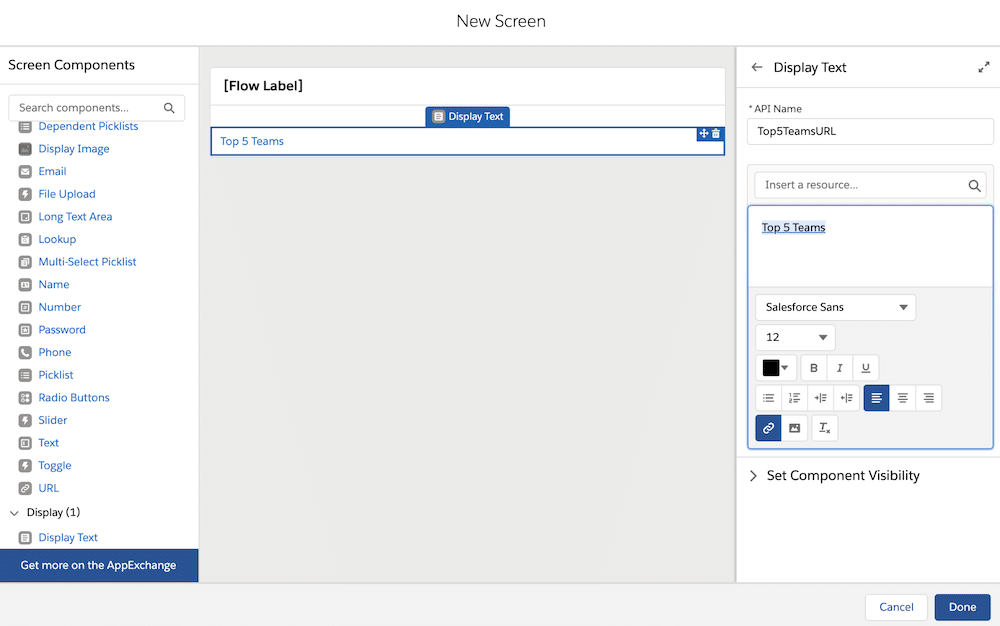
Then, drag and drop the Display Text screen component into the New Screen element.
Enter the text for your URL link in the box shown below.
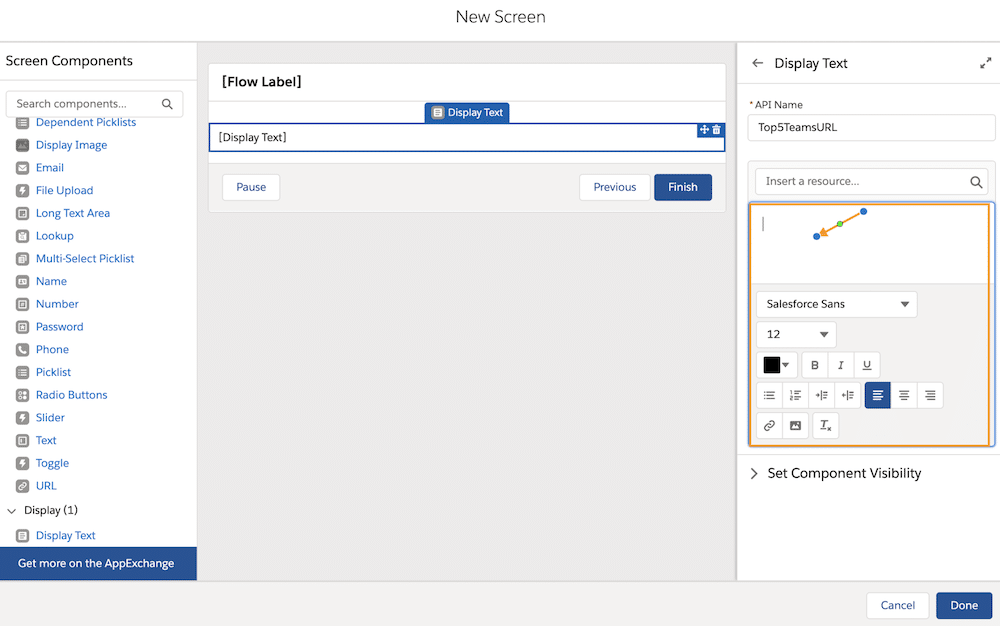
Highlight the text and click on the Link icon.
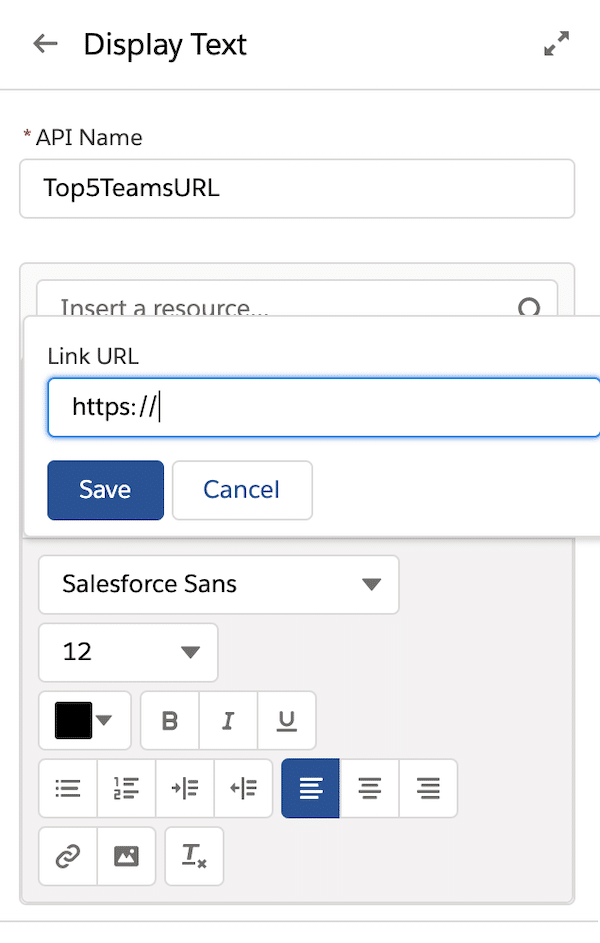
Place the prepared report link in the Link URL box as shown above.
Connect the Start and Screen elements. Save and activate the flow.
3. Embed the flow on the Lightning record page
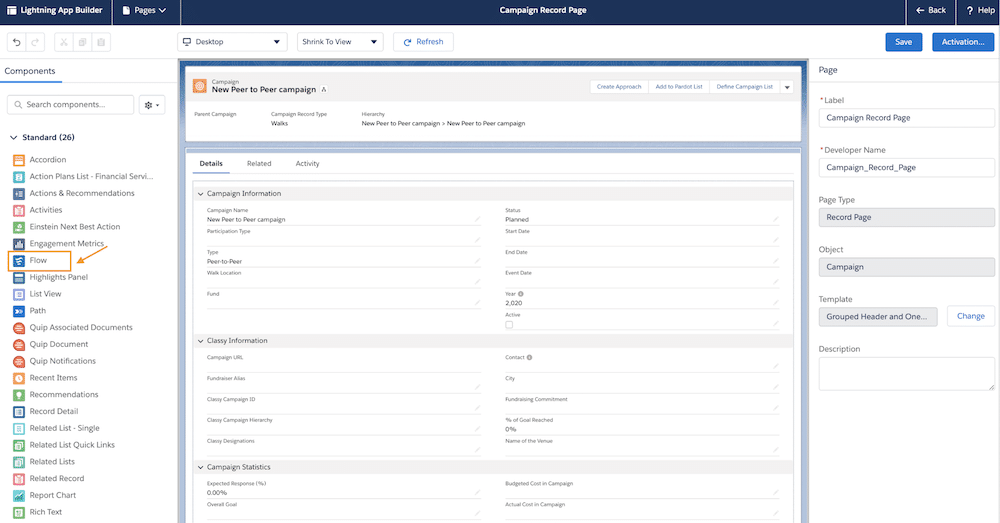
Once the flow is activated, we can place the flow on the Lightning record page to see it in action. We can do that using the standard Flow Lightning component in the Lightning App Builder. Simply drag and drop the component onto the page canvas, and then use the Properties tab to specify which flow we want to run.
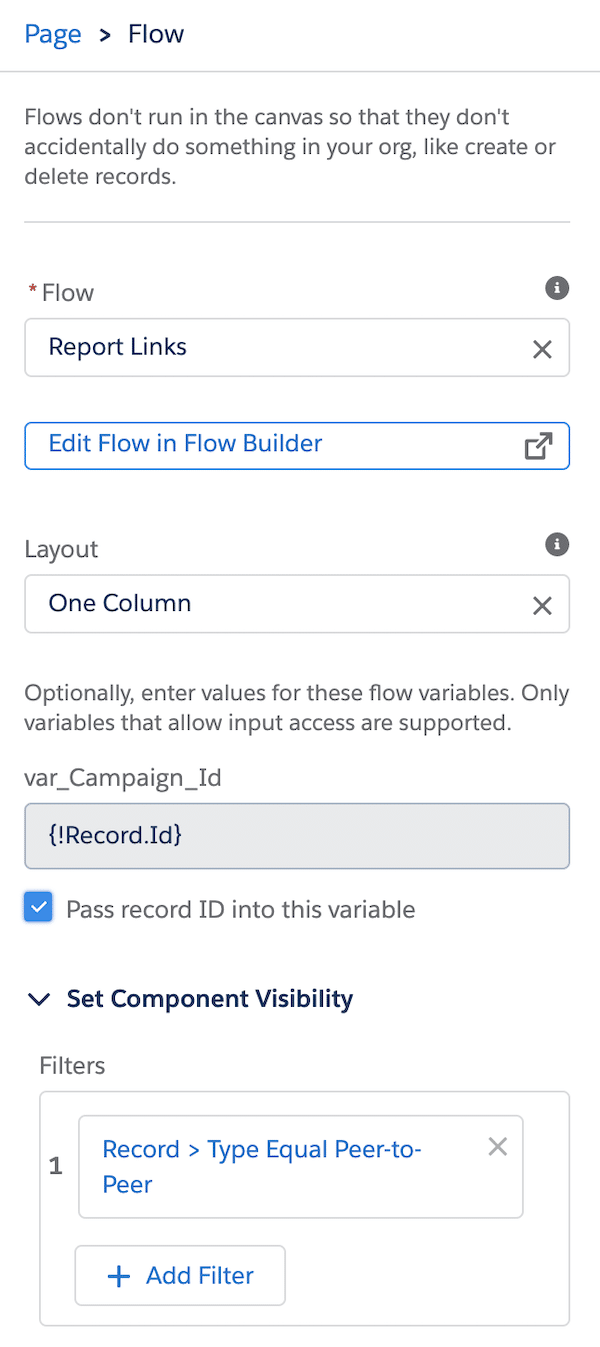
Select the Pass record Id to this variable checkbox for the special variable ‘var_Campaign_id’ created in the flow. This ensures that the record Id of the campaign record is passed to the flow, and the report URL and the report displays data relevant to the Campaign record page that the user is on.
Also, set the component visibility based on any field that you want to use. I have set it based on the Type Equal Peer-to-Peer, since I want the Flow component to be displayed only for peer to peer campaigns.
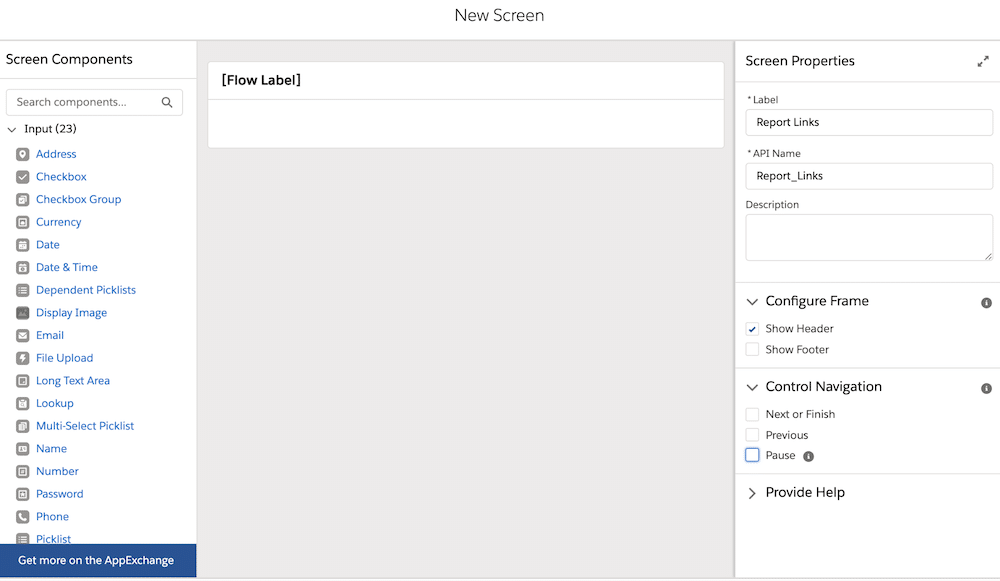
After the Lightning record page is saved and activated, we can look at an example to see that now there’s a Report Links component displayed only for peer to peer campaigns.
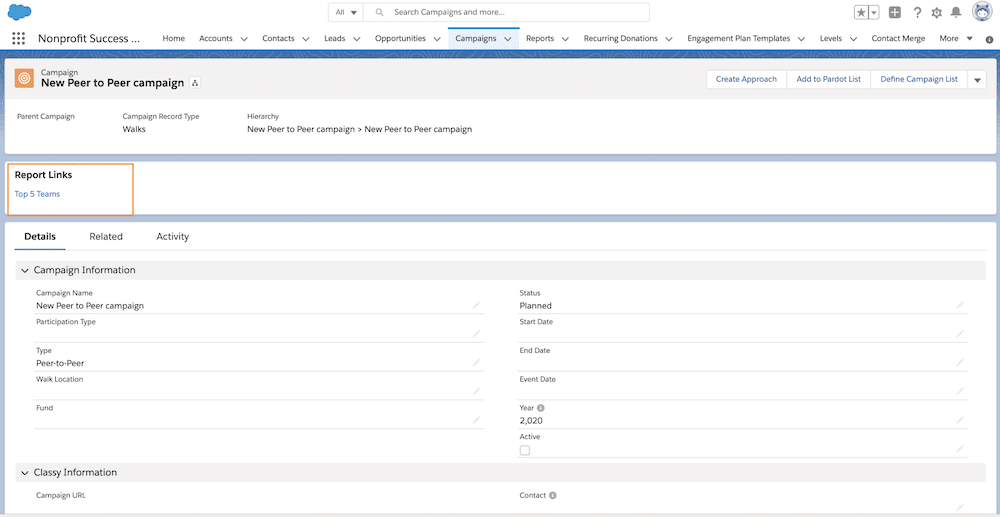
I can position the report link anywhere on the page as shown below:

Business results
Users can now see report links that need to be placed at specific locations. Given the capability of flows and the flexibility of placing components and controlling their visibility on a Lightning page, placing report links where the users desire and only when they have data is a step closer to the user adopting the CRM and trusting its capabilities.
Do try this at home
Let us know what you thought of this solution, and tell us how you want to use it on Twitter using #AwesomeAdmins #HowISolvedThis.
Resources