Ever find yourself building the same automation steps to solve different use cases, which results in slightly different flow solutions? So now you have clones of the same automation steps hanging out in multiple flows. And then, goodness forbid you have to make a change to those steps in all those flows? That can be a maintenance nightmare: first to find all the instances of those same steps, make the needed updates to the impacted flows, test those flows, and then move them through the deployment process. Sounds like potentially a LOT of work for very little value.
No one has time for all that. Life doesn’t need to be that complicated.
Did you know you can break off those repeated automation steps, make them into their own flow, and then reference that flow in all the different automations that use it?! Build it once, maintain it once, use it as many times as you want. Mind blown. #AwesomeAdmins, let’s get you on the road to work smart, not hard with your automation.
I’ve heard of subflows, but what are they?
You record an awesome video, write an article, and later give a presentation on how to deliver great technical demos. Do you write all the tips again in another article or record a new version of the same video for the presentation? Chances are you would just reference the video, perhaps embed a link to it. You wouldn’t spend the time transcribing everything from the video into the article or making a copy of the same video. As you come up with additional advice on how to deliver awesome technical demos, you would replace the original video with an updated version, so anyone linking to the recording from other articles or presentations would reap the benefits of that one video. You build it once, maintain it once, and reference it multiple times.
Same idea applies with flows. A subflow is an autolaunched flow (no trigger) or a screen flow, which is referenced by another flow (called the parent flow) and calls the subflow at its runtime. Use the subflow’s input and output assignments to pass data between the parent flow and the subflow. If you identify repetitive automation steps, make them into their own flow and use the subflow element in the parent flow to reference it. Chunking out your flow into smaller flows, where it makes sense, versus building one massive ginormous flow, makes your automation more manageable in the long run. Your future self will thank you.
What are example use cases solved with a subflow?
Here are a handful of use cases where you can use a subflow.
- You have various user management requirements. They all need the ability to either add or remove a user from a permission set based on certain attributes.
- You have an existing automation process. There’s an enhancement request to create a new process with three automation steps. Those same three steps also apply to the existing automation.
- You have multiple processes that require a task to be assigned to the running user and an email to be sent to the customer.
- You have multiple processes where upon failure, the same steps occur.
Can you think of situations where you would need a subflow?
How do I get started?
It’s important to understand the requirements and overall process and to do your analysis BEFORE you start building your automation. I recommend sketching it out and validating the process with business stakeholders before you log in to Salesforce and go into Setup. It’s so much easier to make changes on paper than to have to reconfigure a flow. Remember, you’re automating manual steps, so think about what actions you take that you need to tell Salesforce to do on behalf of the user, including making decisions: If I search for open cases and I find some, now what do I do? What if I search for open cases and don’t find any; now what do I do? This process map becomes your guide to building your automation.
Show me an example of a subflow
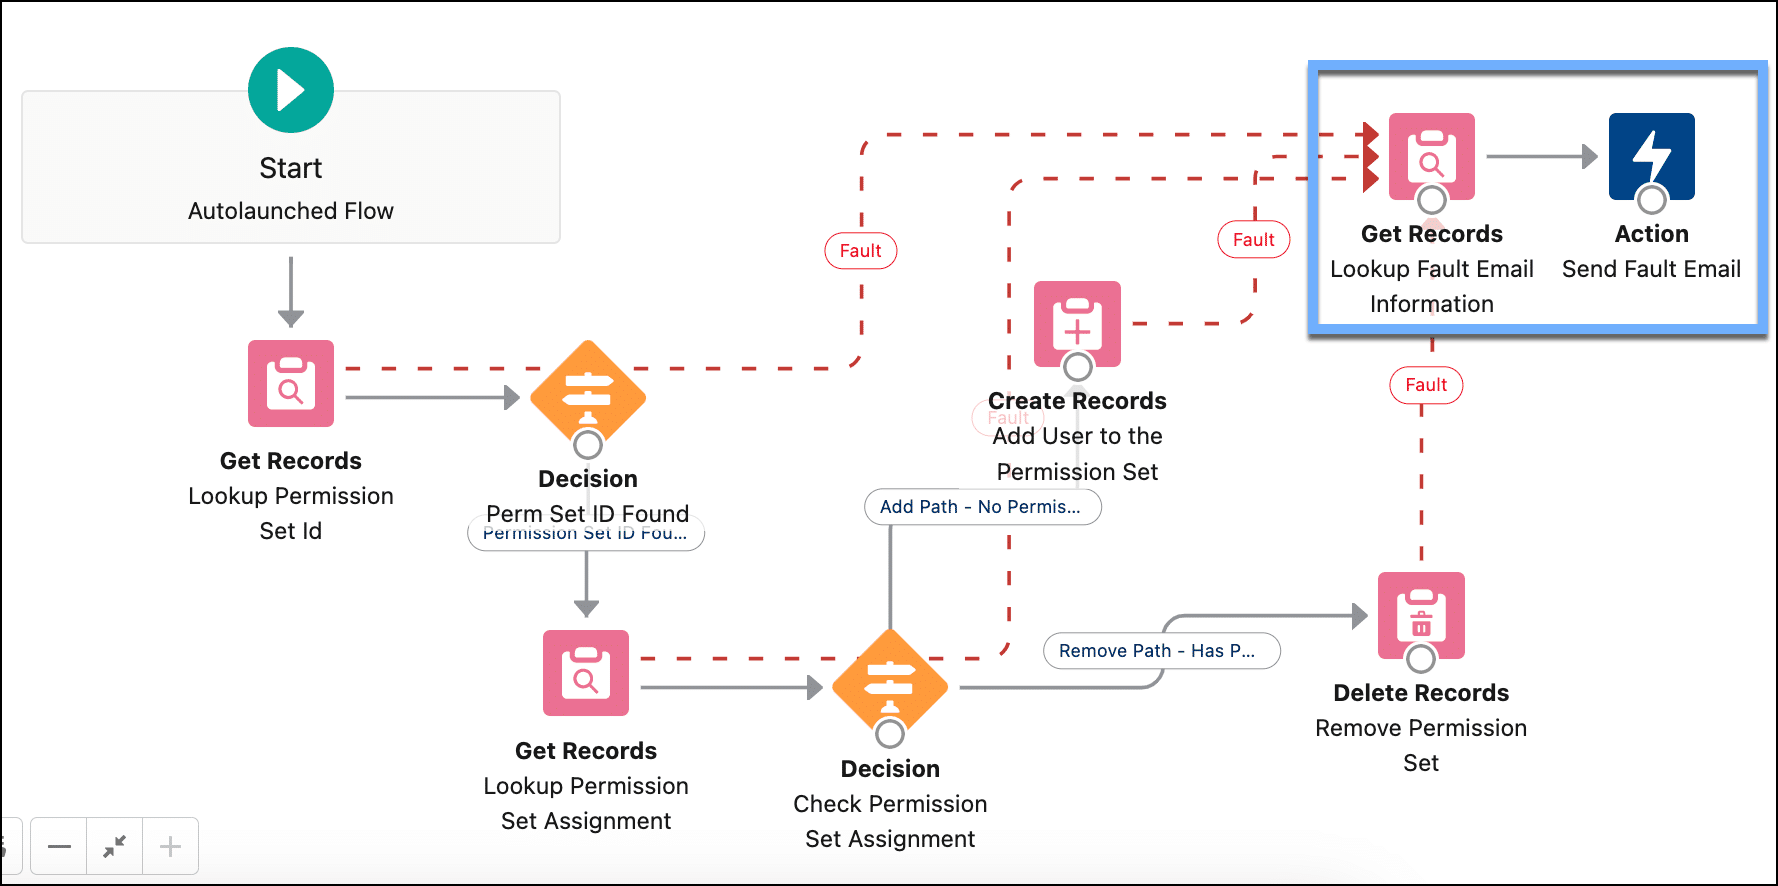
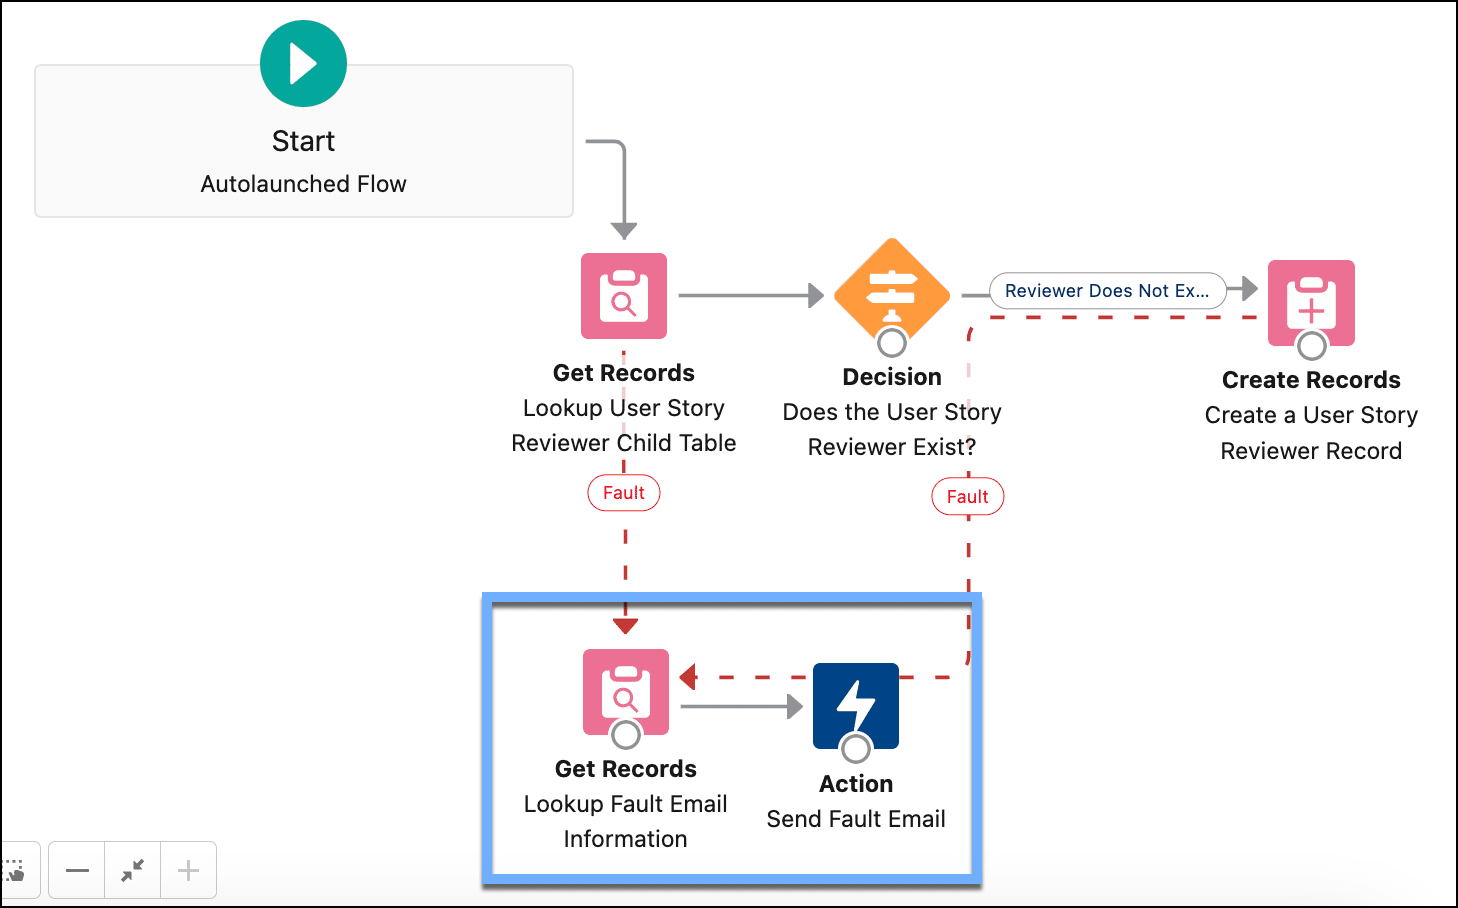
When I was a young #flownatic, I built many flows in my org. I thought that when a flow fails, instead of notifying the person who created or last modified the automation, we should notify the support team email so anyone can take action/investigate. I then proceeded to add two steps to every existing flow in my org and all new ones going forward: a Get Records to look up a custom metadata type (CMDT) record to get the email address and a Send Email action to send the email to the support team email.
One day I came up with an improvement to the two steps, and guess what? I now had to touch every single flow in my org to make the change. OMG! What a maintenance nightmare! My architect colleague asked me why I didn’t use a subflow. I didn’t know what a subflow was; never heard of it. I did some googling and learned this was the perfect use of a subflow!
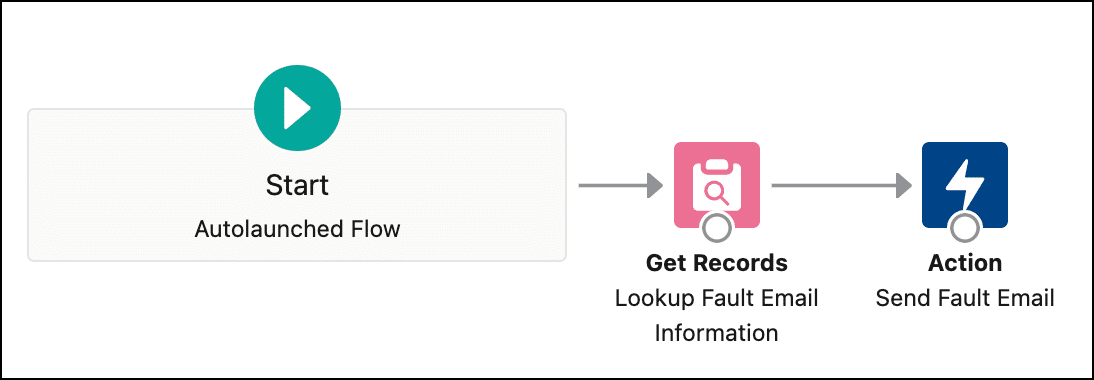
I created the same two steps in their own flow, with the first step to look up the email from the CMDT record, and the next step to email the support email address.
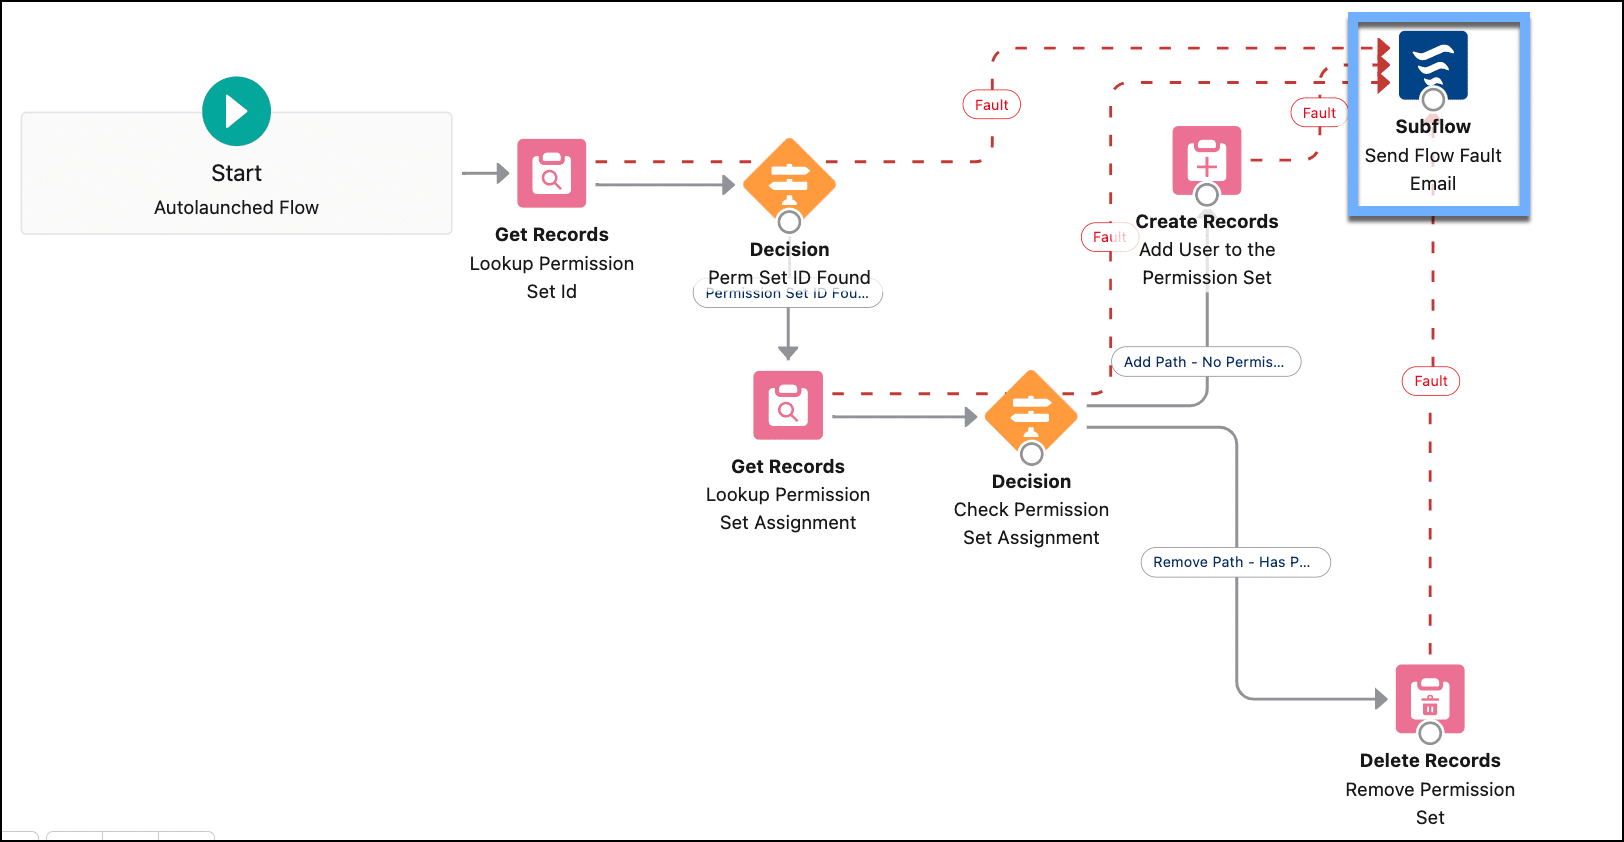
Next, I modified all the flows to call it as a subflow. So, now when I need to maintain the flow, I just go back to the flow referenced in the subflow to update, test, and deploy it. None of the parent flows need to be deployed to production with updates to flow referenced in the subflow. Here are two flows modified to reference a subflow. Now we’re working smart, not hard!

Addison Dogster, the #AwesomeAdmin at our fictional company Mochi Cupcakes, will take us through the steps of creating the flow that’ll be referenced in a subflow and adding the subflow to a parent flow.
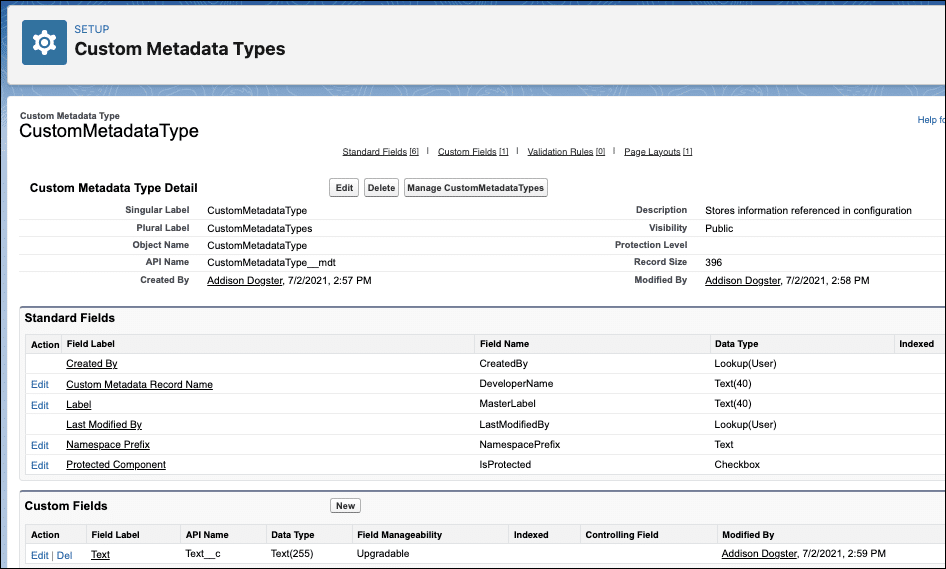
Addison first creates a CMDT object in Setup to hold the support email address. She makes this CMDT generic so that she can use it to create CMDT records that hold up to 255 characters.
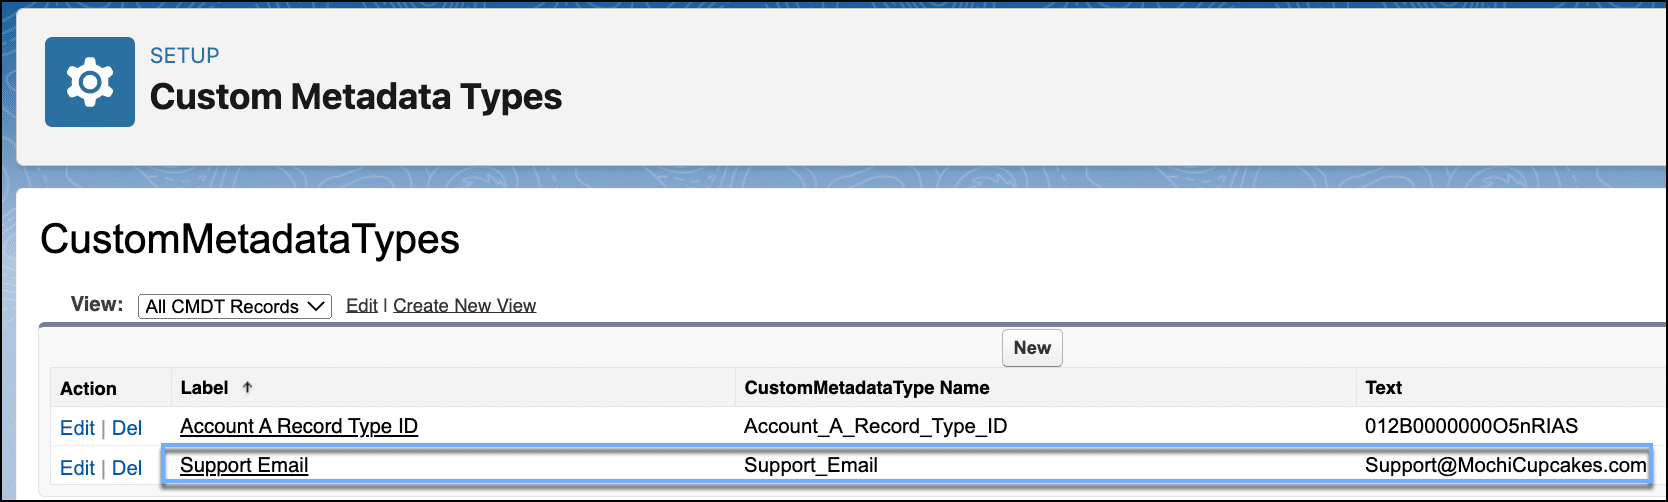
Once the CMDT object is created, Addison creates the CMDT record called Support Email to hold the support email address in the text field.
Now, Addison creates the Send Email on Fault autolaunched flow (no trigger) that queries the CMDT object to get the support email and send the email to support about the faulted flow.

Before Addison creates the flow elements, she creates two input variables. Think of these as a container to temporary hold data for use later in the flow. In this case, we’ll hold the fault message and the flow name that faulted. These two values will be passed from the parent flow into Addison’s subflow.
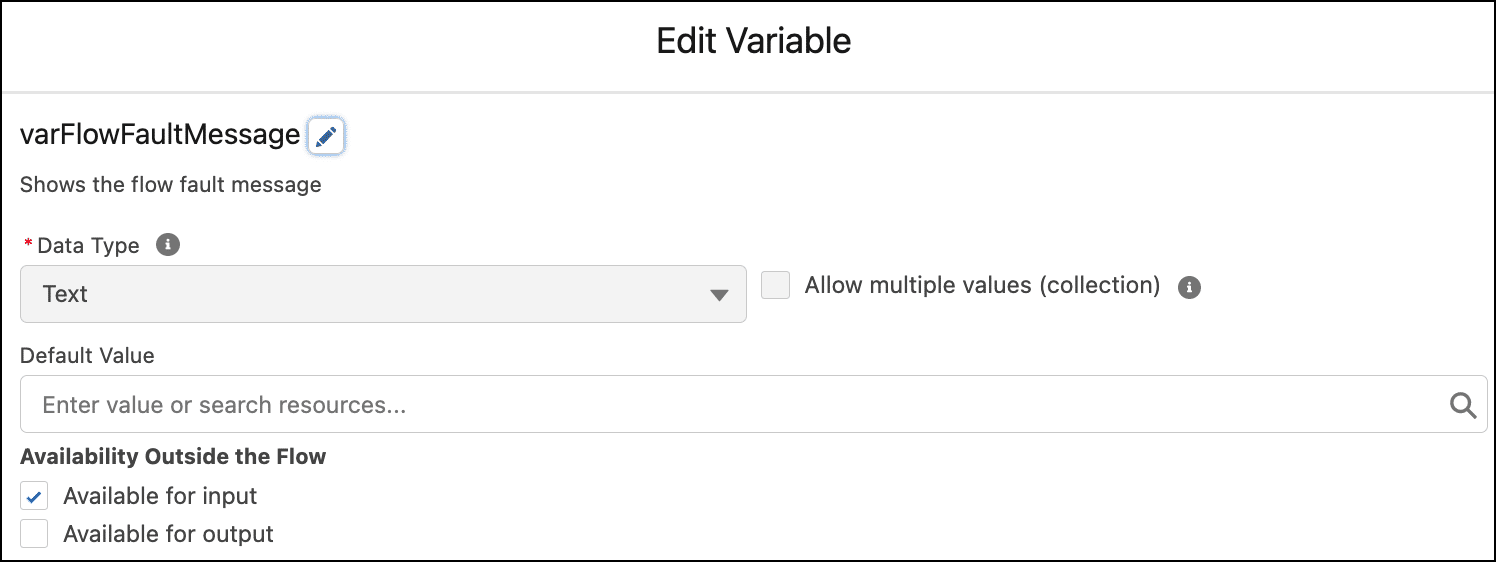
She creates a variable called varFlowFaultMessage of a text data type that is available for input. This will hold the fault message from the parent flow.
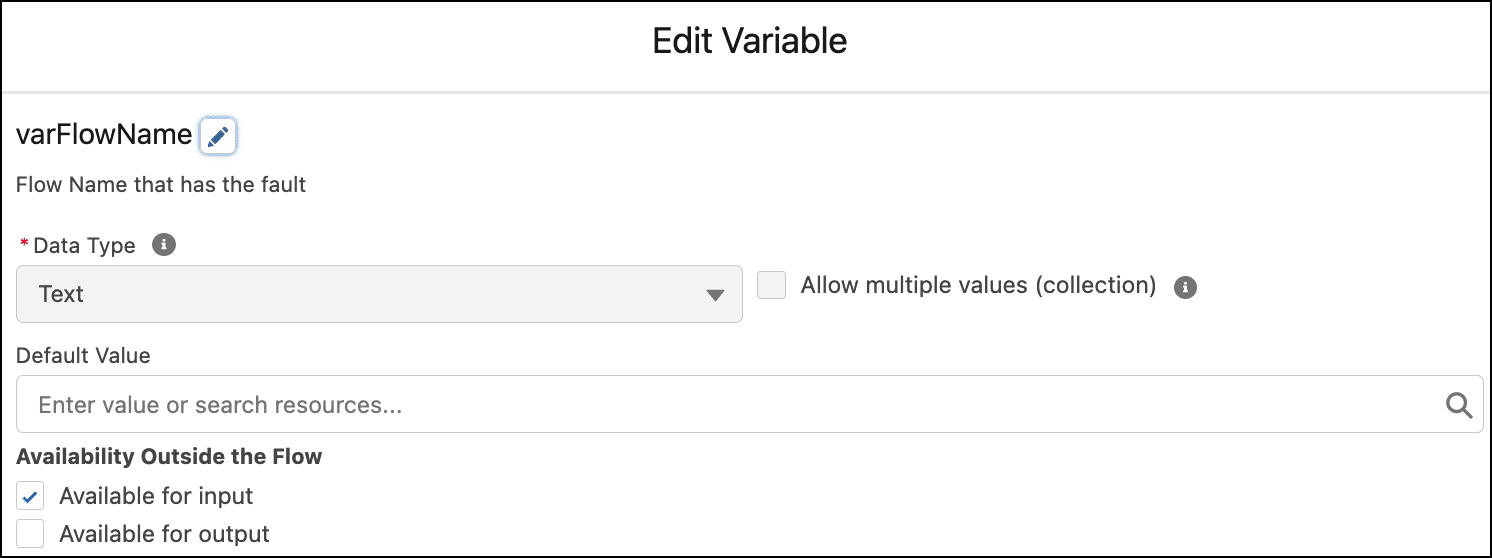
Addison creates a second variable called varFlowName of a text data type that is available for input. This will hold the flow name from the parent flow.
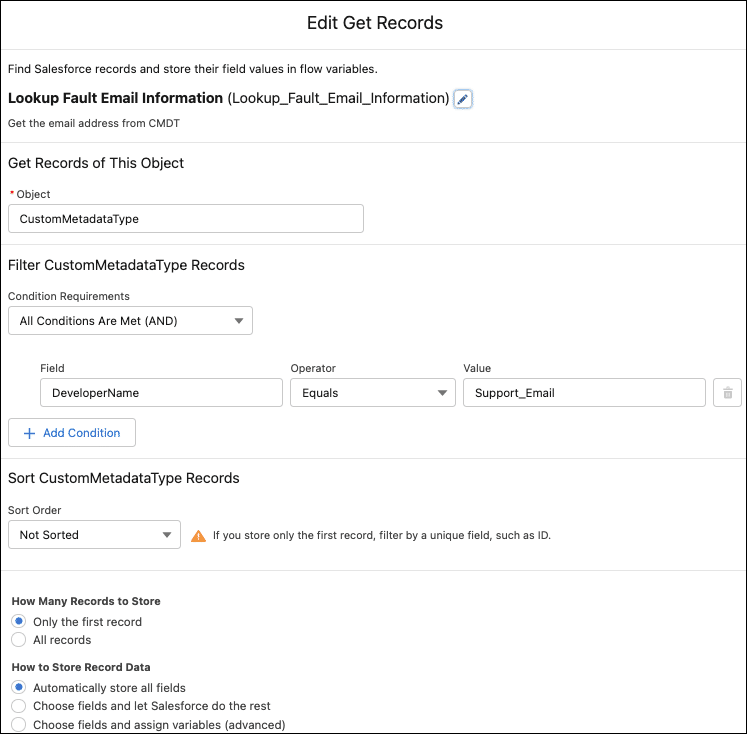
Addison uses a Get Records element to query the CMDT object where the Developer Name is “Support_Email.” Since Addison expects only one record, she selects Only the first record.
Next, Addison creates an action using the Send Email flow action.
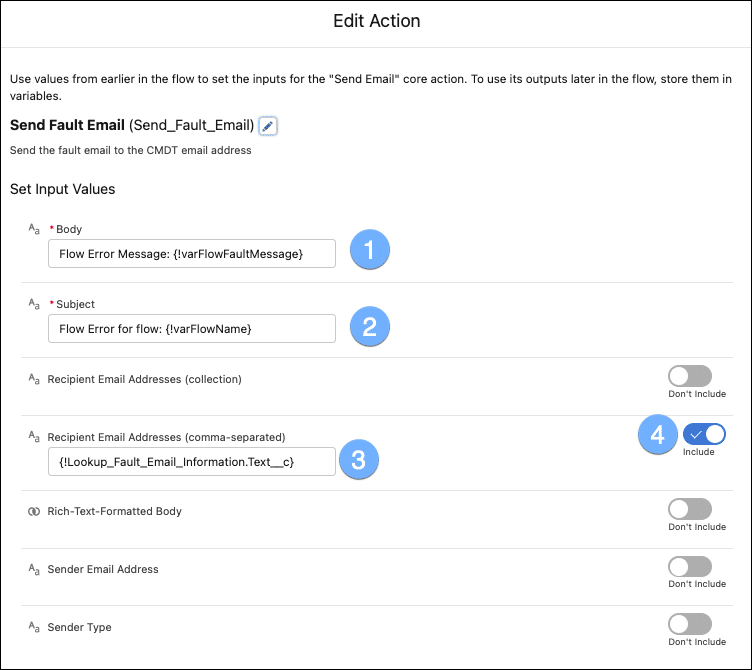
Addison configures the Send Email action:
- Specifies the email body to show Flow Error Message: {!varFlowFaultMessage} (This dynamically displays the flow fault message, which will be passed from the parent flow to the subflow.)
- Specifies the subject to show Flow Error for flow: {!varFlowName} (This dynamically displays the name of the flow that faulted, which will be passed from the parent flow to the subflow.)
- Specifies the recipient email address as {!Lookup_Fault_Email_Information.Text__c} (This pulls in the value in the custom text field from the CMDT record found in the Get Records element. In this case, it’s the support email address.)
- Sets toggle to Include (This indicates the flow will use this field as the recipient field in the Send Email action.)
She tests using the Debug feature, then saves and activates the flow.
Now, Addison can reference the flow in another flow (exception: record-triggered flow) in her org as a subflow. She opens her parent flow “0-Assign a User Story Reviewer” and adds a Subflow element. Addison searches on the flow API name of the flow she created earlier and selects it. She then configures the subflow, specifying the value in the flow fault message and flow name input fields that will be passed into the subflow.
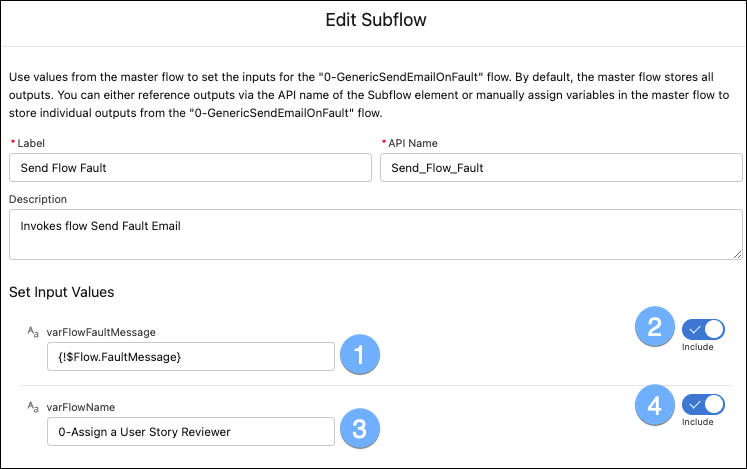
Addison configures the subflow that will call the 0-GenericSendEmailOnFault flow.
- Configures the value in the varFlowFaultMessage to {!$Flow.FaultMessage} (This will dynamically pass the flow’s fault message to the subflow.)
- Toggles to include the value into the subflow’s varFlowFaultMessage input field
- Configures the value in the varFlowName to 0-Assign a User Story Reviewer (This is the parent flow’s name, which will pass to the subflow.)
- Toggles to include the value into the subflow’s varFlowName input field
Since the subflow in this scenario should occur only when a fault occurs, Addison connects this to the fault connector. If the Update Records, Get Records, or Create Records fails, then it will call the subflow to run.
Addison saves and activates the flow. She repeats these same steps for all flows she wishes to reference the same subflow. With this change, Addison saves herself and her team time by cutting down the flows they would need to maintain if any enhancements were needed to the subflow in the future. #WorkSmartNotHard
Get practicing. Build and use your first subflow!
Get learning. Go build and reference a subflow. Start flexing those flow automation muscles. Use the example Addison built above to build something similar in your org or build something completely new. You do you. Give it a try!
If you’re new to flow, there are two great blogs with relatable videos created to teach you the concepts used in flow. Check out 5 New Videos to Help You Understand Tricky Flow Concepts and 6 New Videos to Help You Understand Flow Builder. Also, watch videos from my Automate This! YouTube series. We cover various use cases solved with record-triggered flows, subflows, loops, migration strategy by different Trailblazers, specific flow features you can use with your flows, and much more! I live stream a new episode each month so be on the lookout.
Resources


