Editor’s note: This post was updated on November 14, 2024, with the latest information and resources.
Empowering your teams with real-time insights is key to staying competitive. Agentforce gives you the tools to create customized agents with development options that best suit your company’s needs.
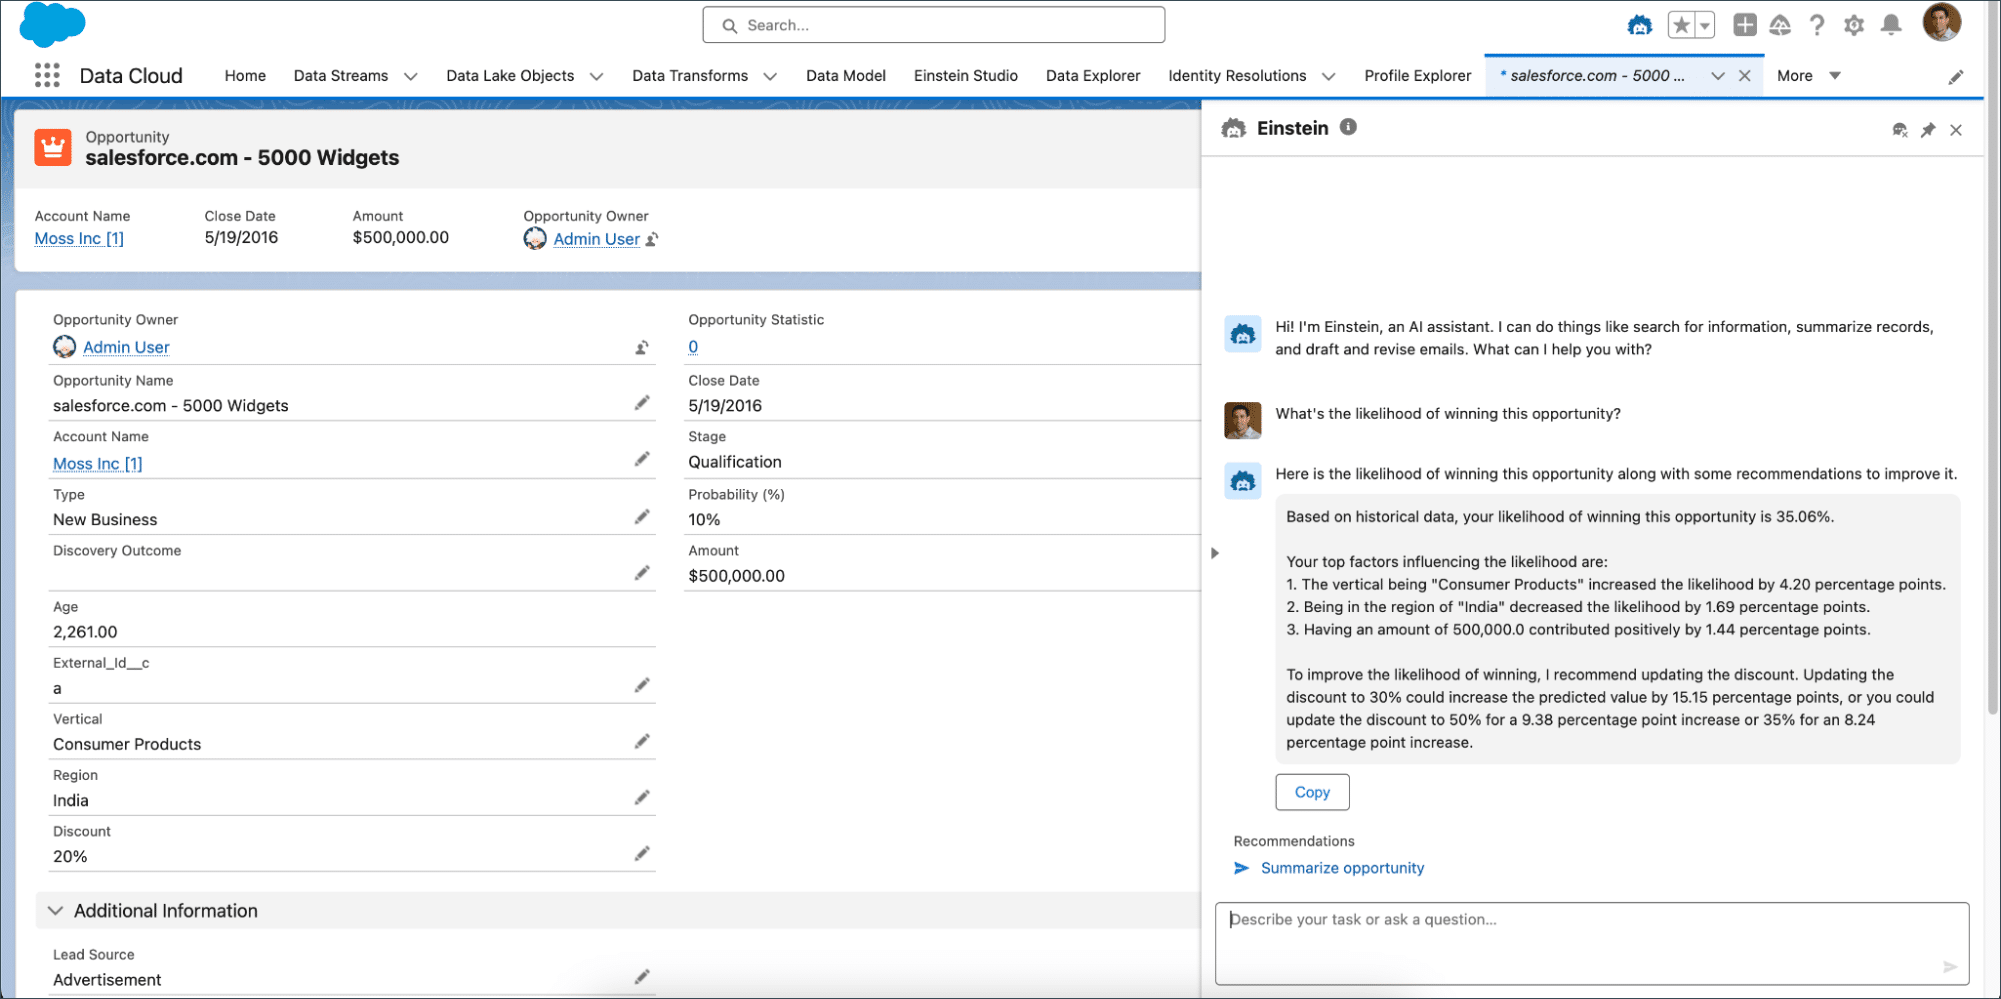
When setting up custom agent actions, a common use case is getting it to provide real-time, actionable insights. Your knowledge of your org’s processes is the key to leveraging Agentforce’s functionalities. Imagine your users are browsing an opportunity and they want to know how likely they are to close it so they can prioritize their time. Or, they might be looking at some leads and trying to figure out if they’ll convert or not.
With Agentforce custom actions, you can enable your users to receive that information directly within their workflows so they can make informed decisions and take proactive measures.
Define your use case
Are you looking to predict the win rate of an opportunity? The conversion rate for a lead? In order for your agent to surface real-time insights, you’ll need to first train and create a predictive model. Your use case will inform the data you need to prepare for it.
Here at Salesforce, we have two ways of creating a model: Our no-code Model Builder and our bring-your-own-model option.
We’ll focus on our no-code option here. This is a quick, low-friction way of creating models for deployment. It supports binary classification and regression models, and it’s a fast and easy way for anyone to onboard onto model building.
You can read about the Bring Your Own Model (BYOM) option in the Resources section at the end of this post.
Prepare your data
The key to a good model is good data. First, ensure that you have a sufficient and organized amount of data; this is what your model will be trained on. With this data, your model can recognize patterns and trends that enable it to make informed predictions in real life. Luckily, with Data Cloud, we have a centralized way to ingest and prepare data for model building.
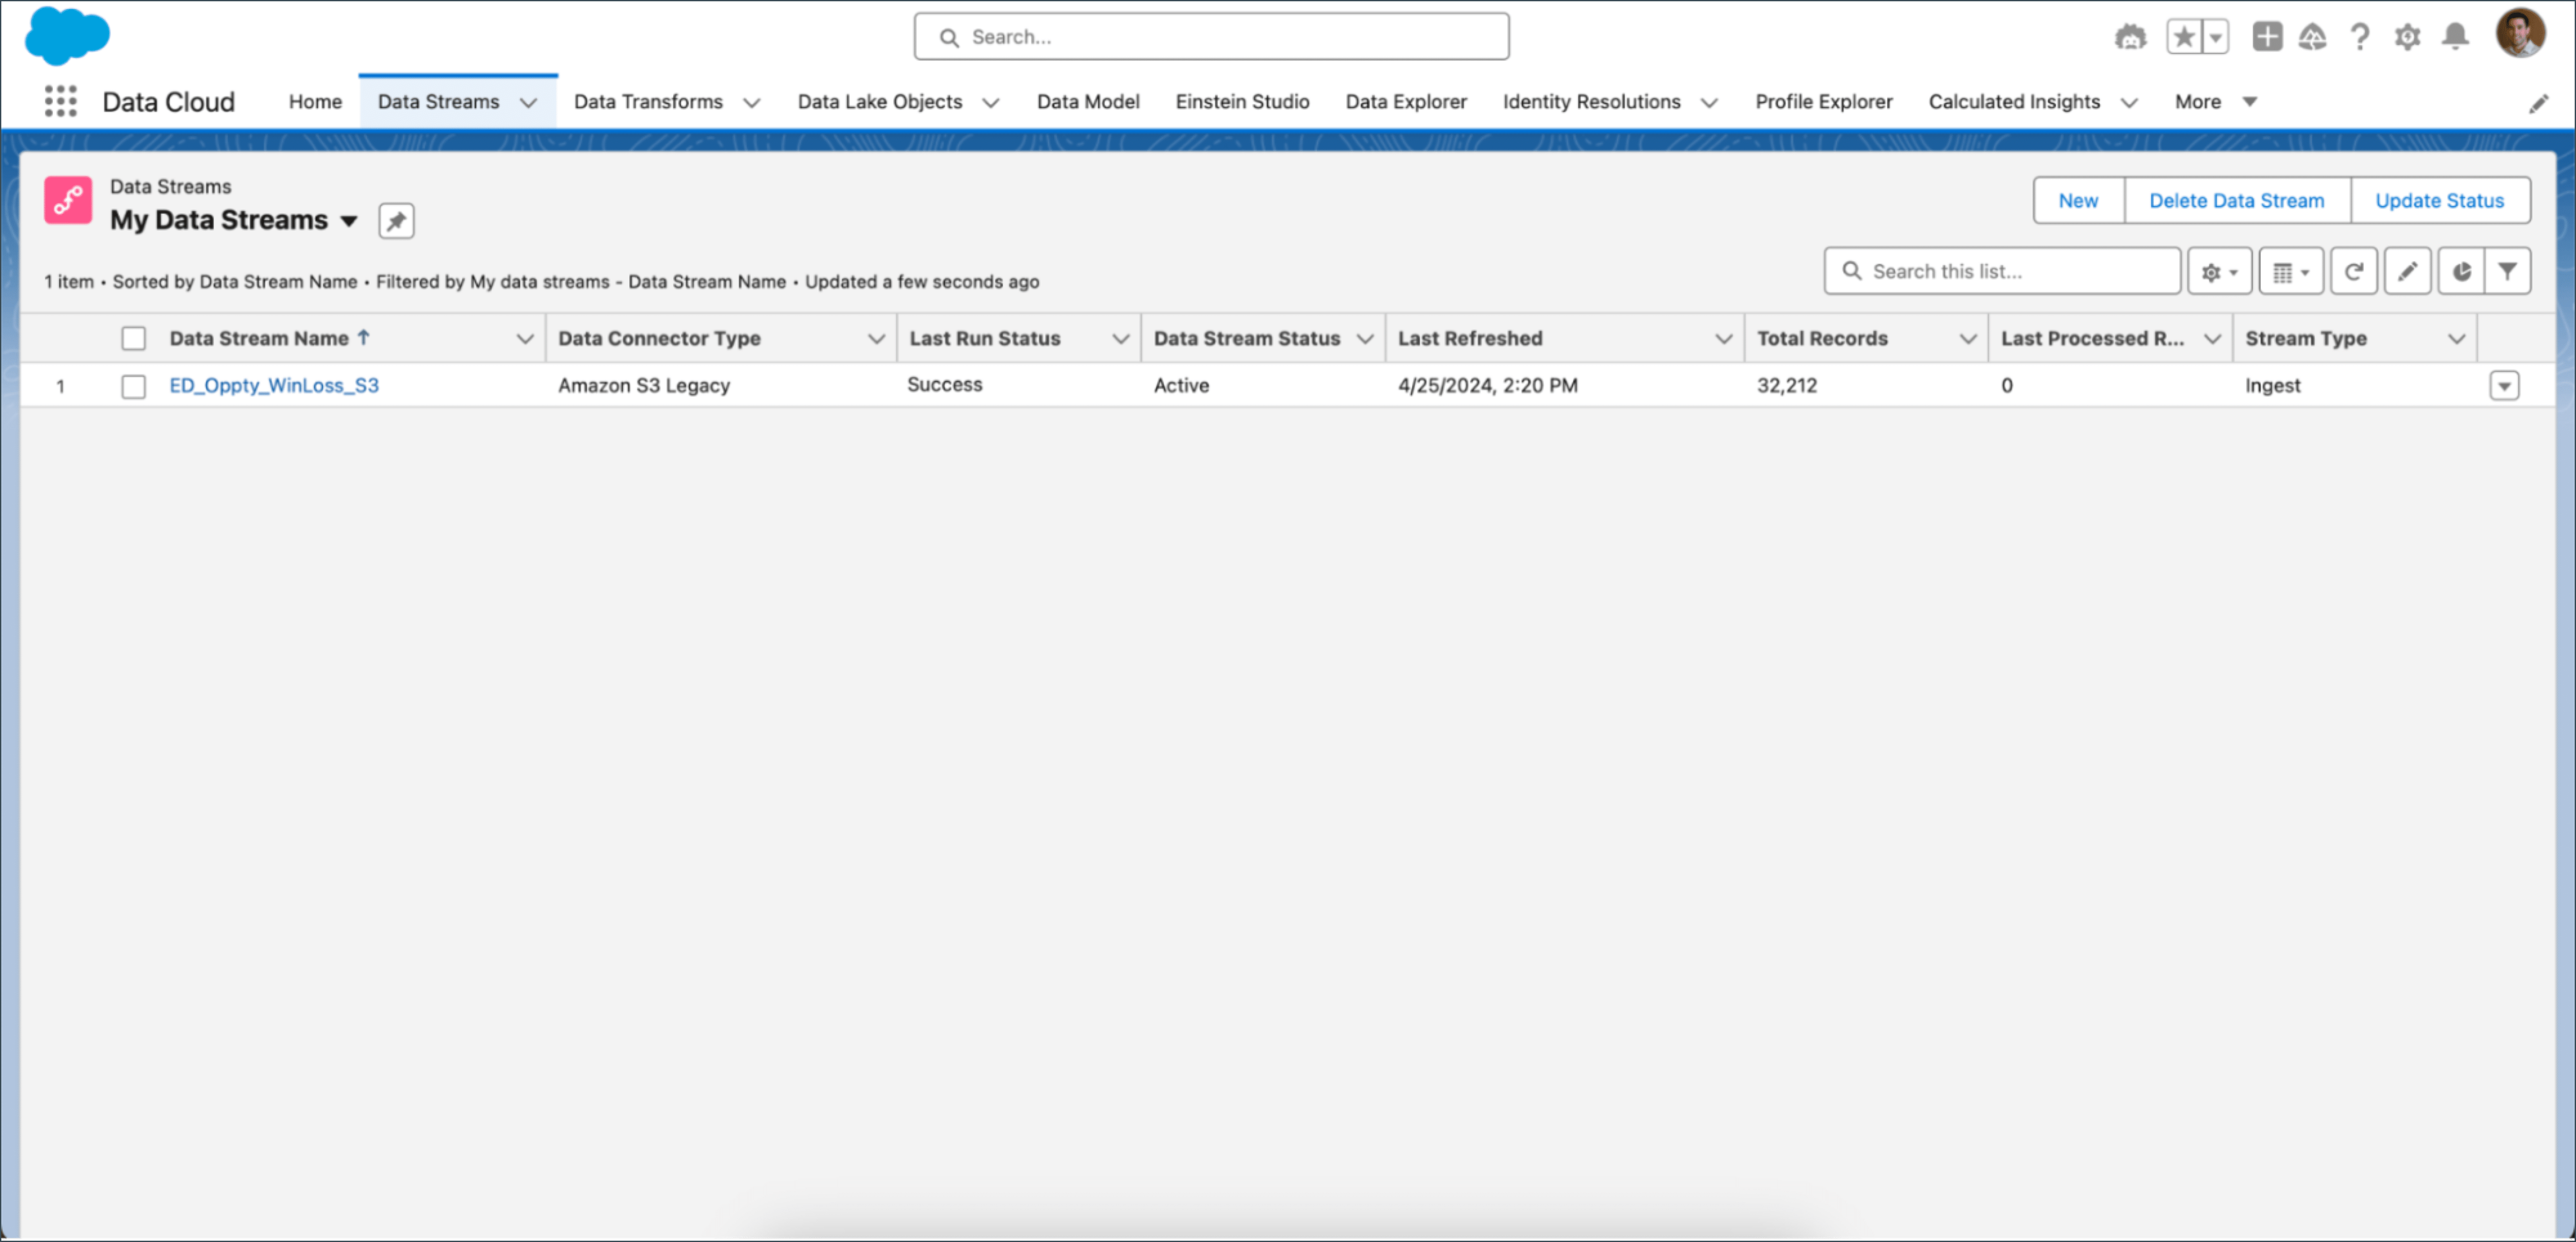
Start by ingesting your desired data as a data stream. In Data Cloud, select the Data Streams tab and click New. You can ingest Salesforce objects or external data.
Next, map your data to a data model object (DMO). By doing so, you make your data recognizable to the Salesforce ecosystem. If you leave your data unmapped, you won’t be able to leverage it.

After mapping your data, you’re ready to move on to preparing your model.
Prepare your model
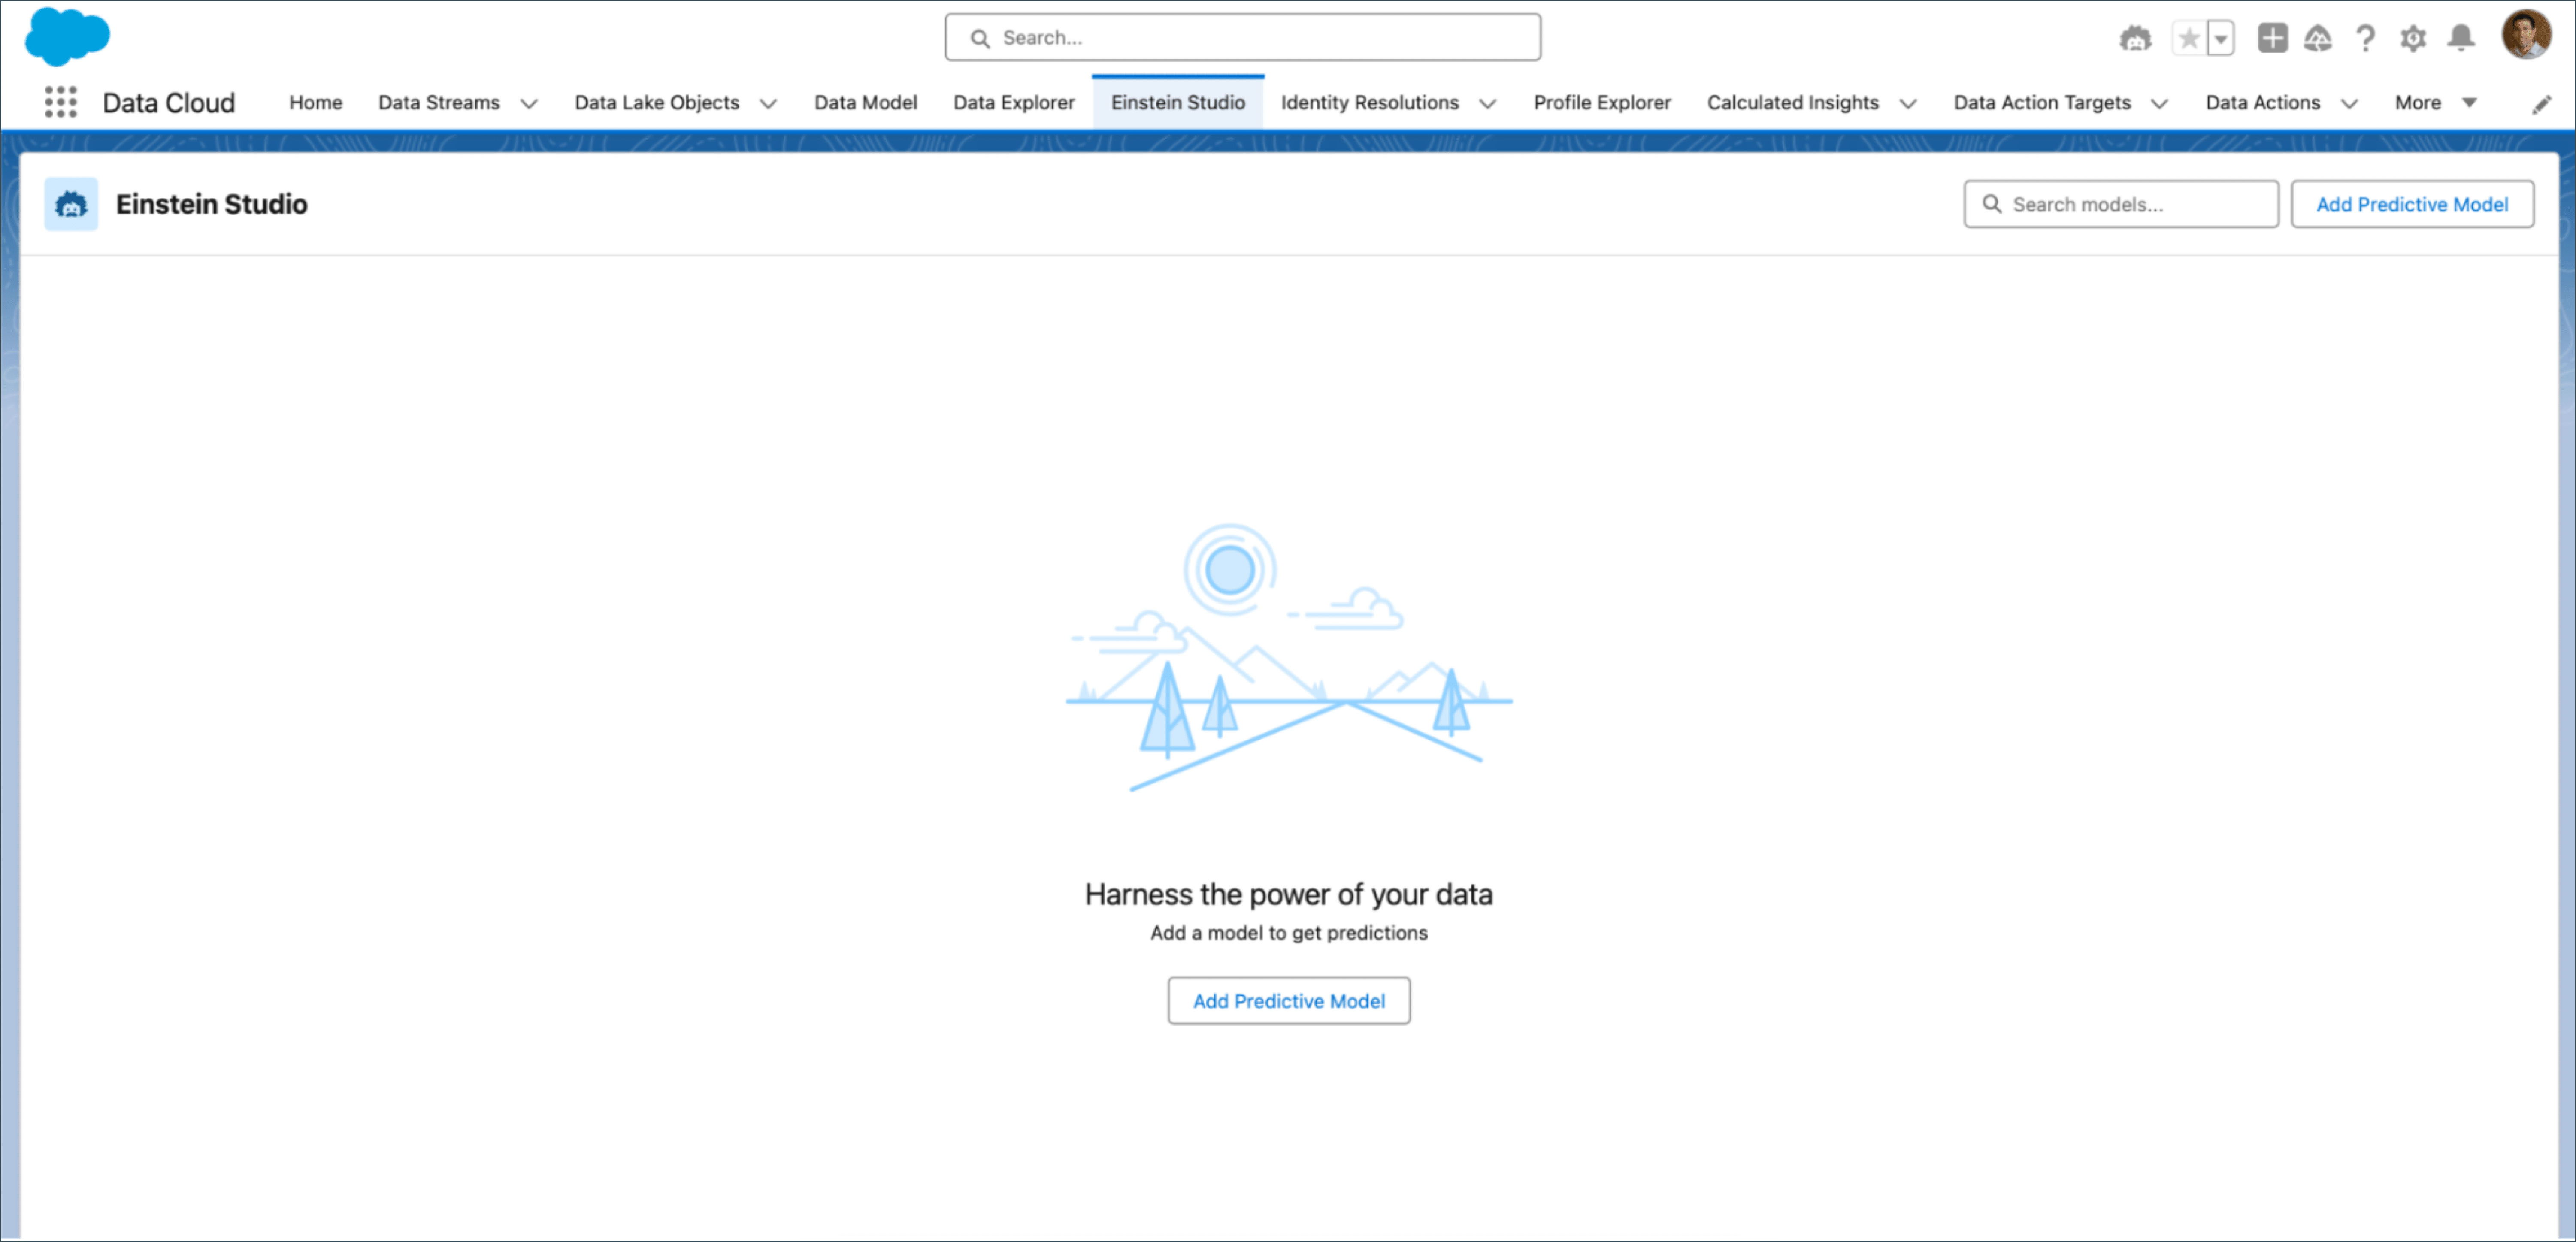
Select the Einstein Studio tab. From there, click Add Predictive Model to launch into Model Builder.
Choose the no-code model option and click Next.
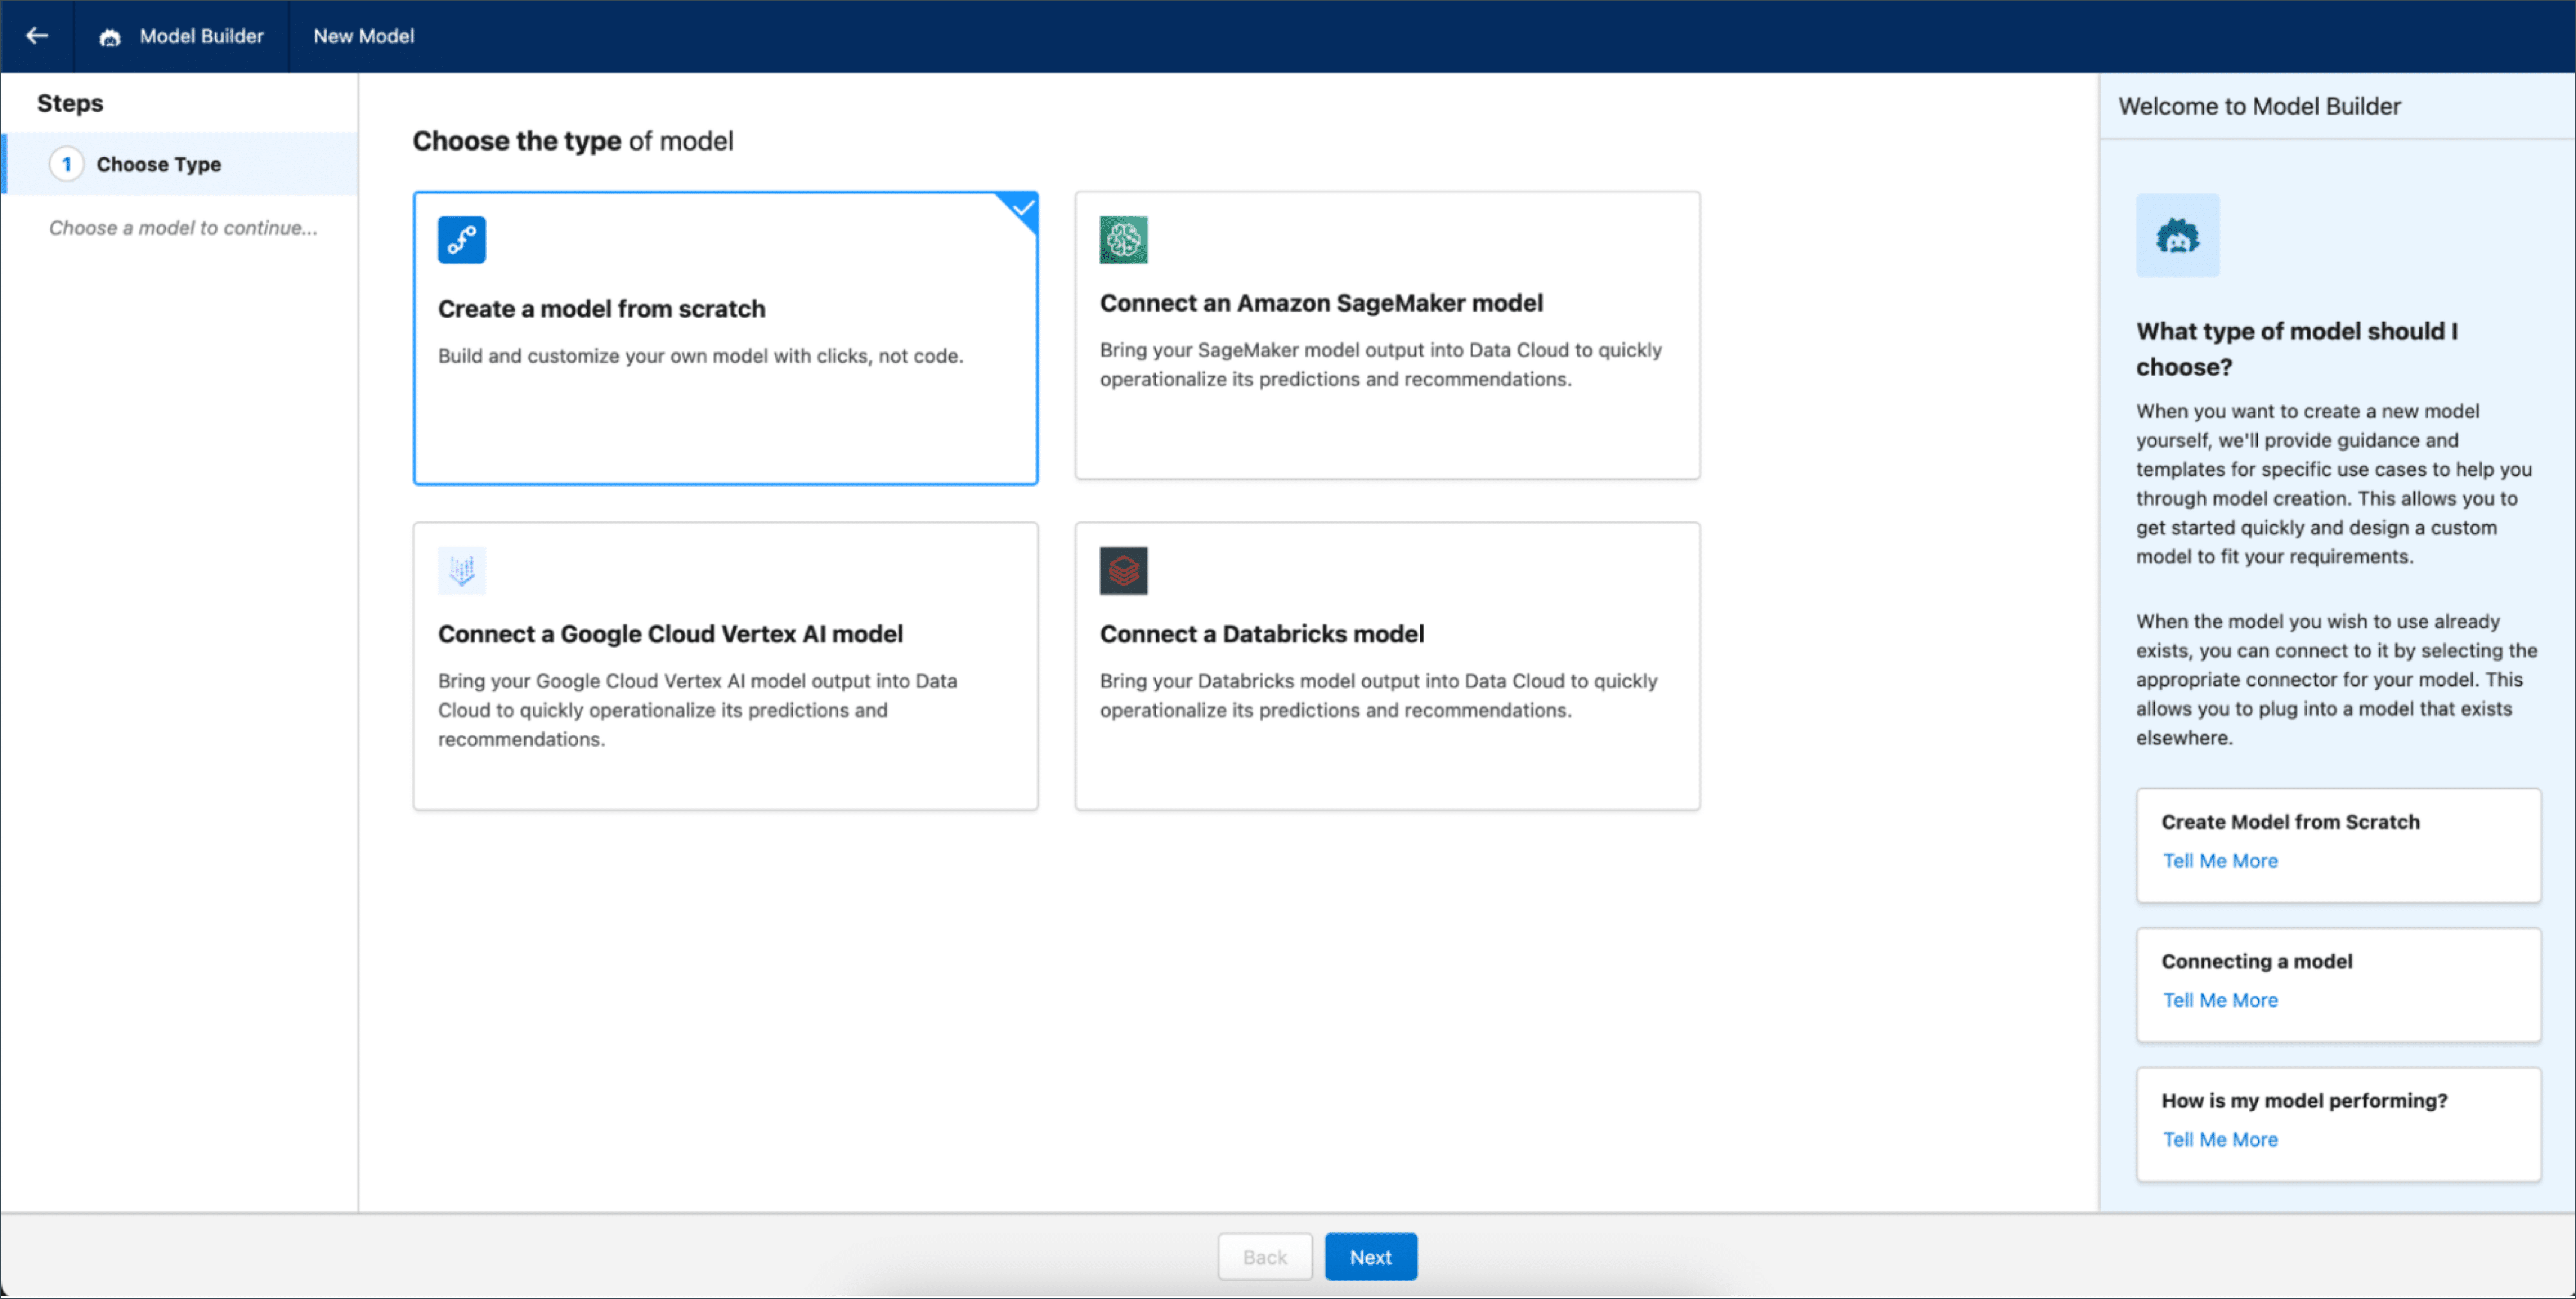
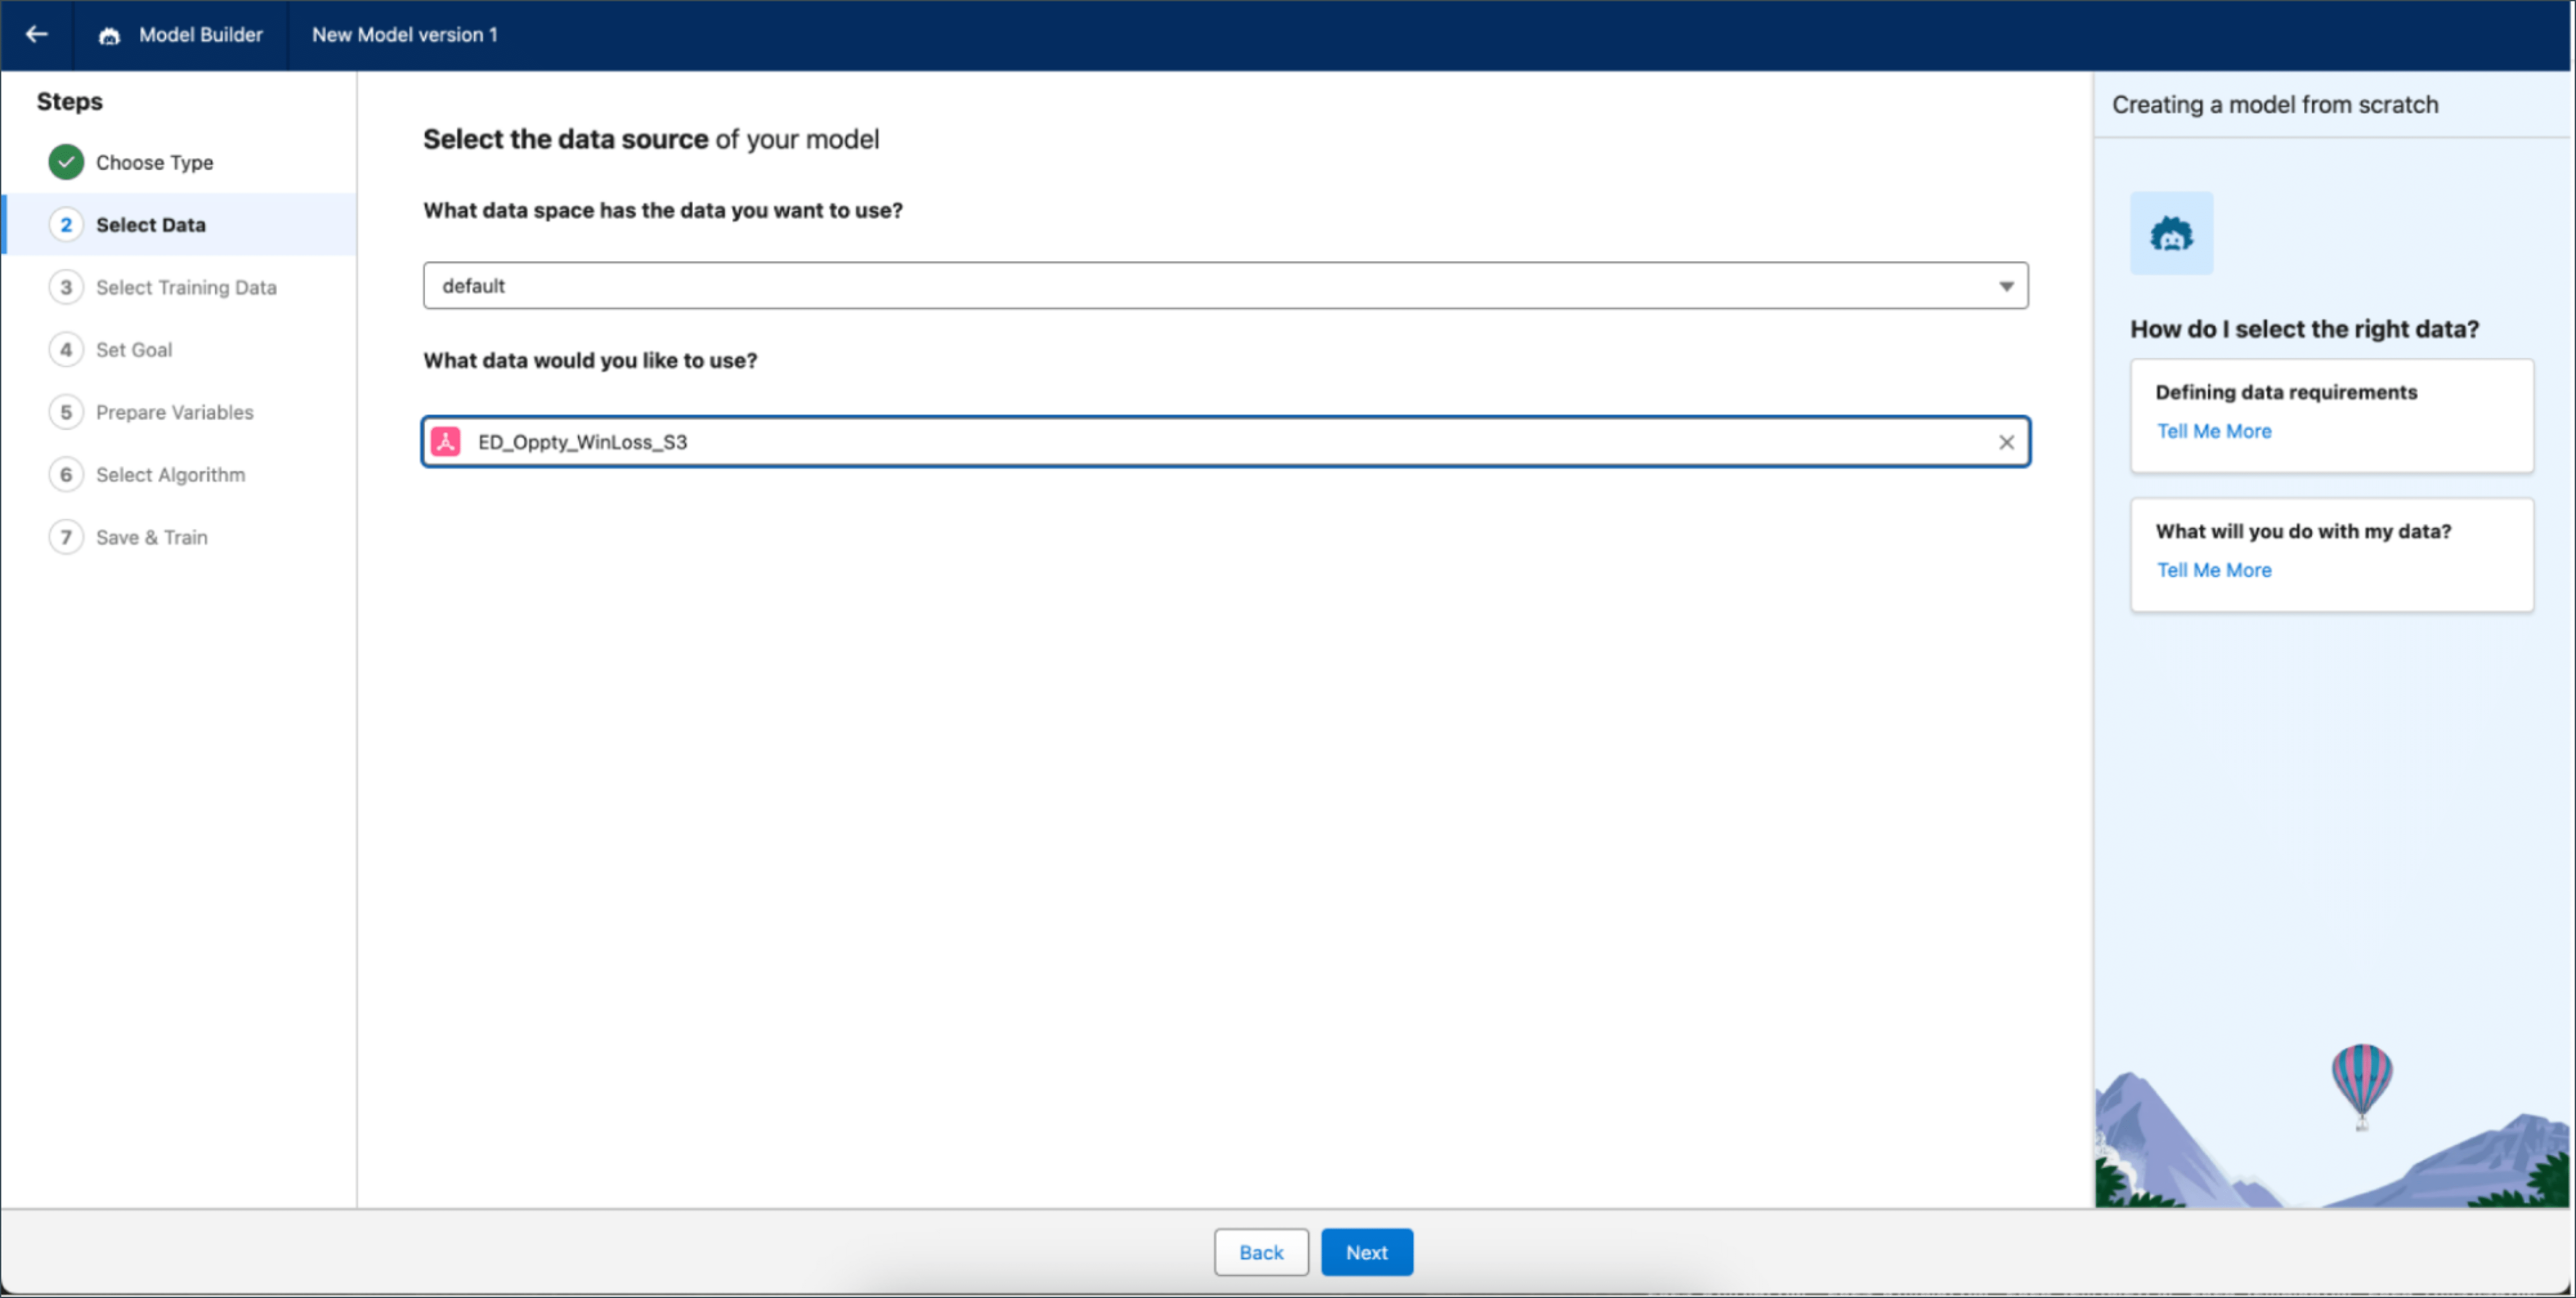
Select the DMO that you just created. This will be the data your model is trained on.
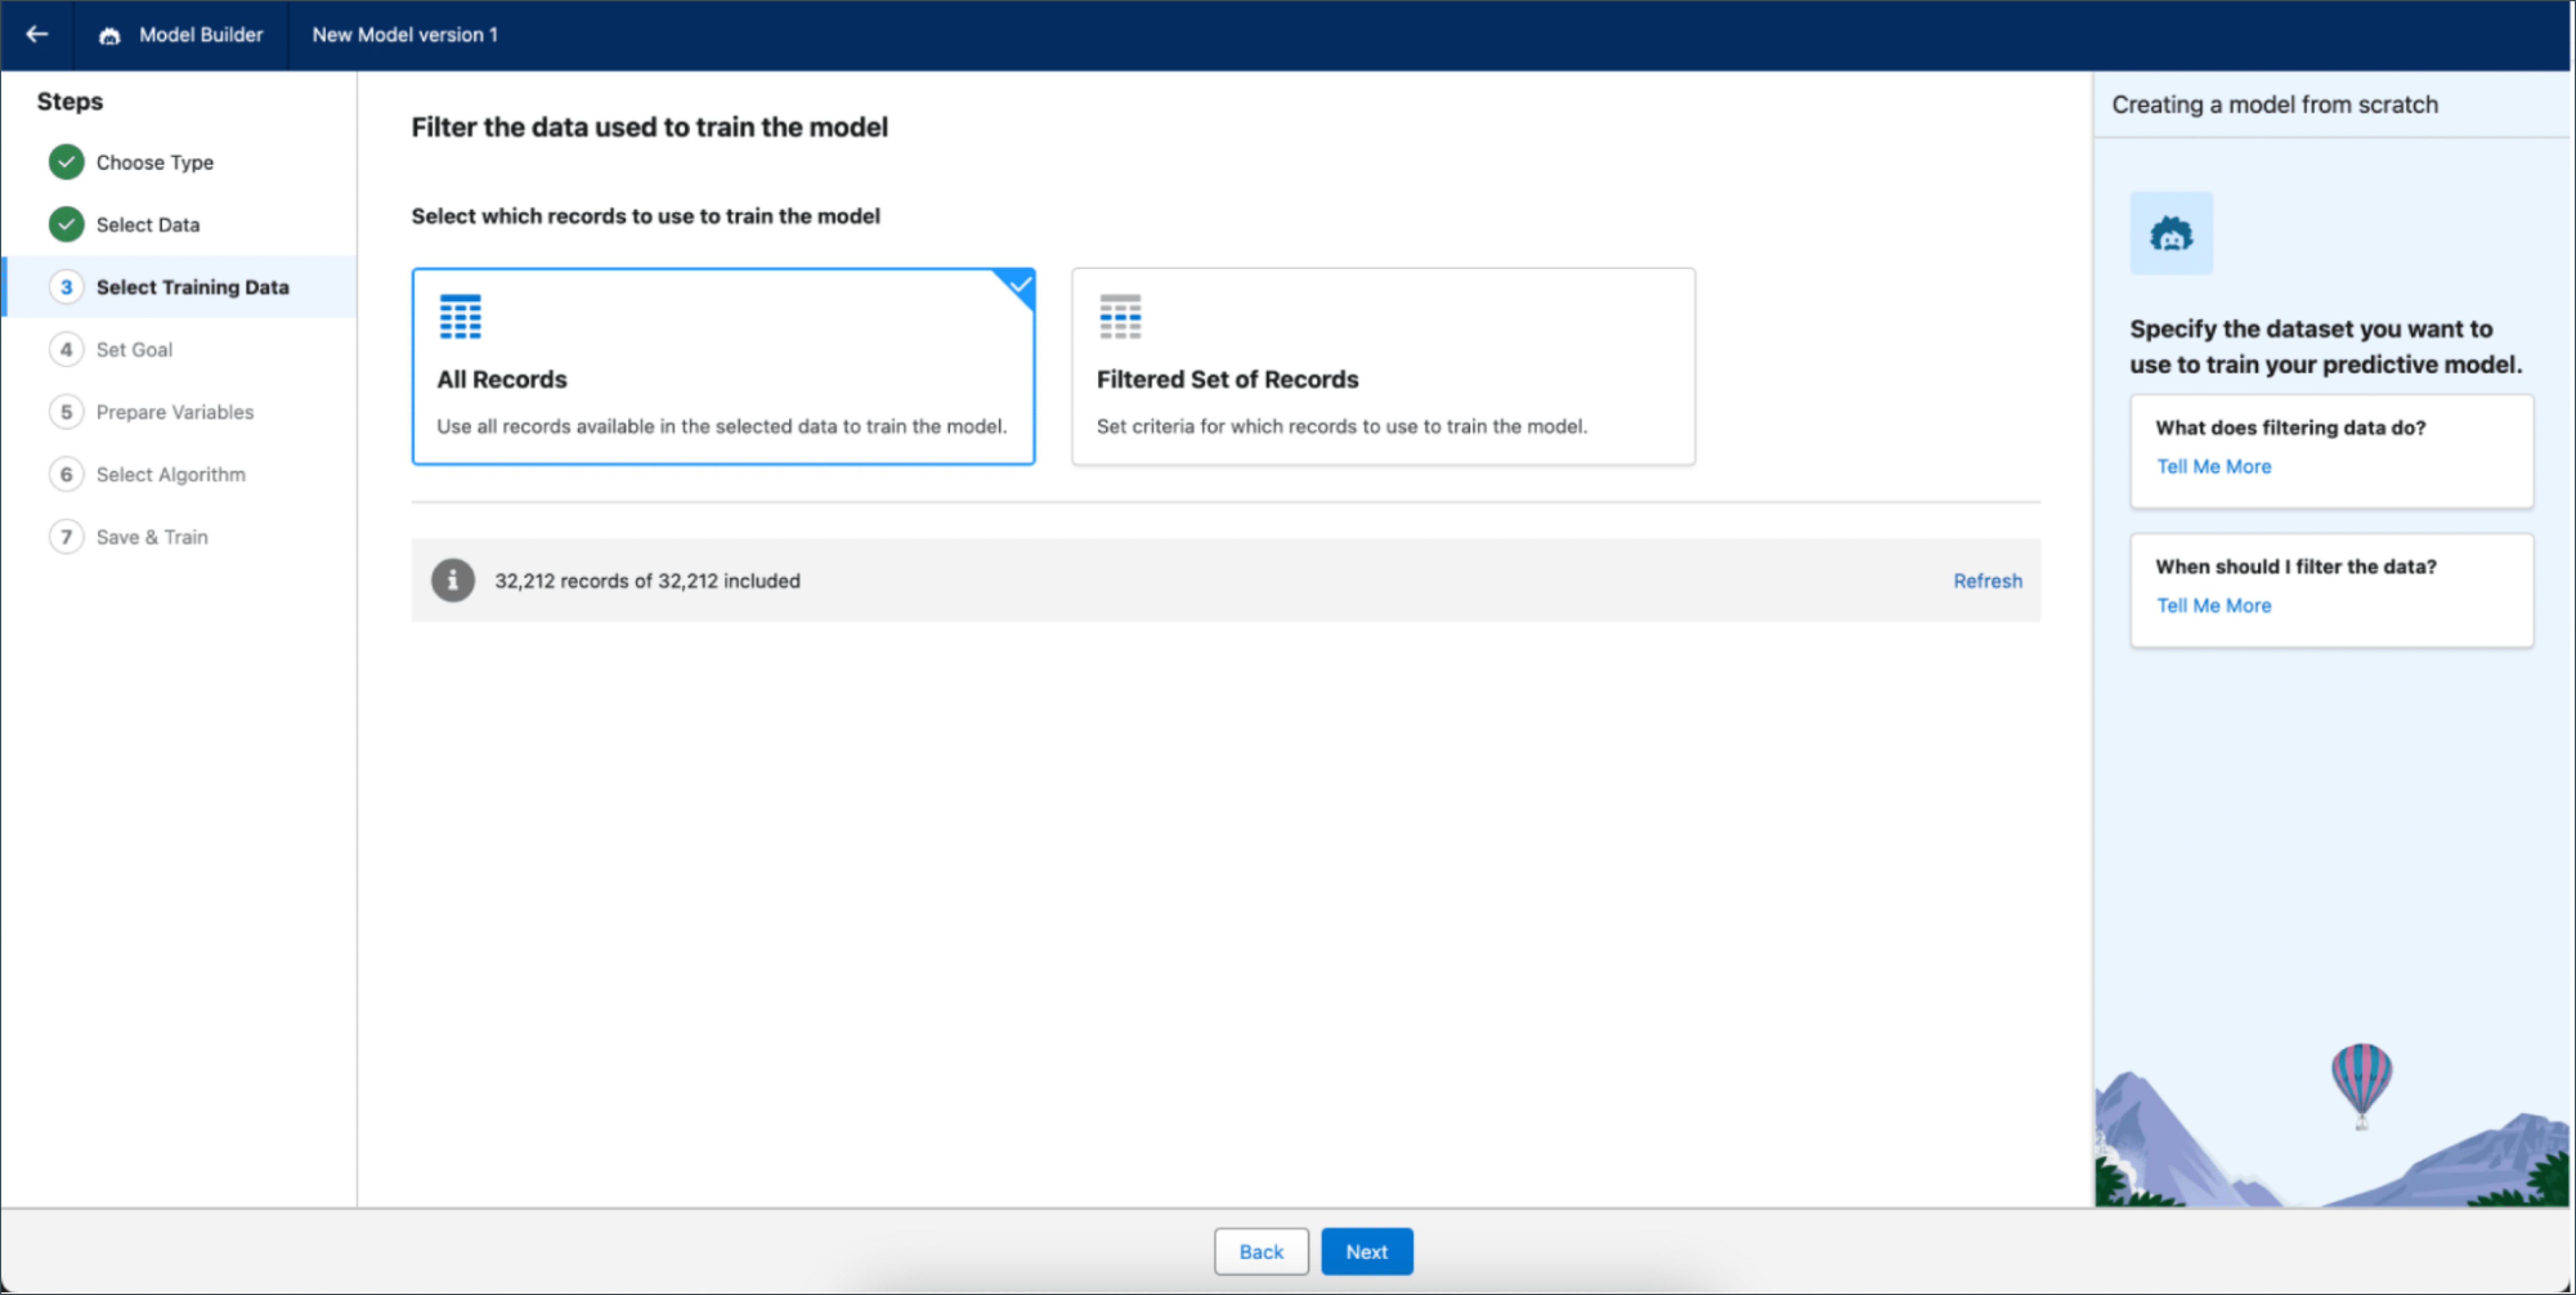
You also have options to filter or choose all of that data for your model.
Next, set the goal for your model. Think of this as what you want your model to predict.
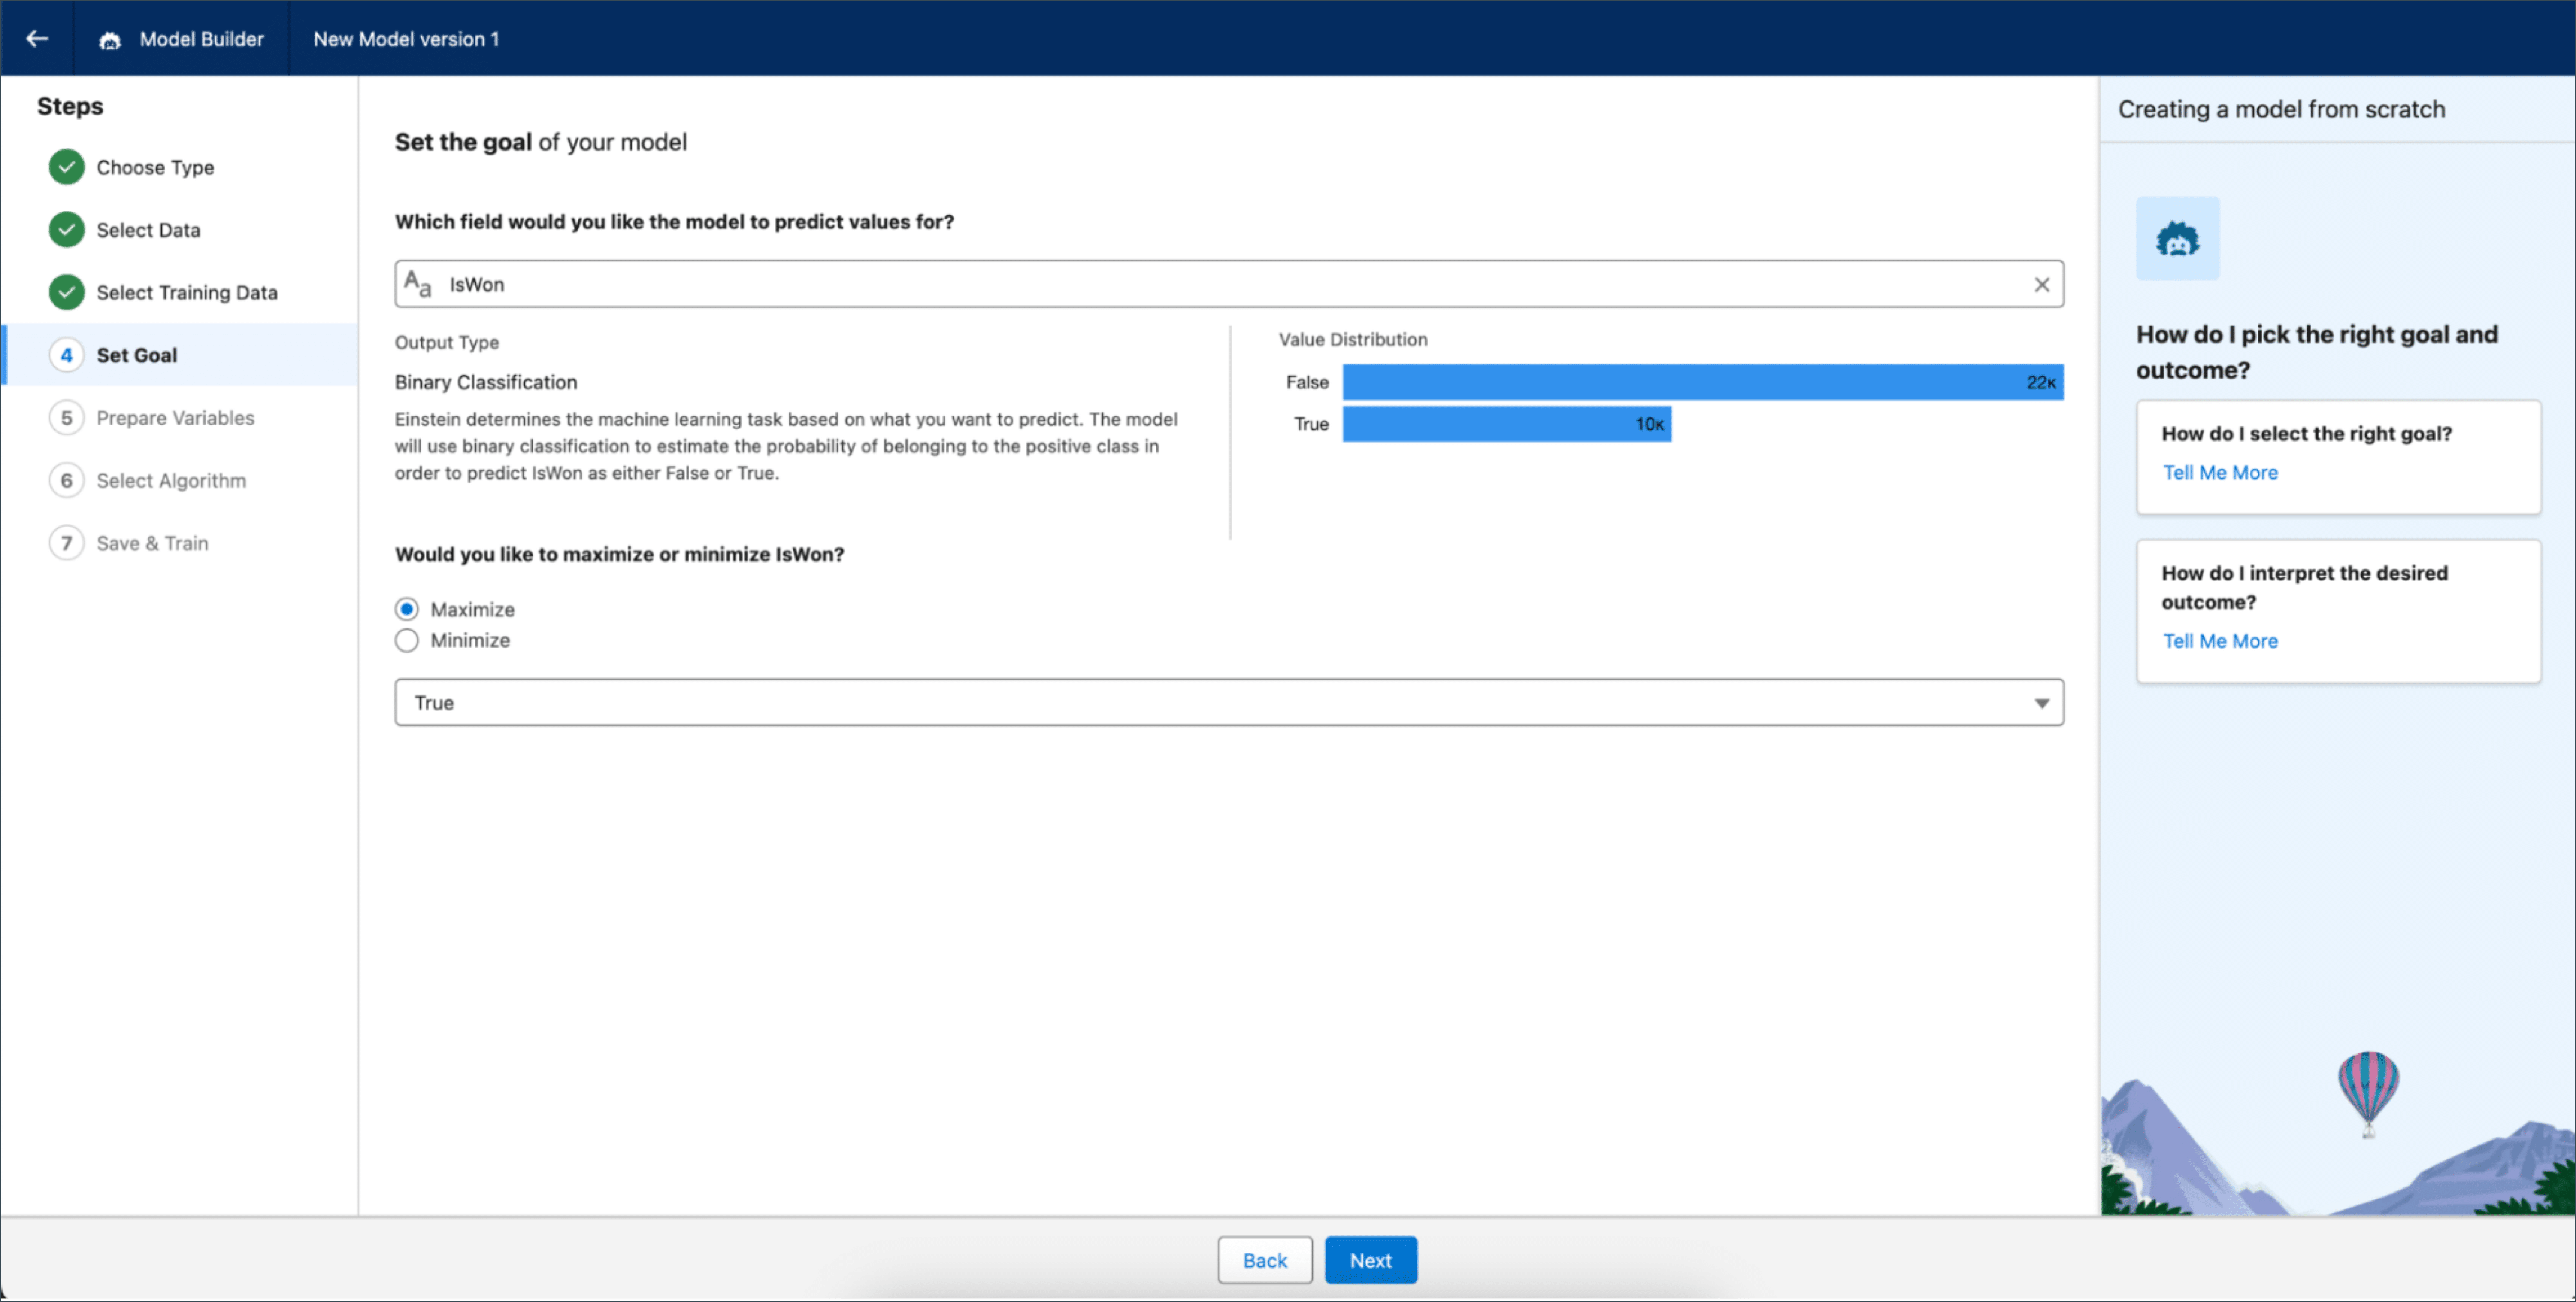
You can also choose if you want to include all variables or just a subset of them in your model. This can be helpful if you don’t want to take some variables into consideration.
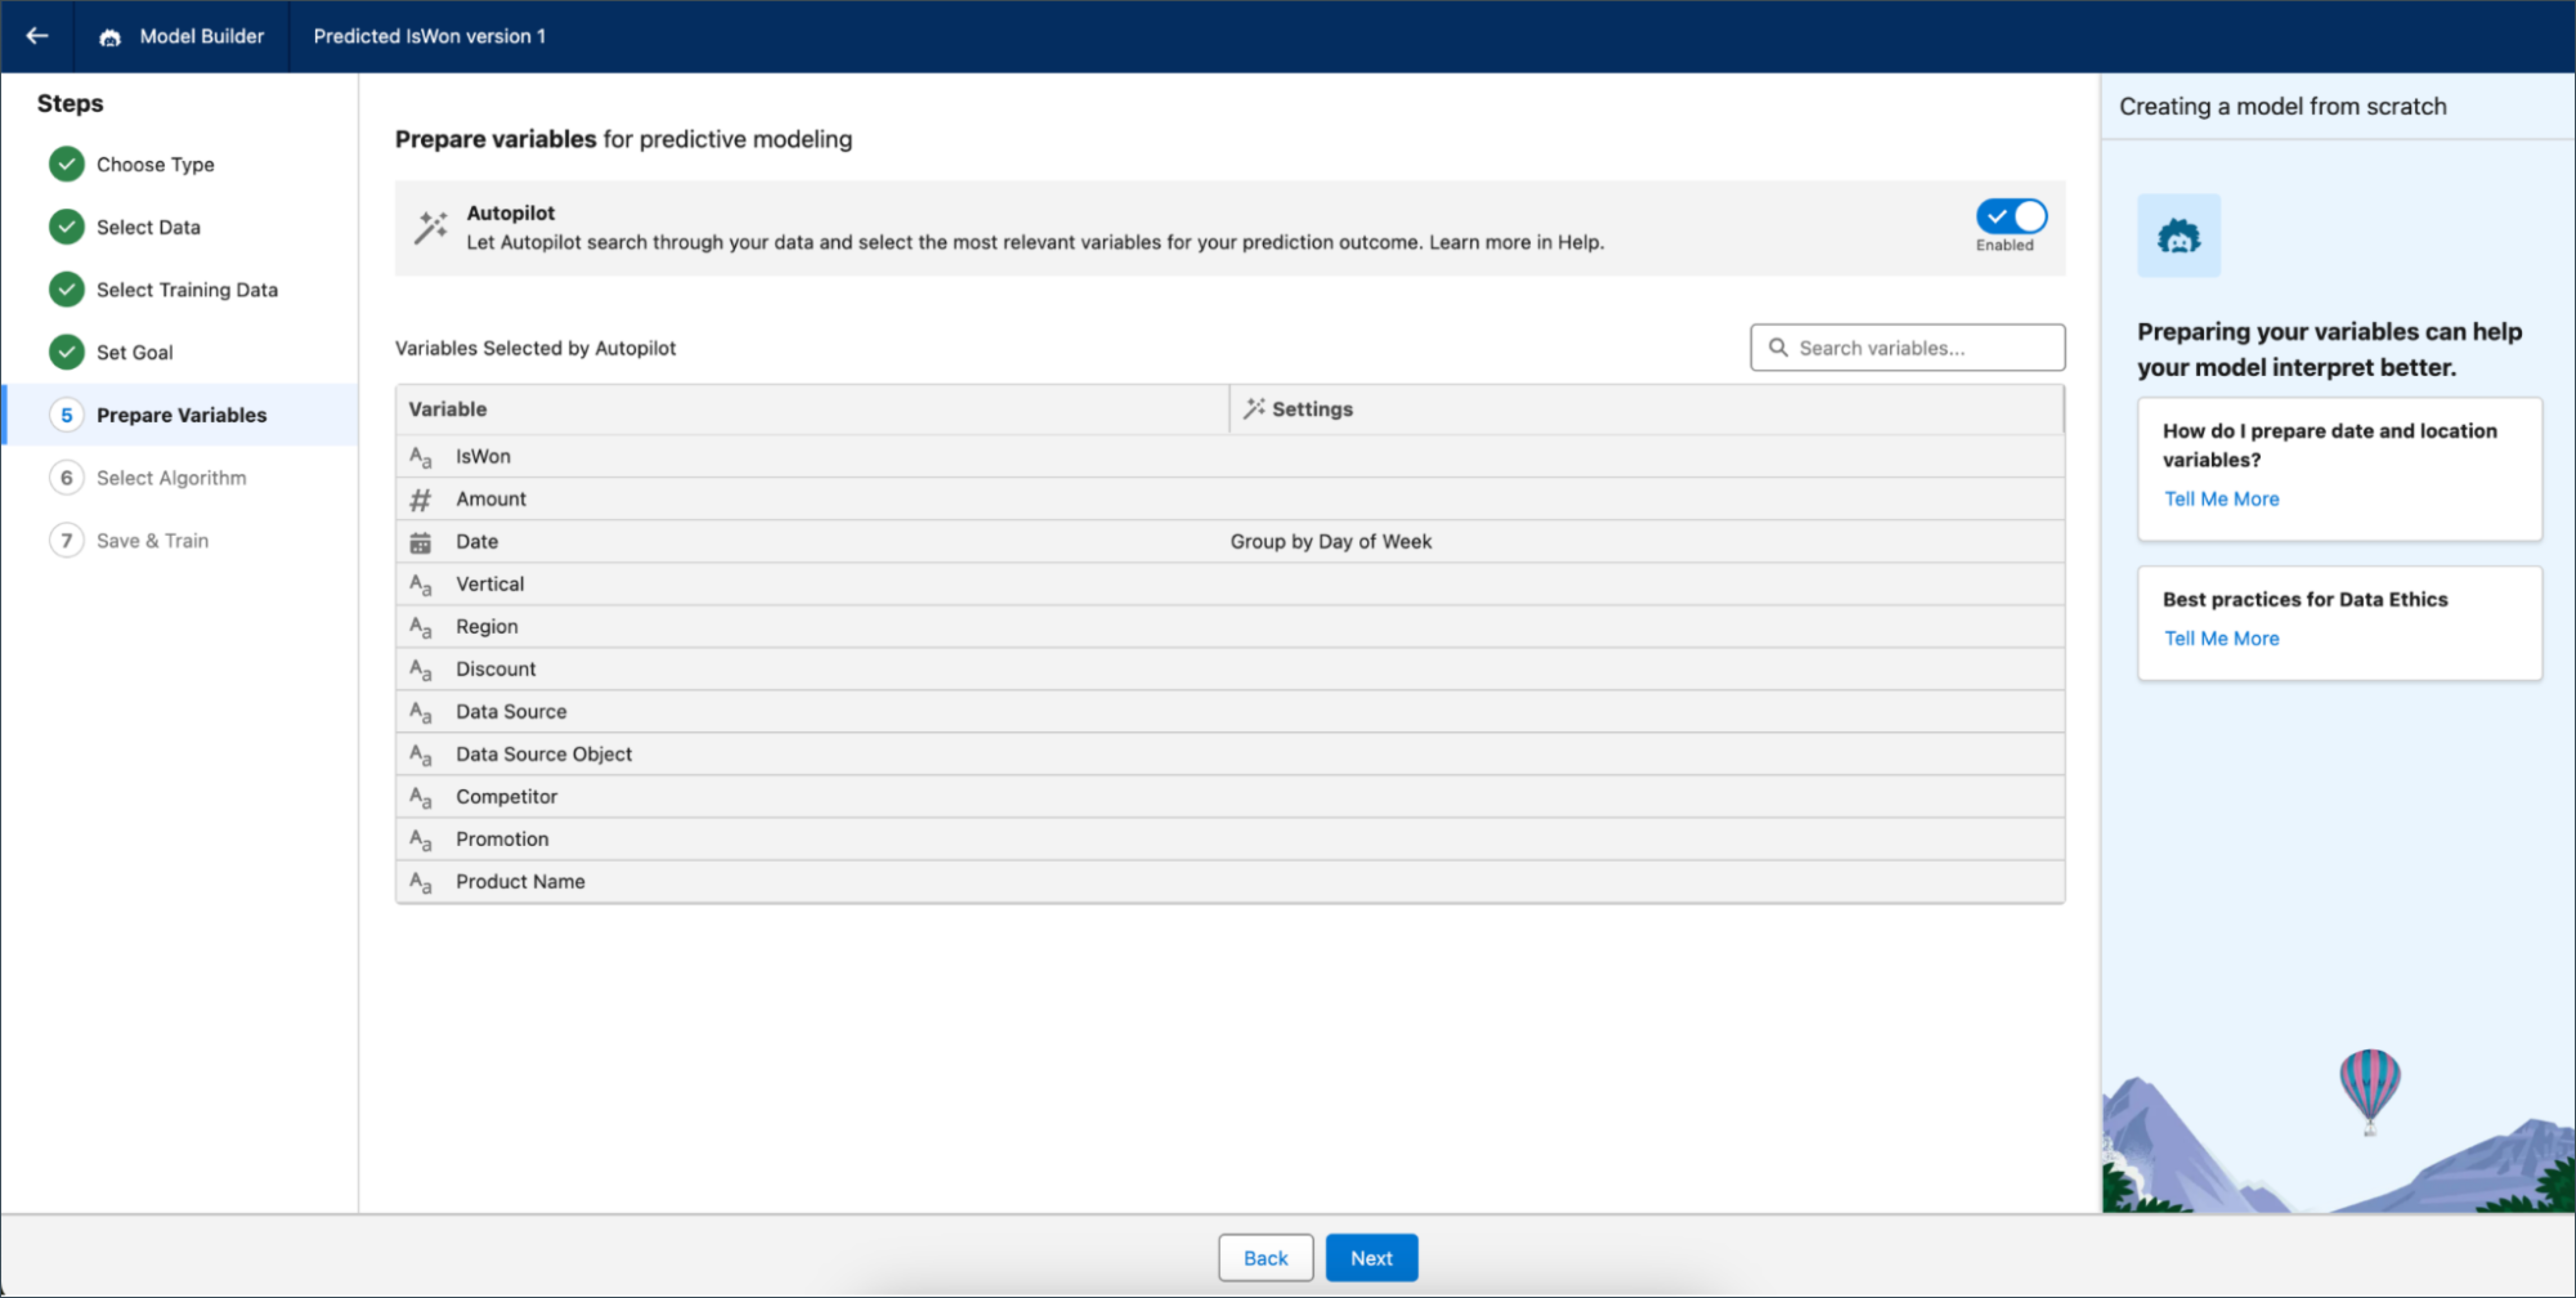
Model Builder will suggest the right algorithm for your model, but you also have the option to choose your own.
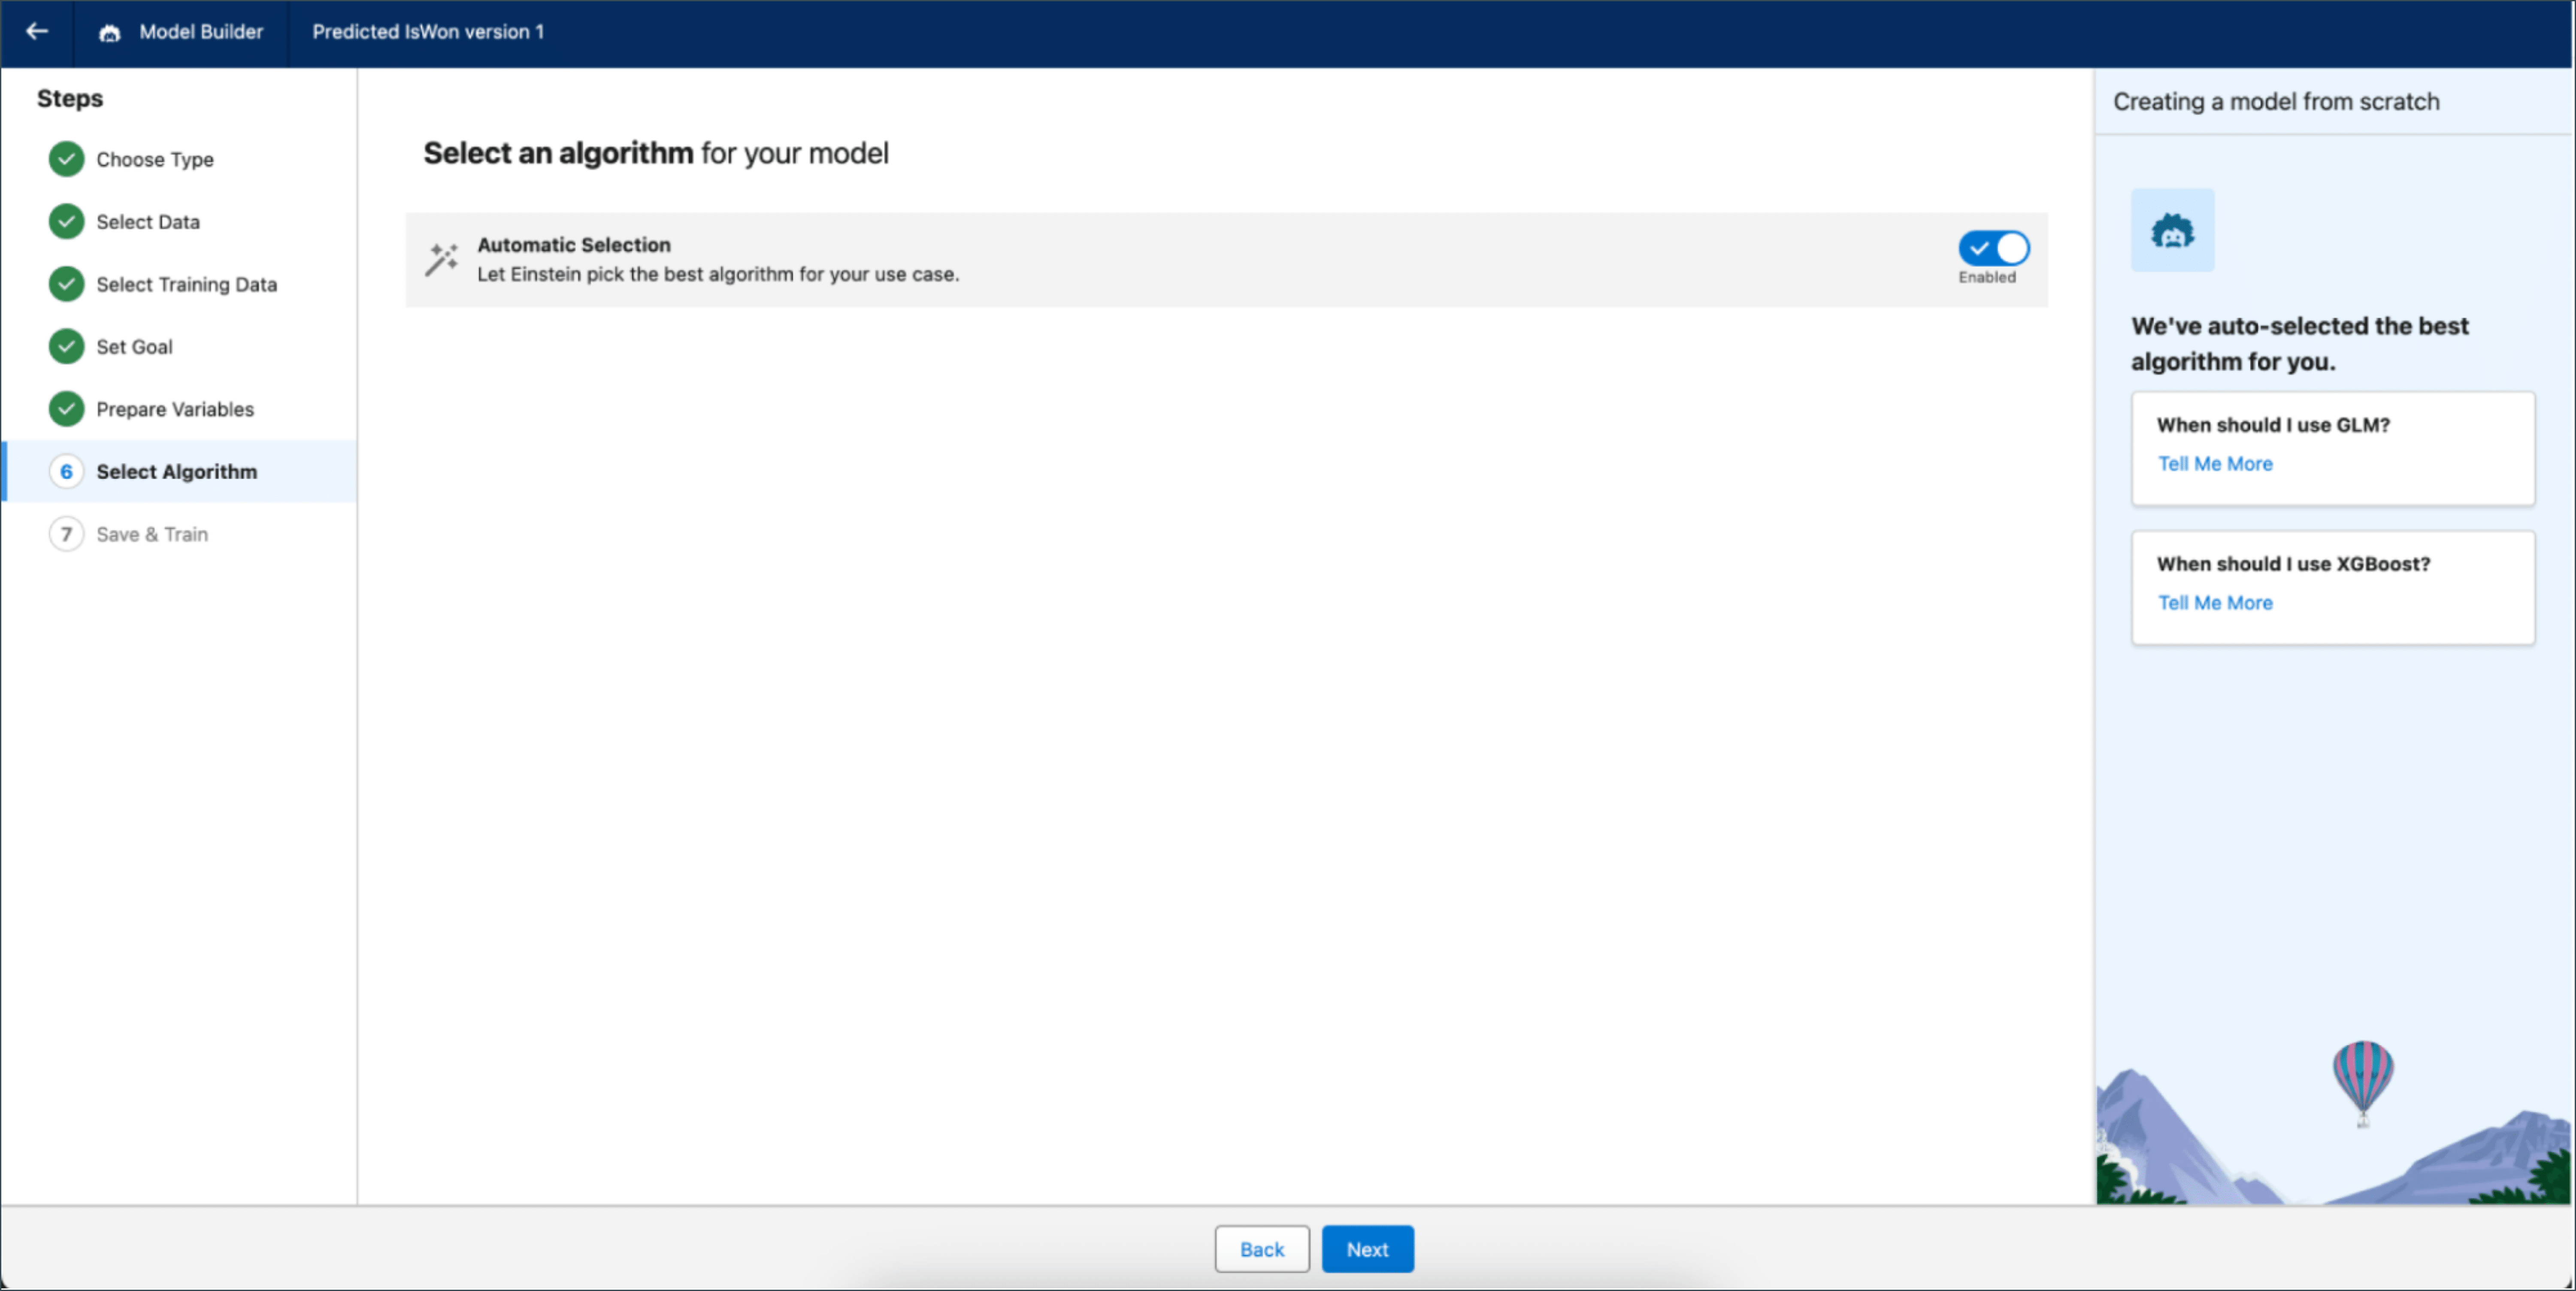
Click Next, then Save. Now, you can start training your model!
Activate your model
Once your model is trained, don’t immediately activate it. A good model depends on good data, and this step will tell you if there are any data issues you should be aware of.
On the model details page, click View Training Metrics to launch Model Builder again. Here, you’ll see a robust set of training metrics that provide more information on your data and your model performance.
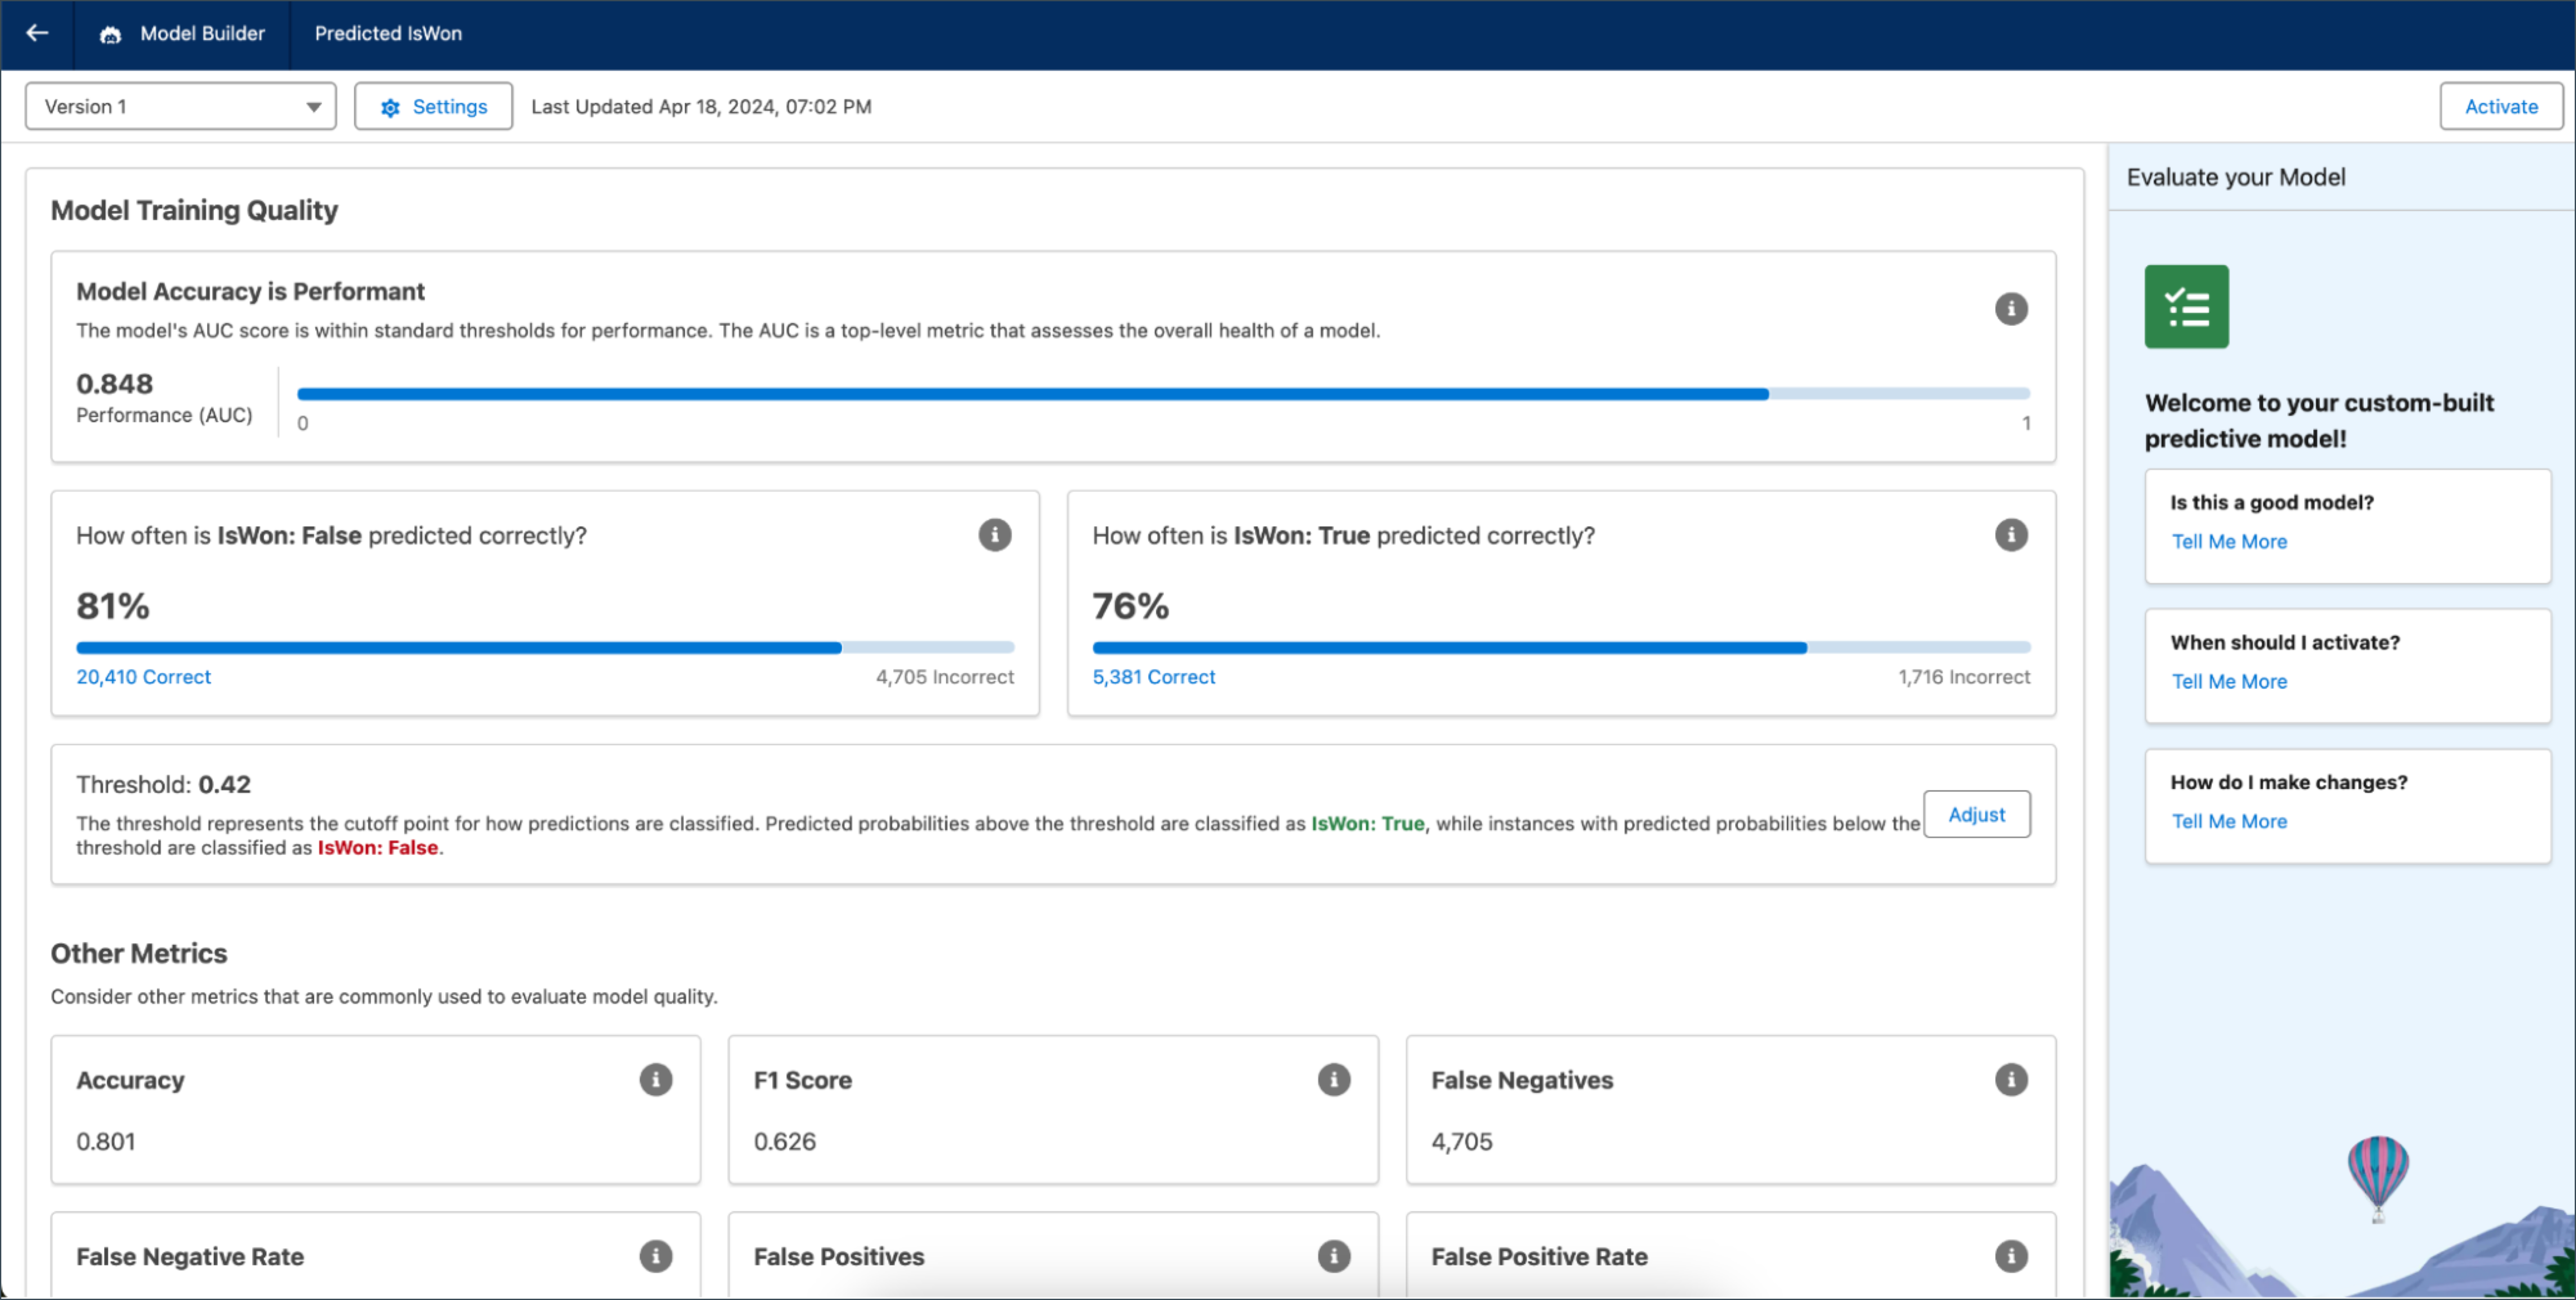
Not sure what some of the metrics mean? Don’t worry, hover over the ℹ symbol for more information. You can also be assured that if there are major issues in model accuracy, Model Builder will flag it to you.
If everything looks good, go to the top right and click to Activate the model.
Prepare model outputs for consumption
Again, we want our agent to provide real-time, actionable insights. As part of this, we don’t just want our agent to give us a prediction–we also want our agent to explain it and recommend some steps for improvement!
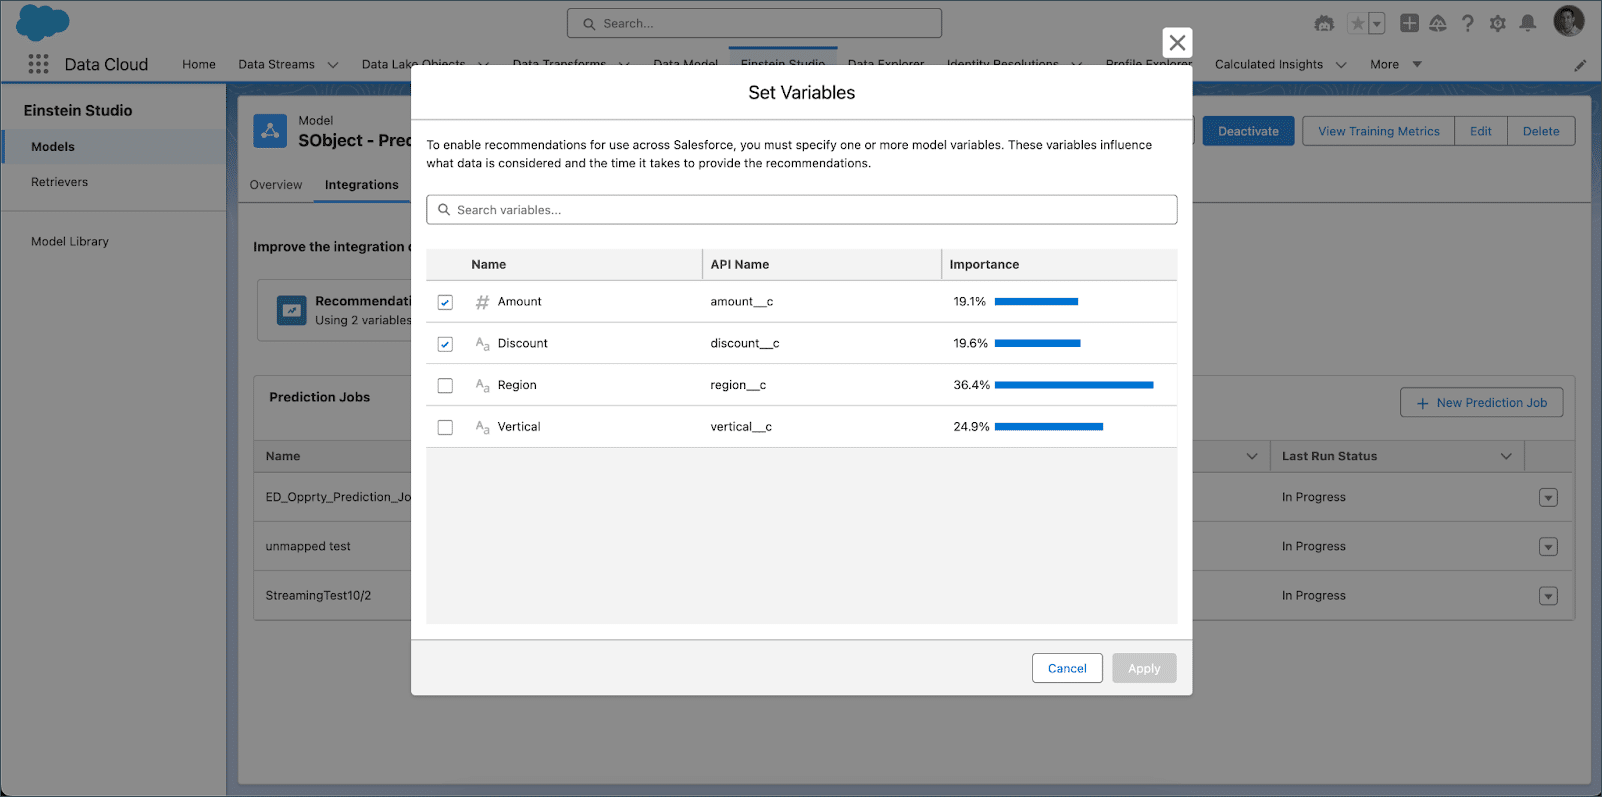
We provide top factors and top improvements in our no-code models: Top factors help you understand what values contributed most to your prediction, while top improvements provide quantifiable, actionable steps towards your goal (which here is maximizing the likelihood of winning an opportunity!)
Top factors come out of the box, but you’ll have to configure actionable variables for top improvements: In other words, you need to tell your model what variables are actually changeable or not by your user. Imagine telling someone to change the address of an opportunity to boost its win rate–that would not be helpful!
To do so, navigate to the model you want to use in Einstein Studio, click on the Integrations tab, and choose which variables are actionable. In our simple use case here, those would be amount and discount.
Next, we’ll also keep in mind that our top factors and improvements are formatted in different ways for each integration. For Flow, which you will be using, top factors and improvements are delivered as JSON–but you want your agents to respond to you in natural language.
To do this, let’s create a nifty prompt template that will take in JSON and output paragraphs. We’ll provide the example below, but due to how extensible Prompt Builder is, you can choose to write and tune your prompt in any way that works for you.
For this example: you can start by creating a flex prompt with three free text inputs: the Prediction Value, Top Factors, and Top Improvements.
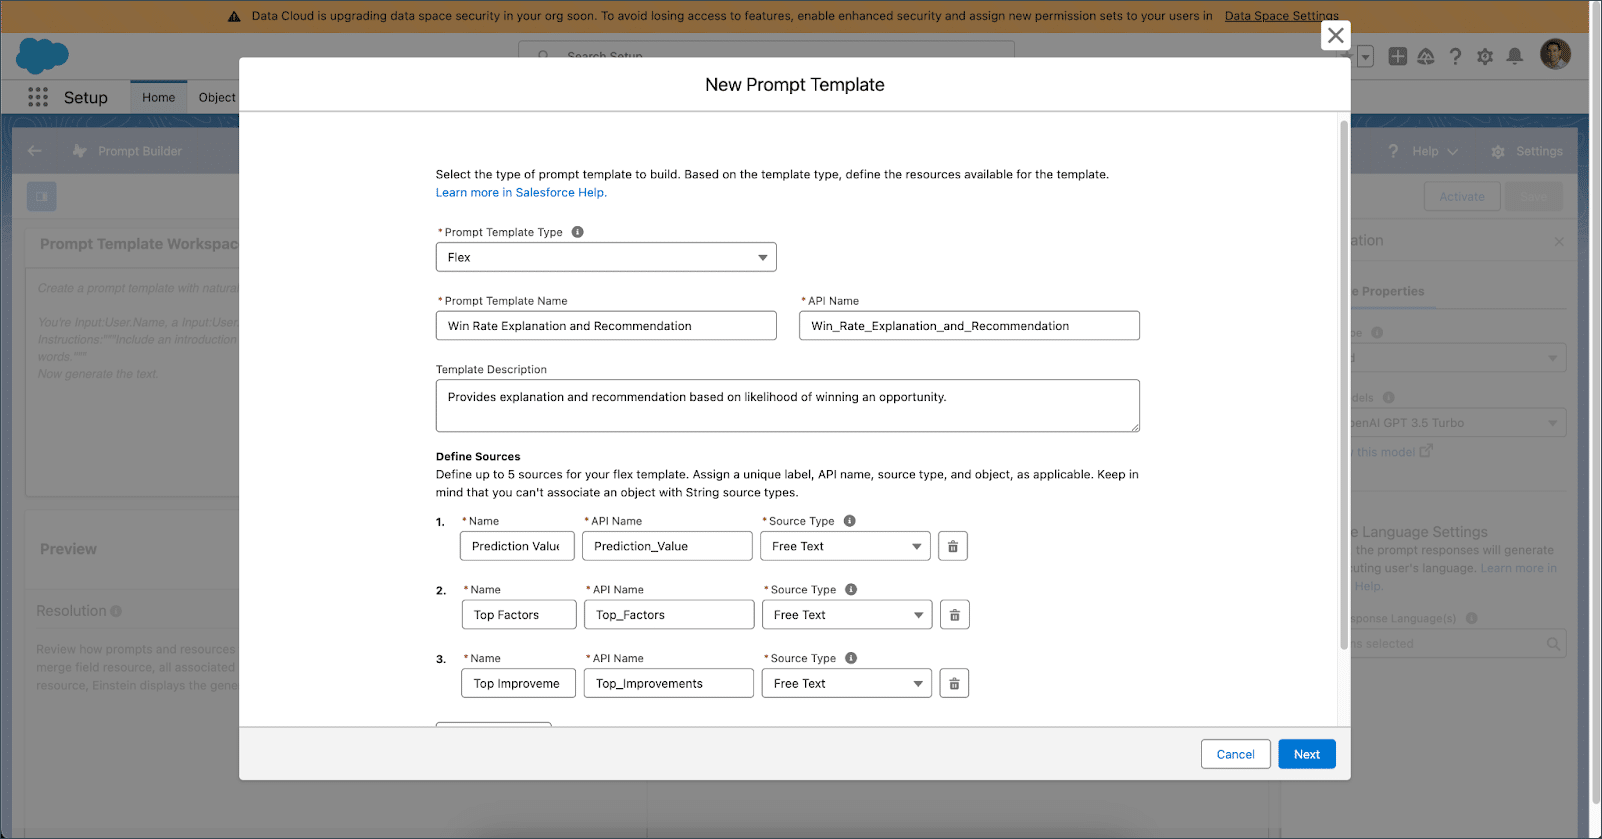
Then, in your prompt, make sure to provide a few examples of a JSON format for top factors and how it should be interpreted, and likewise for top improvements. This is a technique called few-shot prompting and helps clarify to the model how responses should be delivered.
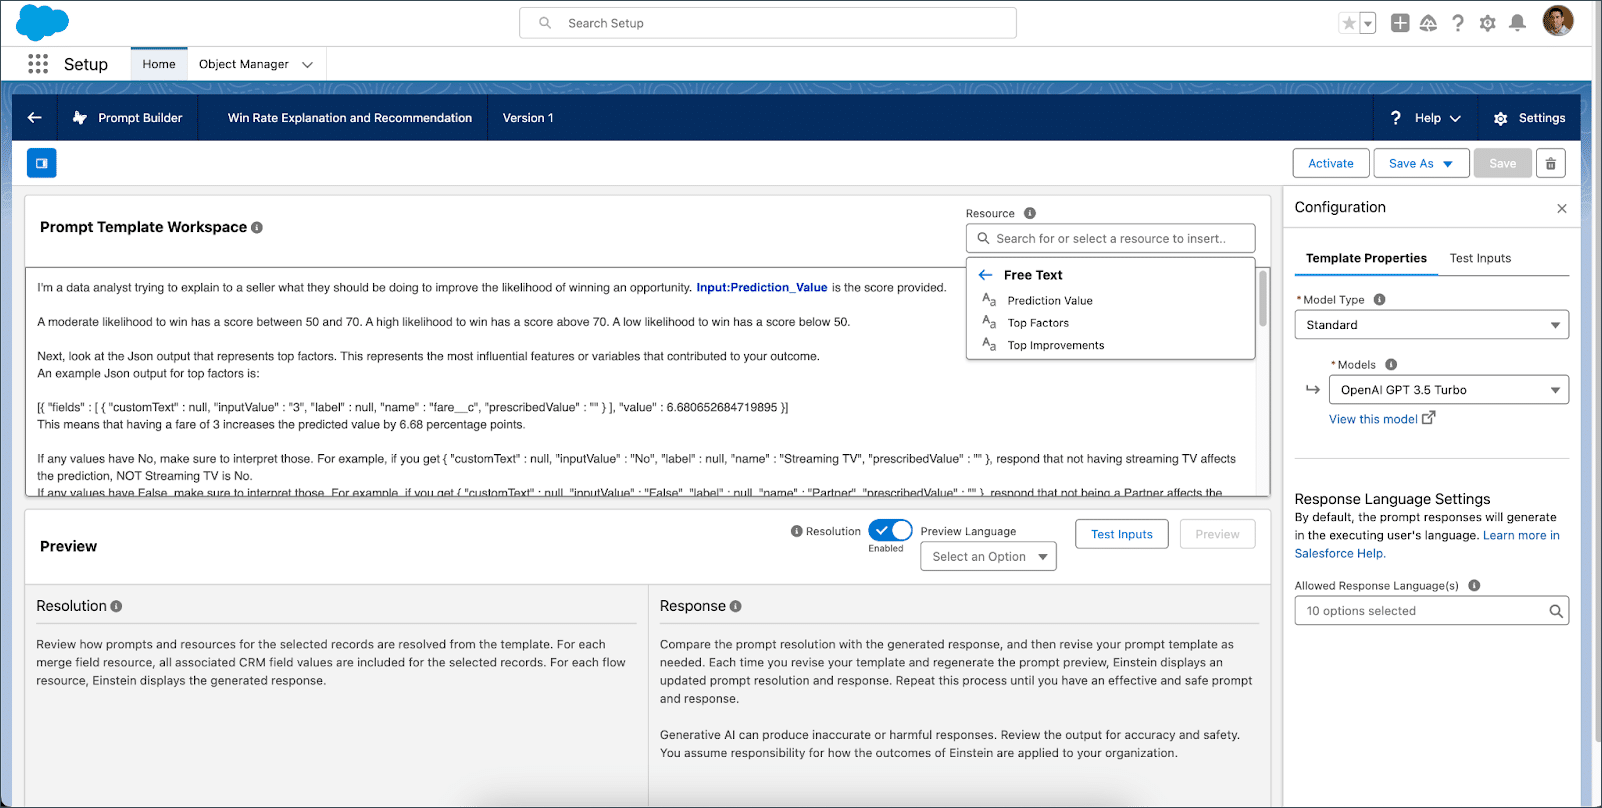
Make any additional formatting or tone requests, then save and activate. Now you’re ready to build your invocable action.
Create an invocable action
Now that you have a predictive model and a prompt template, you can have your agent apply that model conversationally to provide real-time insights.
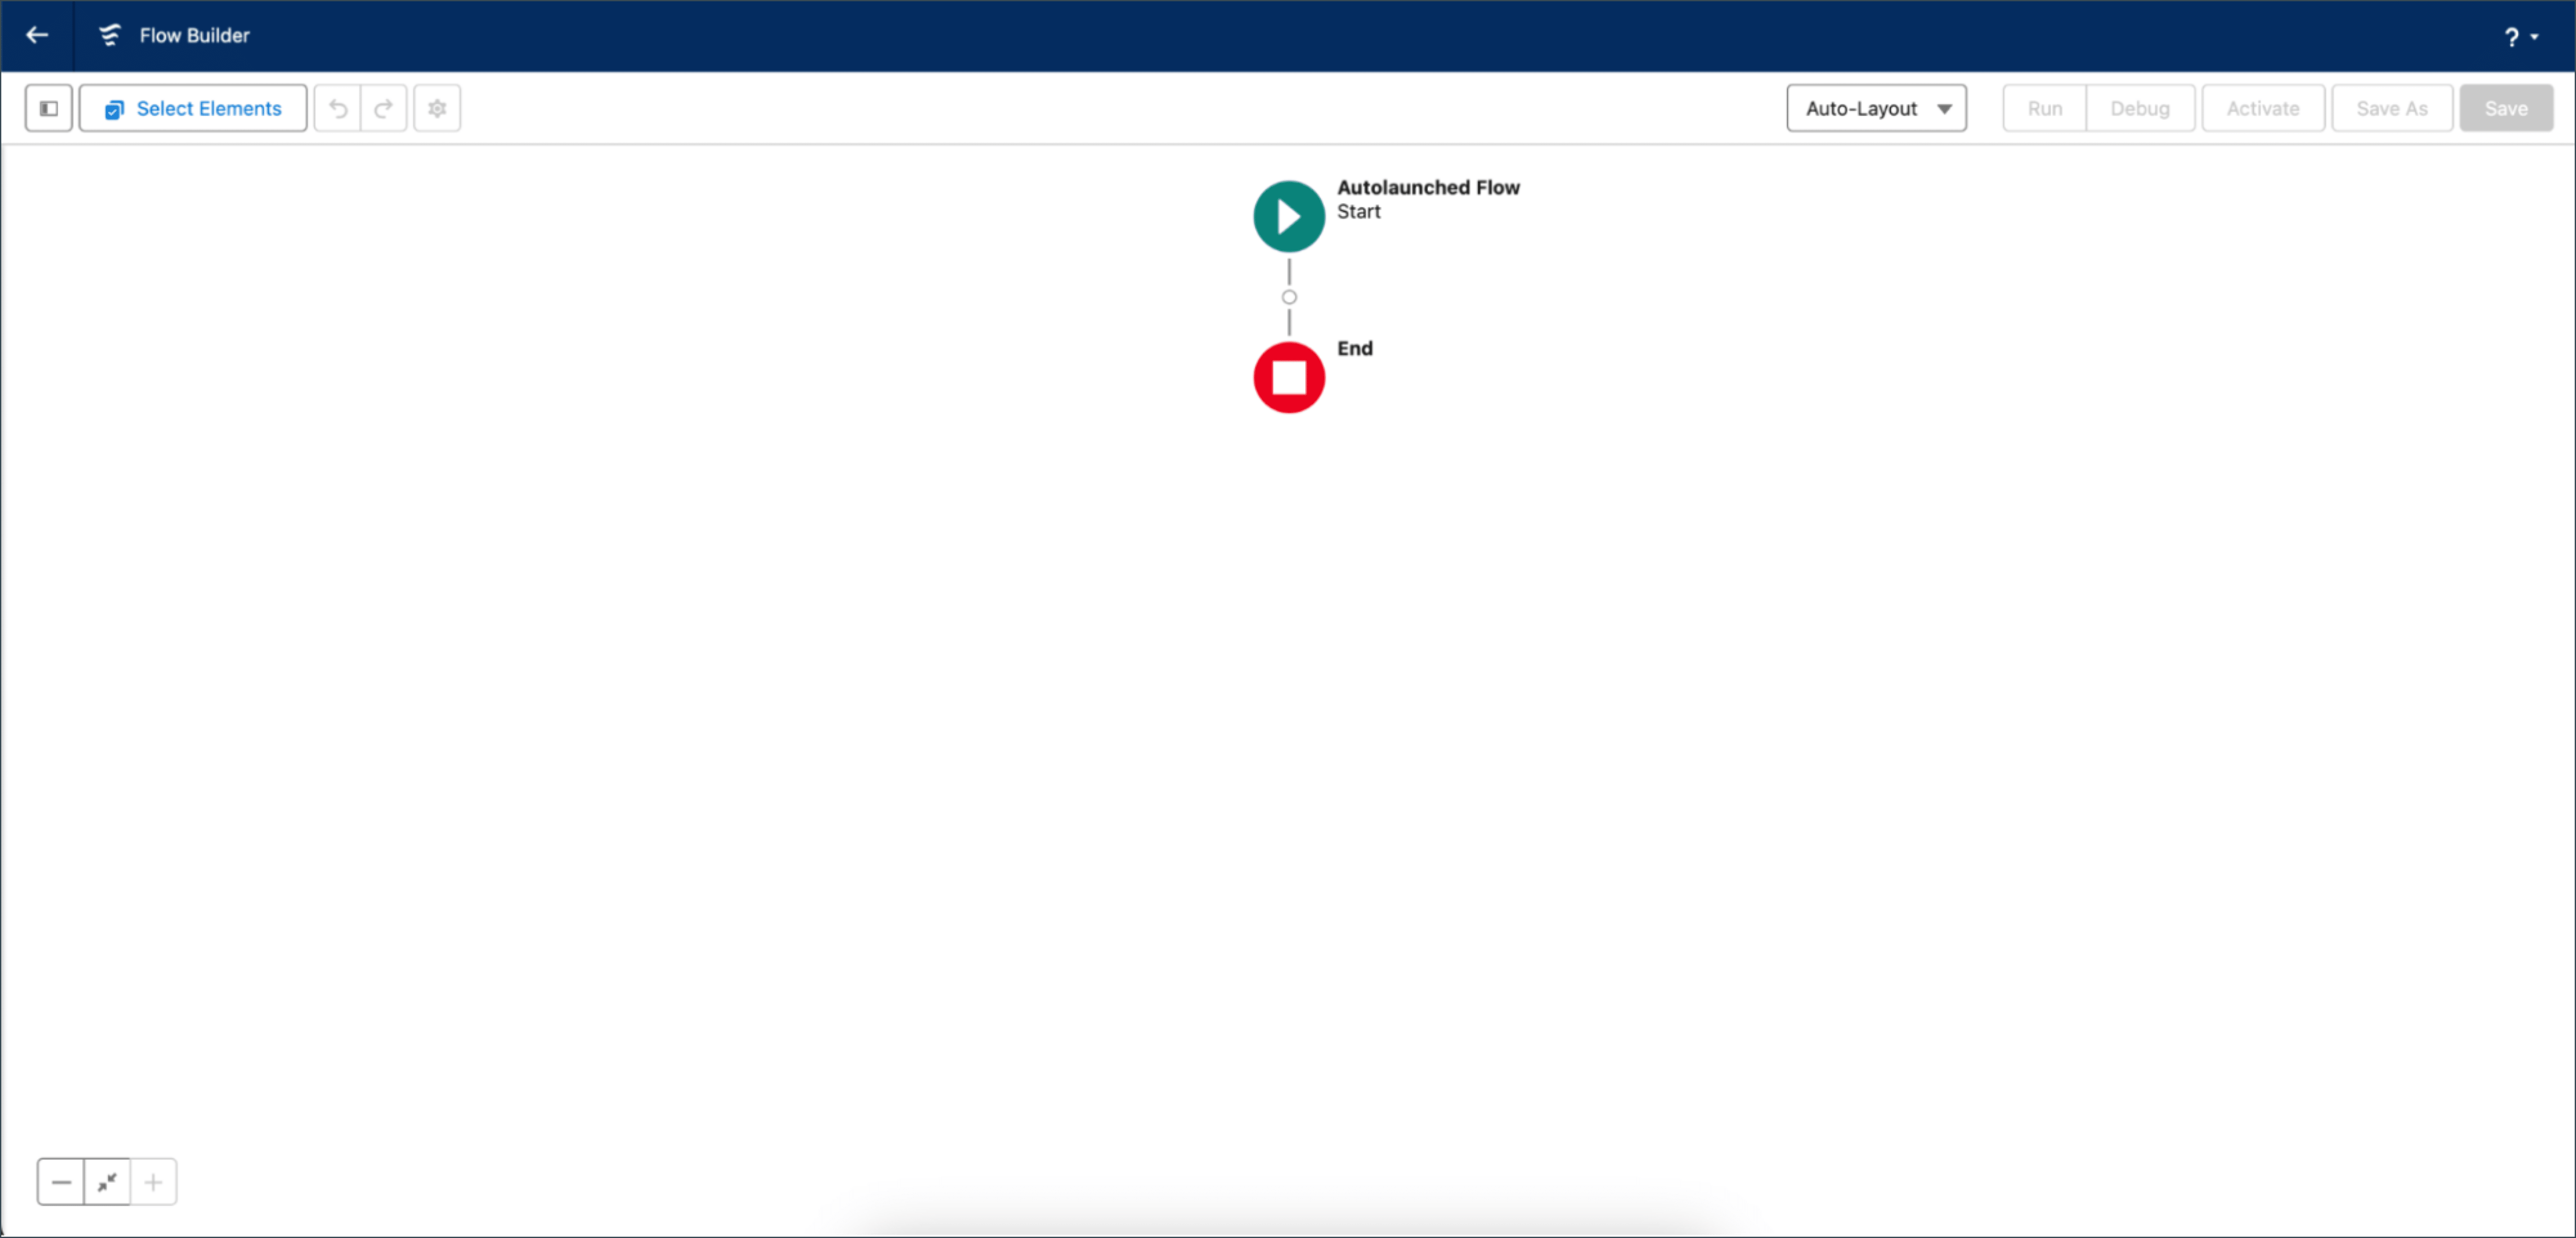
You can do this with a flow. First, launch the Flow Builder interface and create an autolaunched flow. Let’s use the example of getting the win rate of an opportunity.
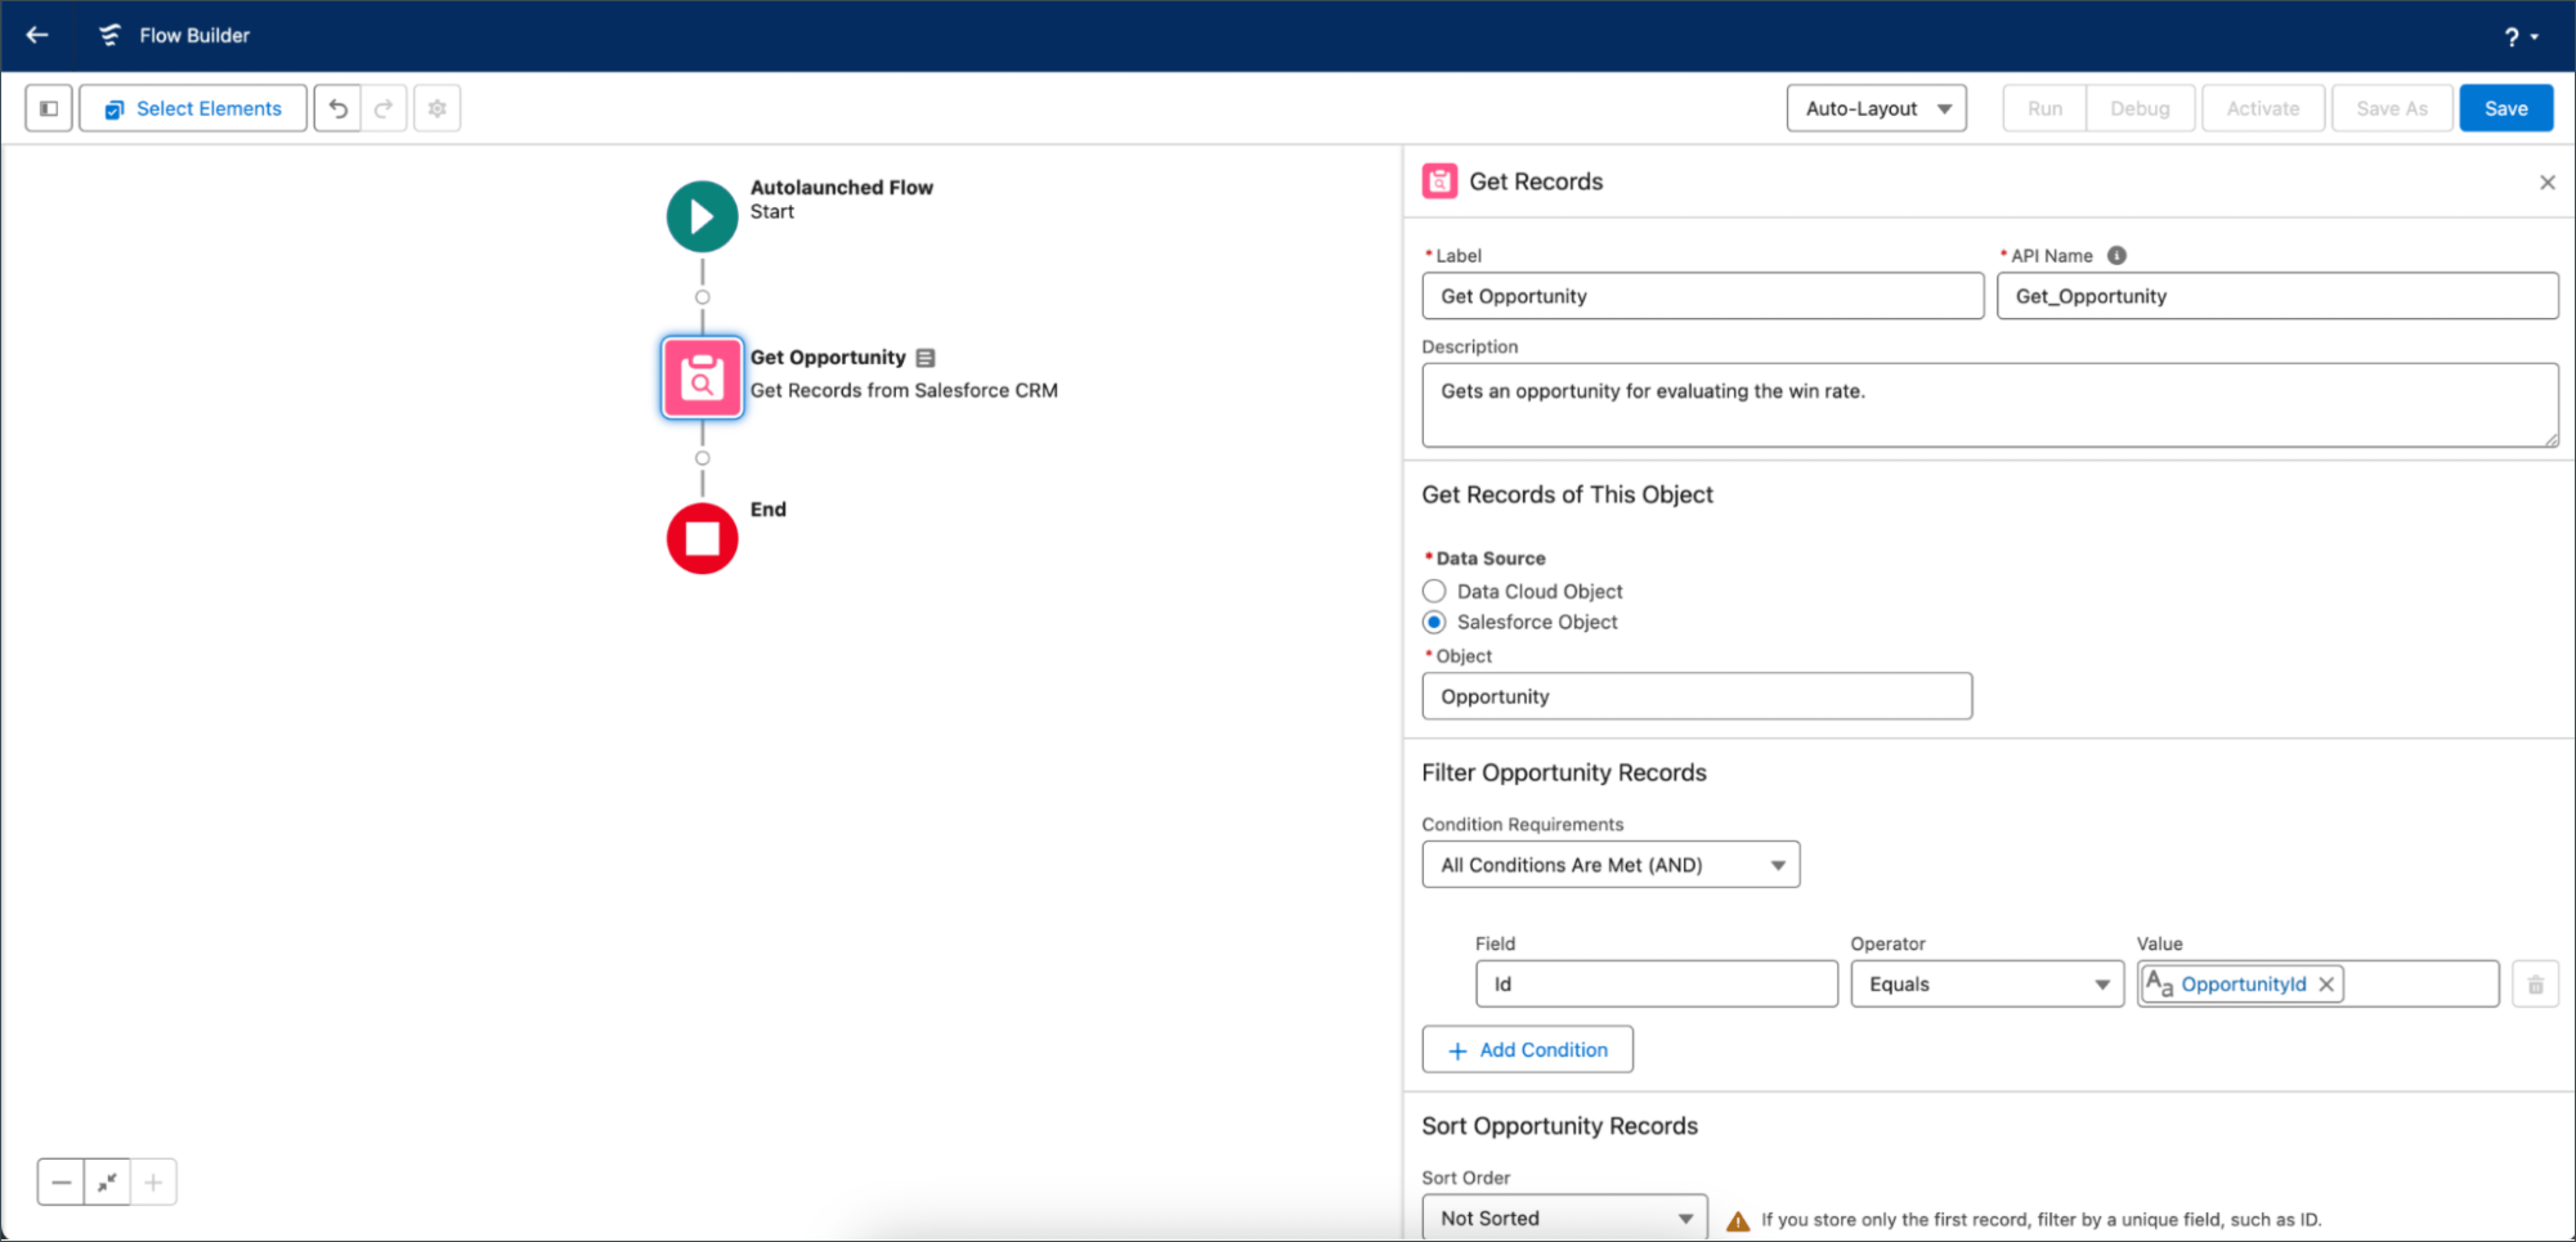
Your first node will be a Get Records element. This node will retrieve what the agent will look at to provide a prediction. For example, if you want the agent to provide the likelihood of winning an opportunity, you want this Get Records element to get an opportunity record. Make sure to describe what the input is.
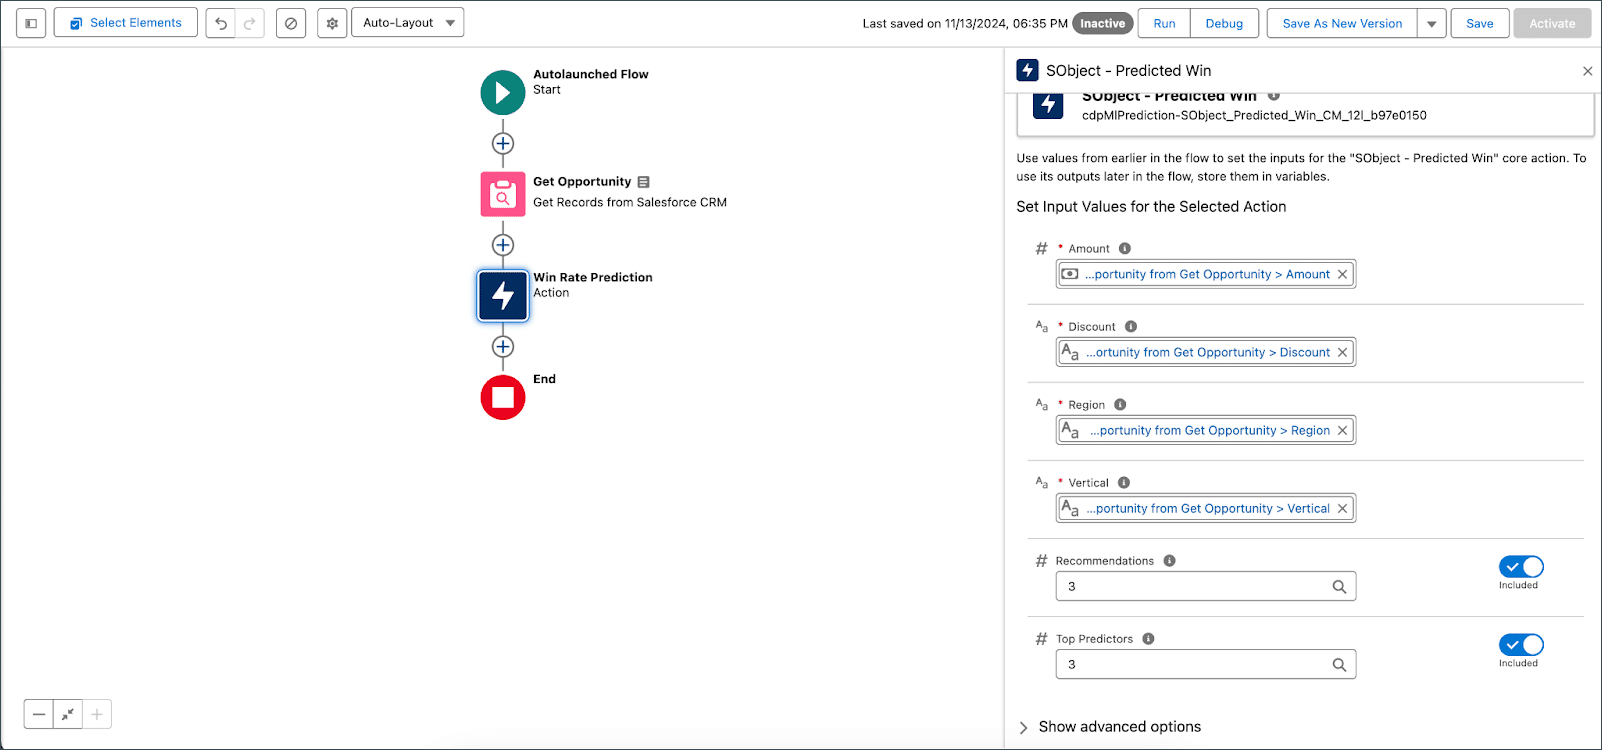
Your second node will be a Data Cloud action. From Action, choose Data Cloud Action, then look for the name of the predictive model you created. After selecting that model, make sure you map the model inputs to fields on the record from the first node. This is very important because you want the model to look at the right fields before making a prediction.
You also have the opportunity to enable top factors and top improvements. You can enter any value from 0 to 3 for the number of top factors and improvements you want to receive.
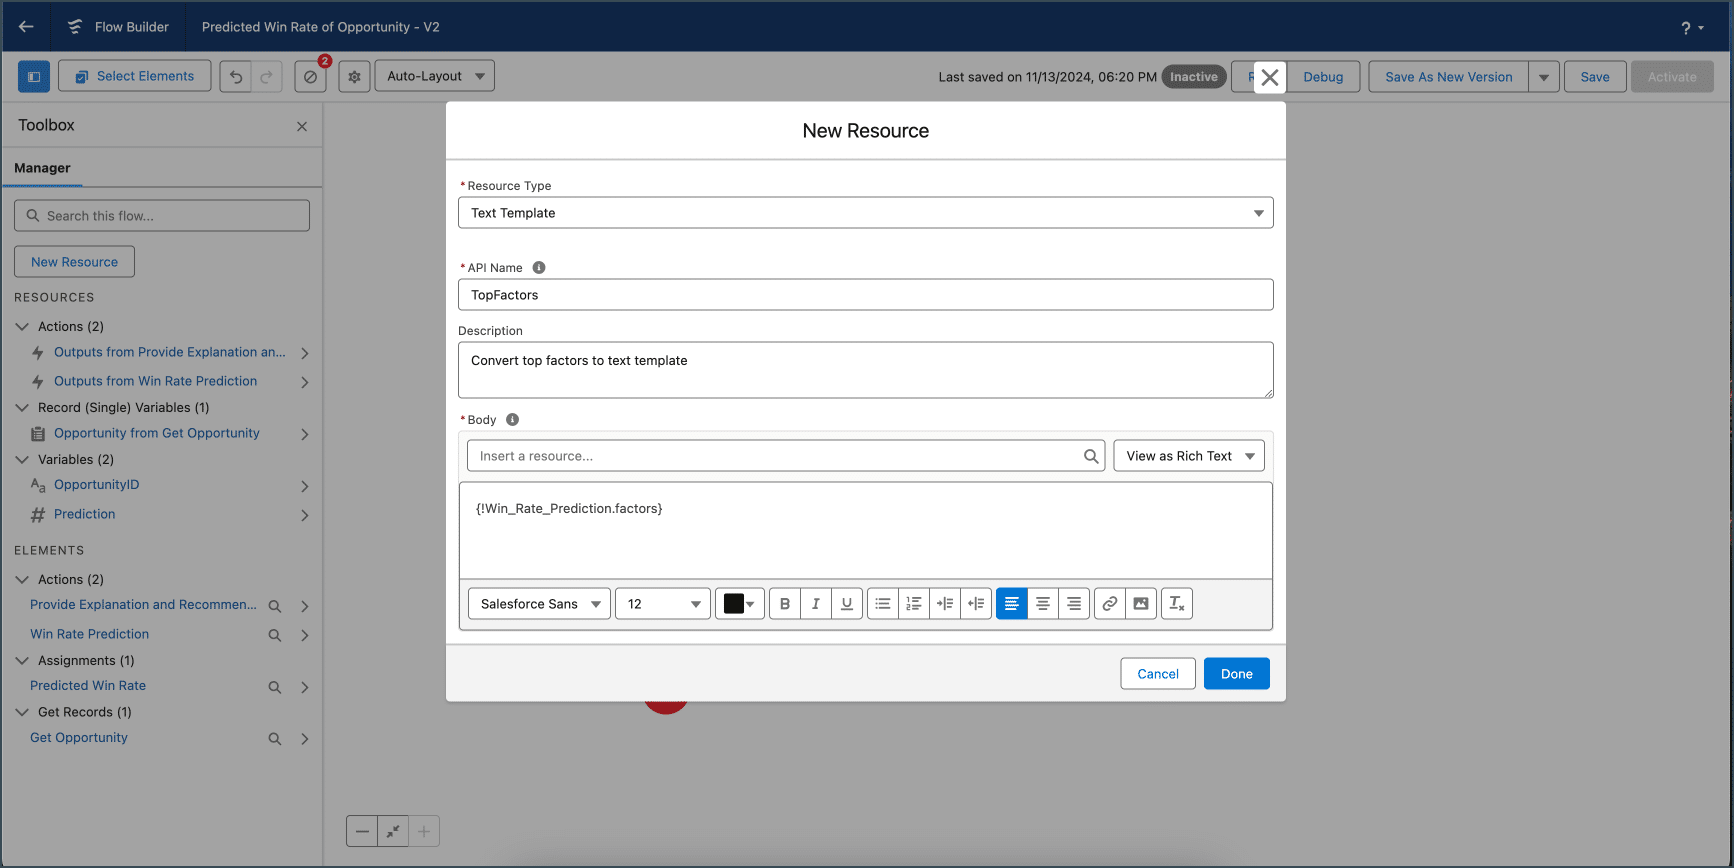
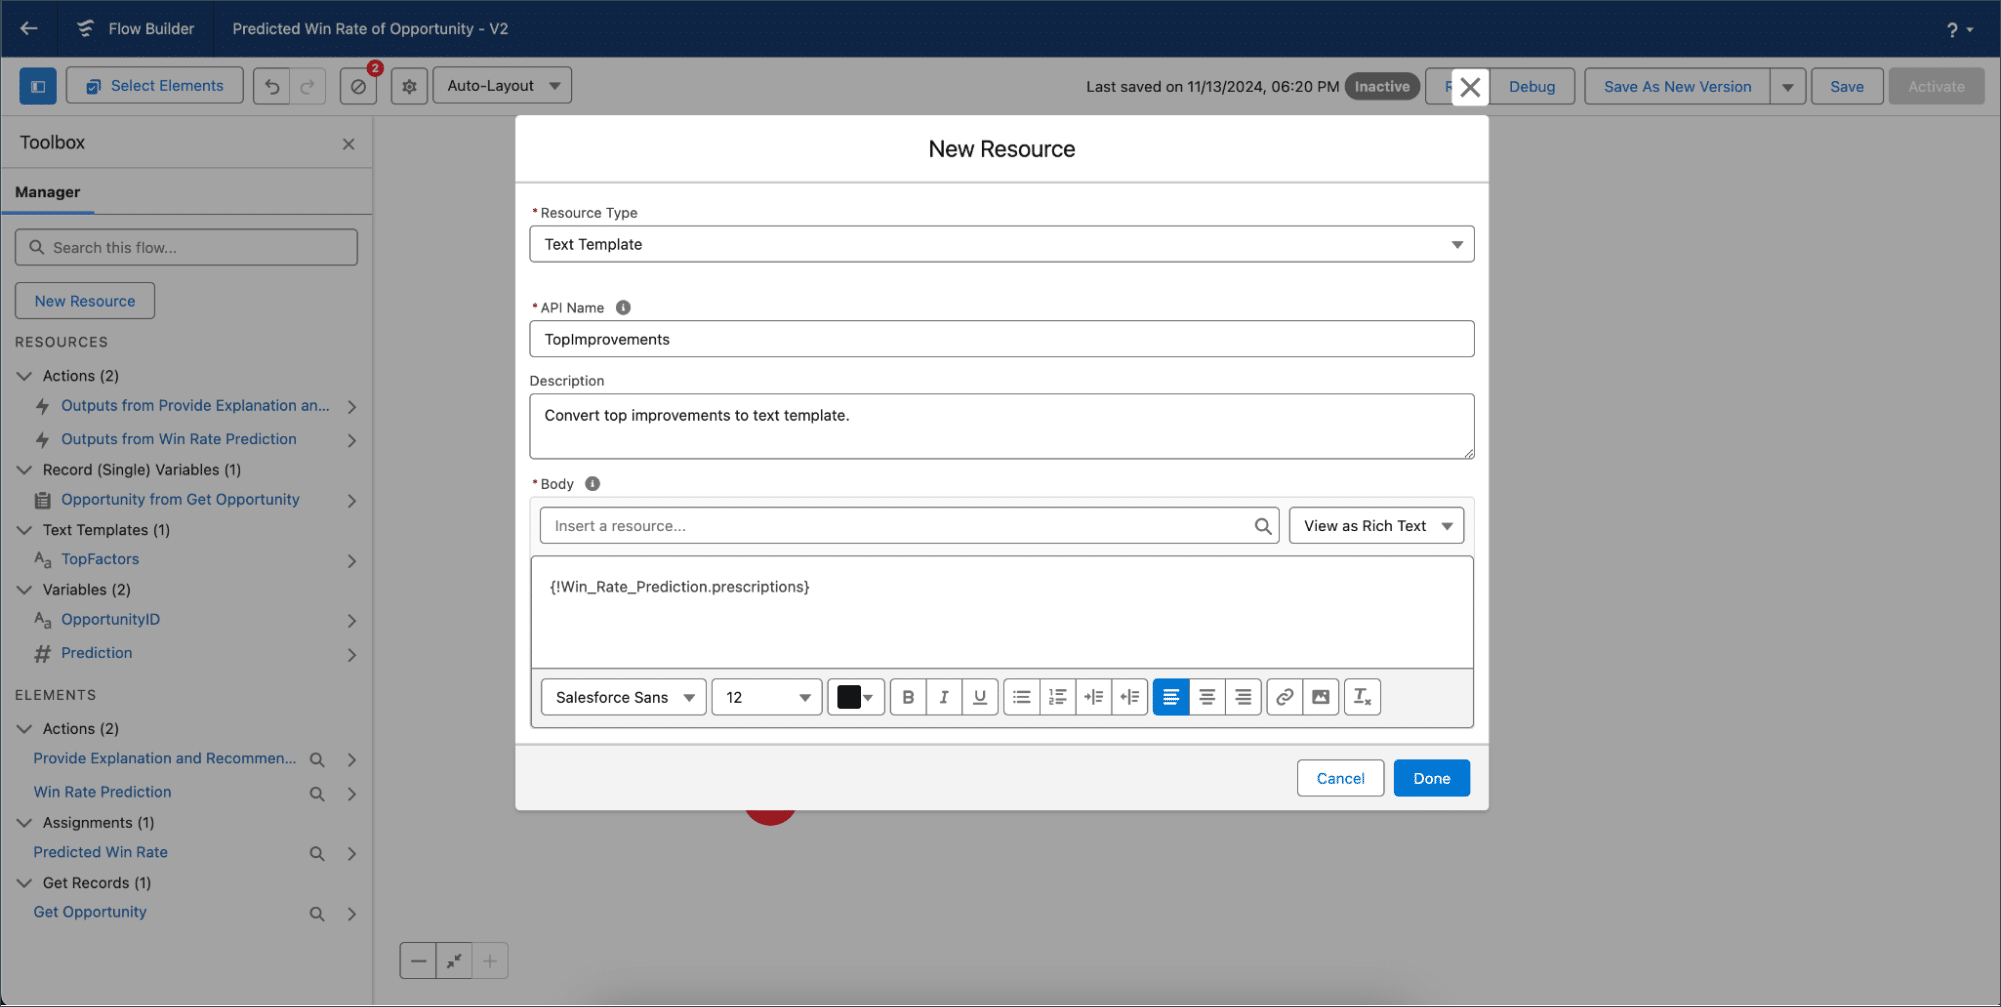
We want to add our prompt node next to process the outputs from our second node into natural language. Remember how the prompt takes in free text inputs and how our top factors/improvements are JSON–to make top factors/improvements understandable to the prompt, navigate to the resource section on the top left and create two new text templates.
Add the top factors output from the previous node to one text template and save.
Add top improvements to the other text template and save.
Now you are ready for your third node, which will be our prompt template. Add an Action node and select your prompt.
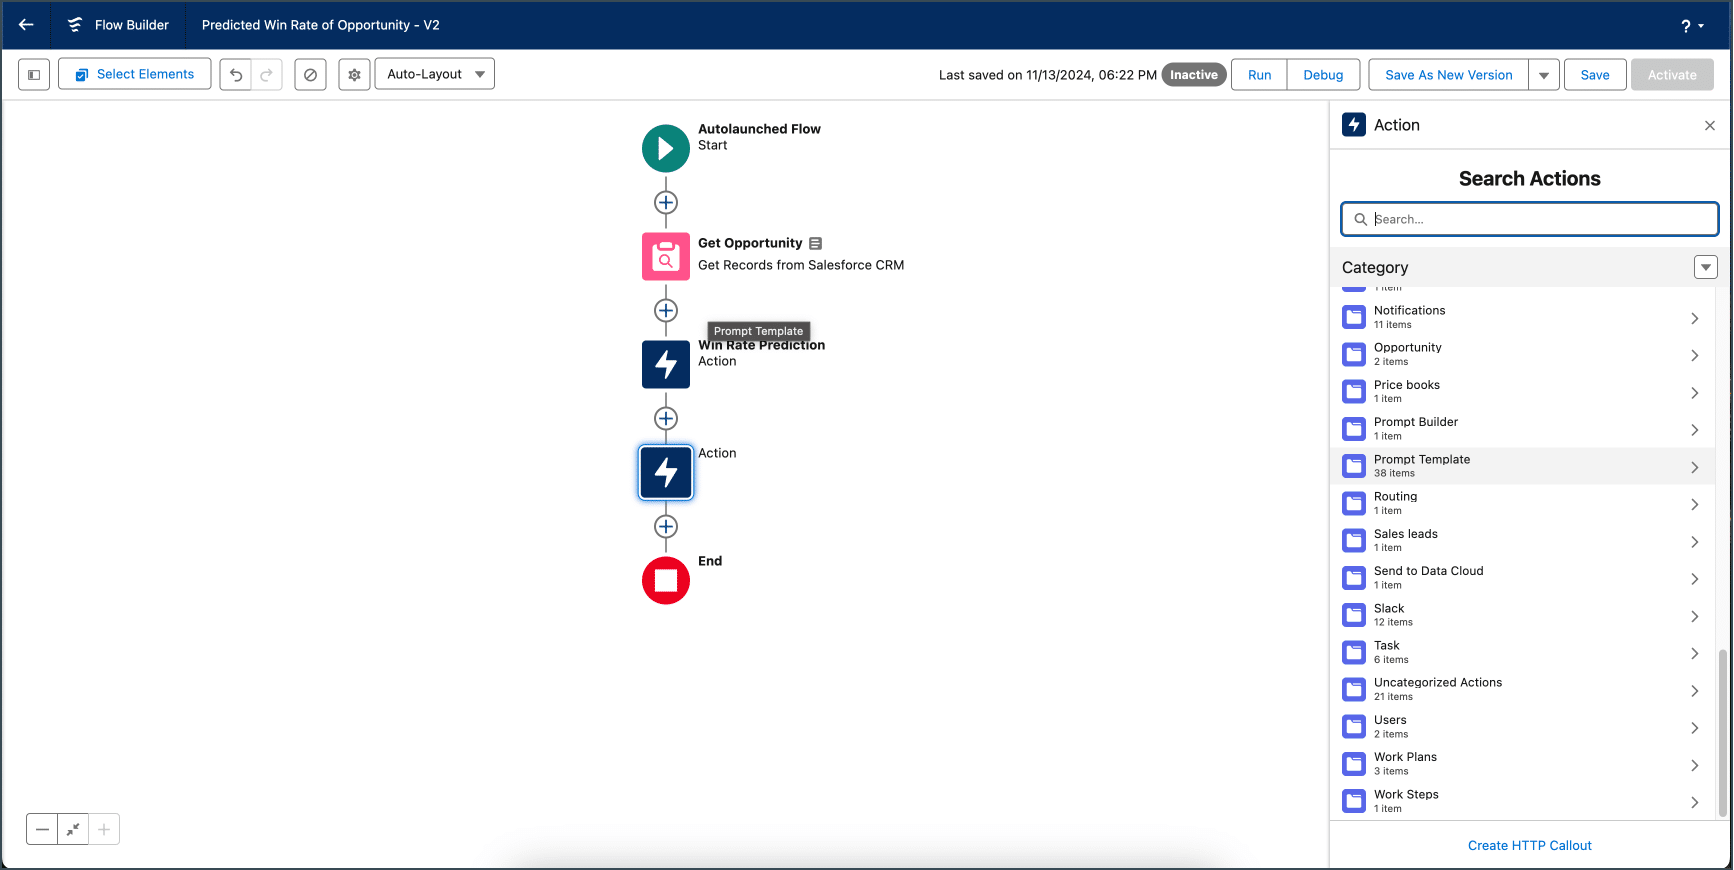
And add in your prompt template inputs. Again, depending on how you configured your prompt template, this step may look slightly different.
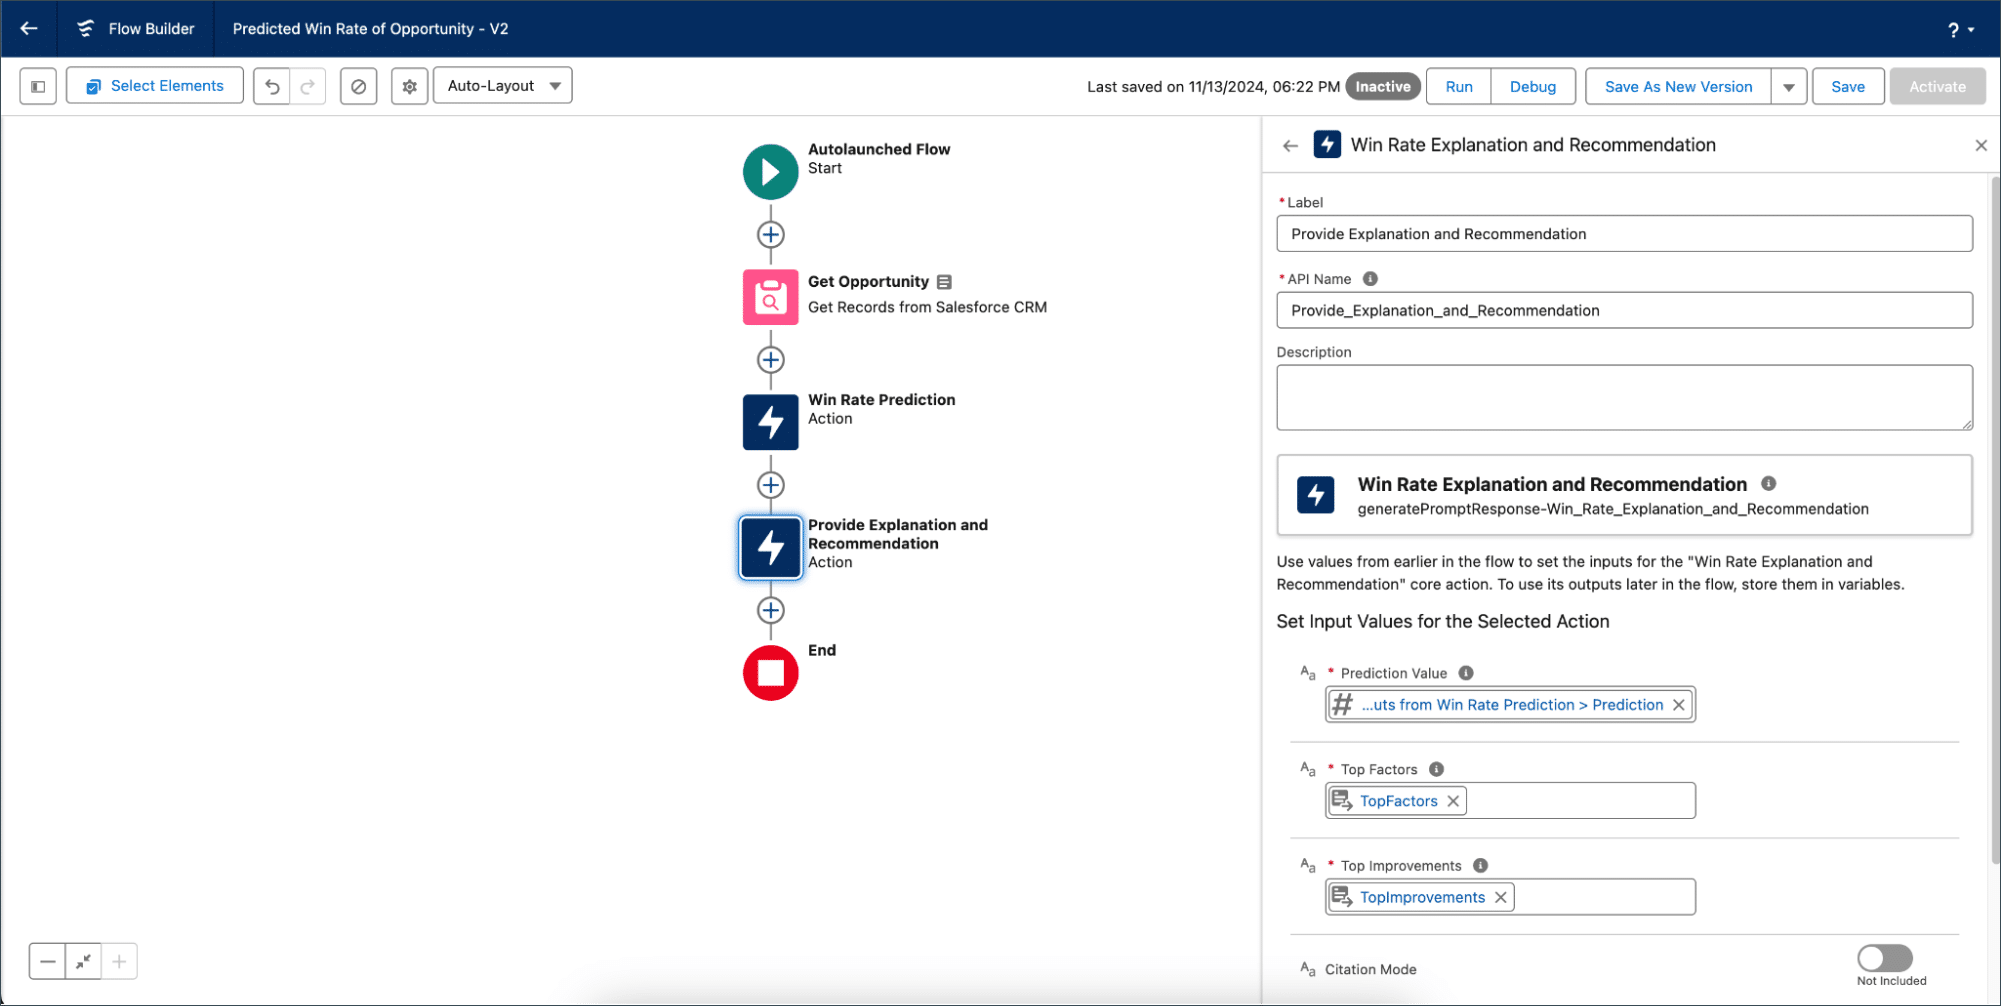
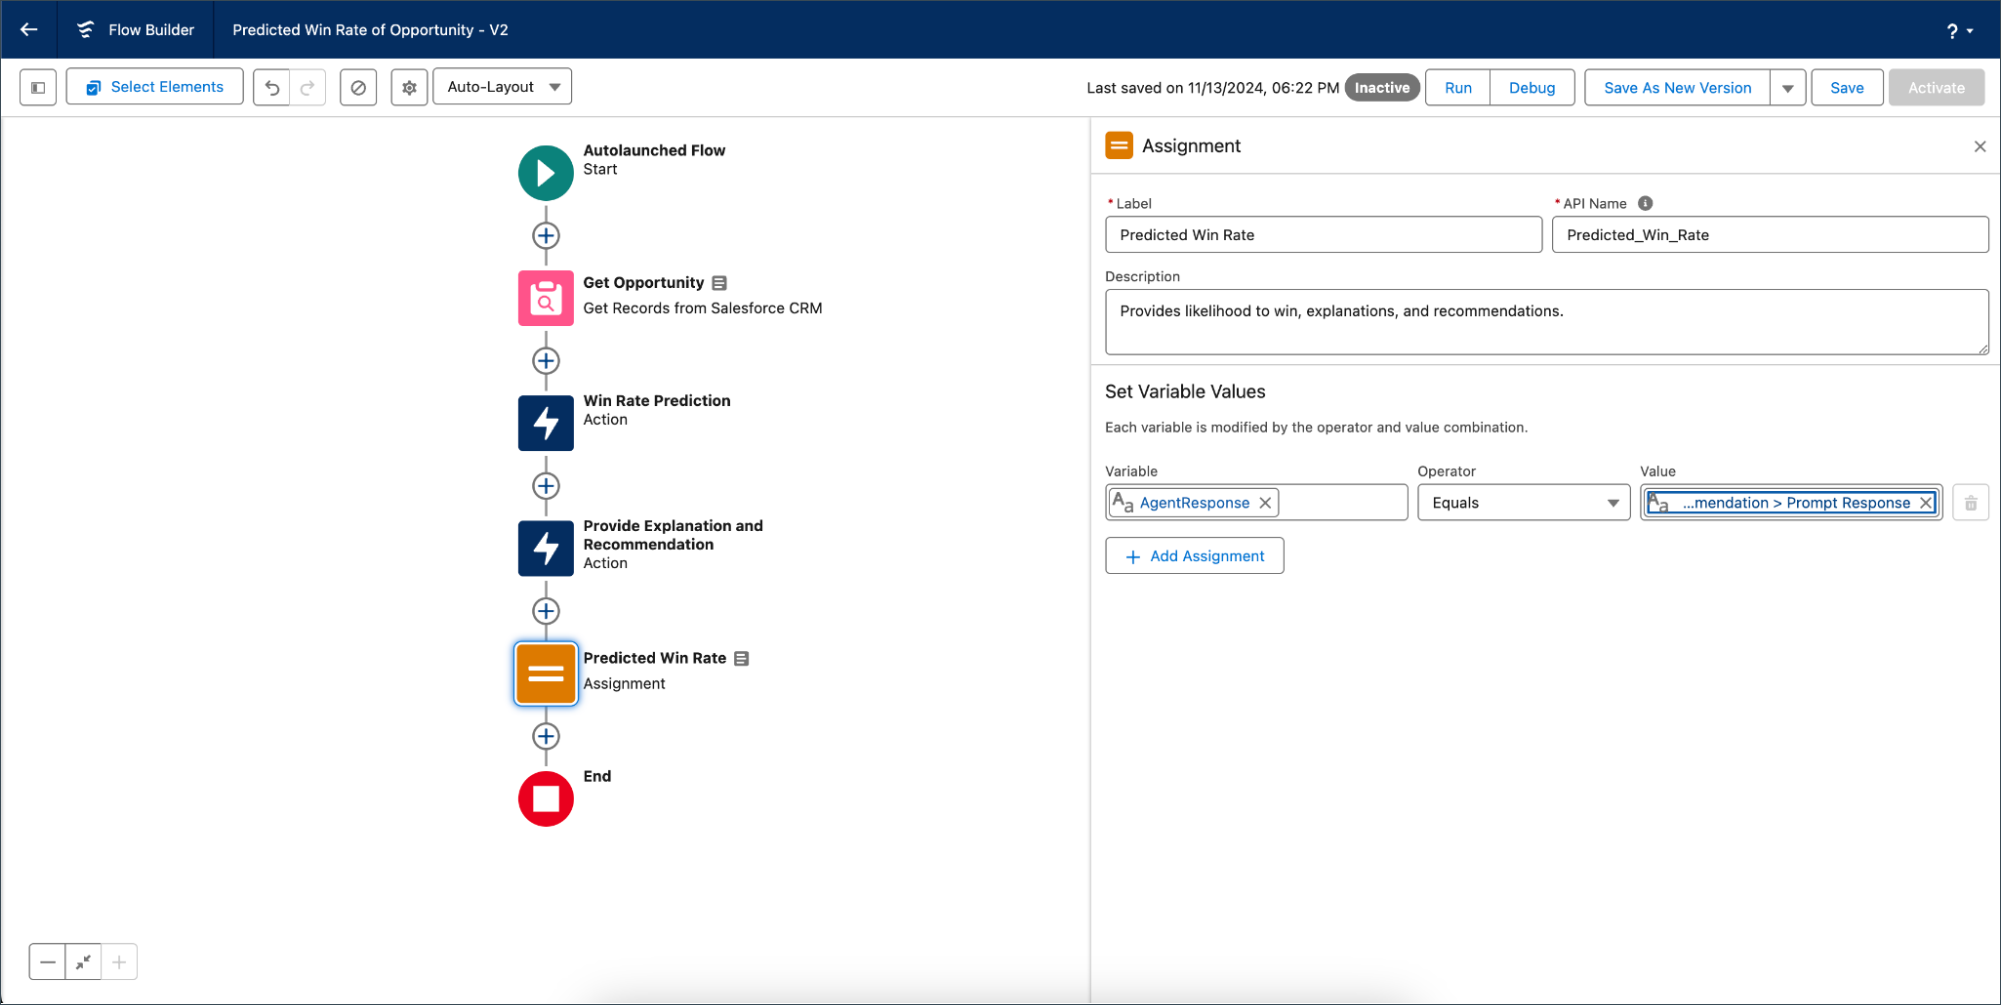
You are now ready for your last node, an Assignment element, where you assign the output of the previous node to the overall flow output. Make sure to describe what the output is.
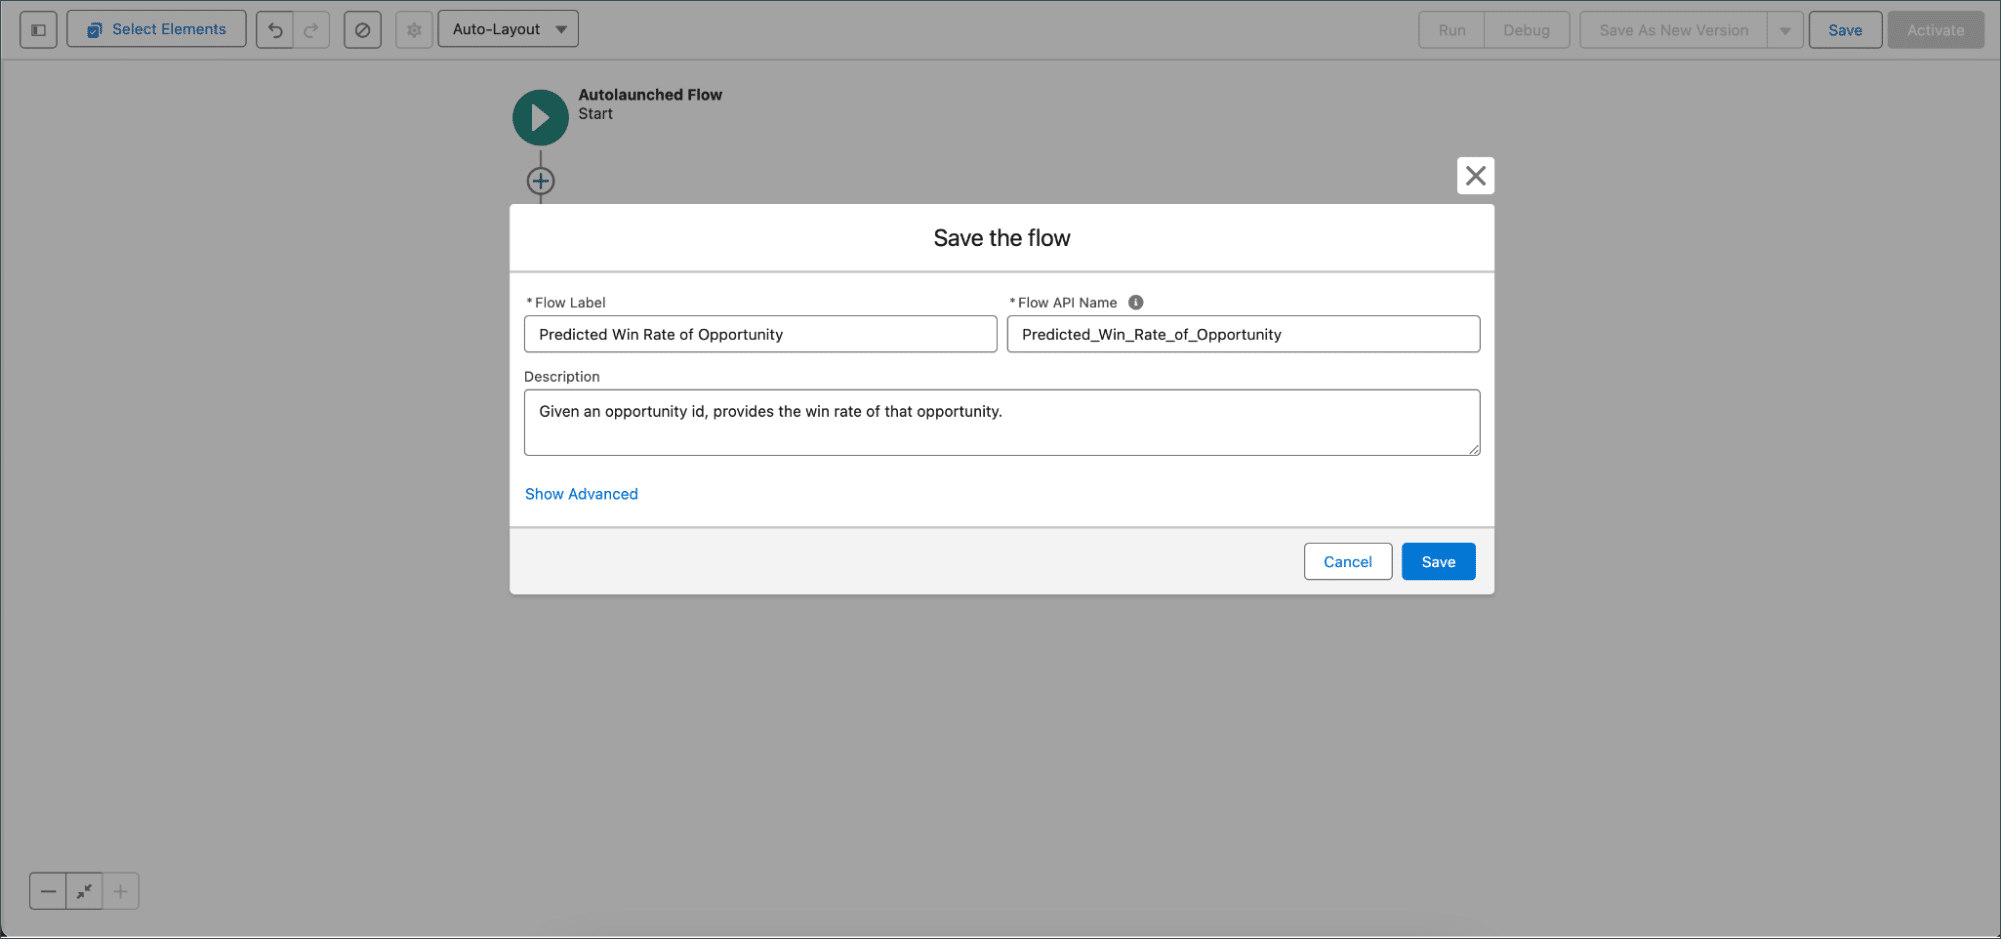
Lastly, click Save and give your flow a description. In four nodes, you’ve set up your invocable action.
Create an Agentforce custom action
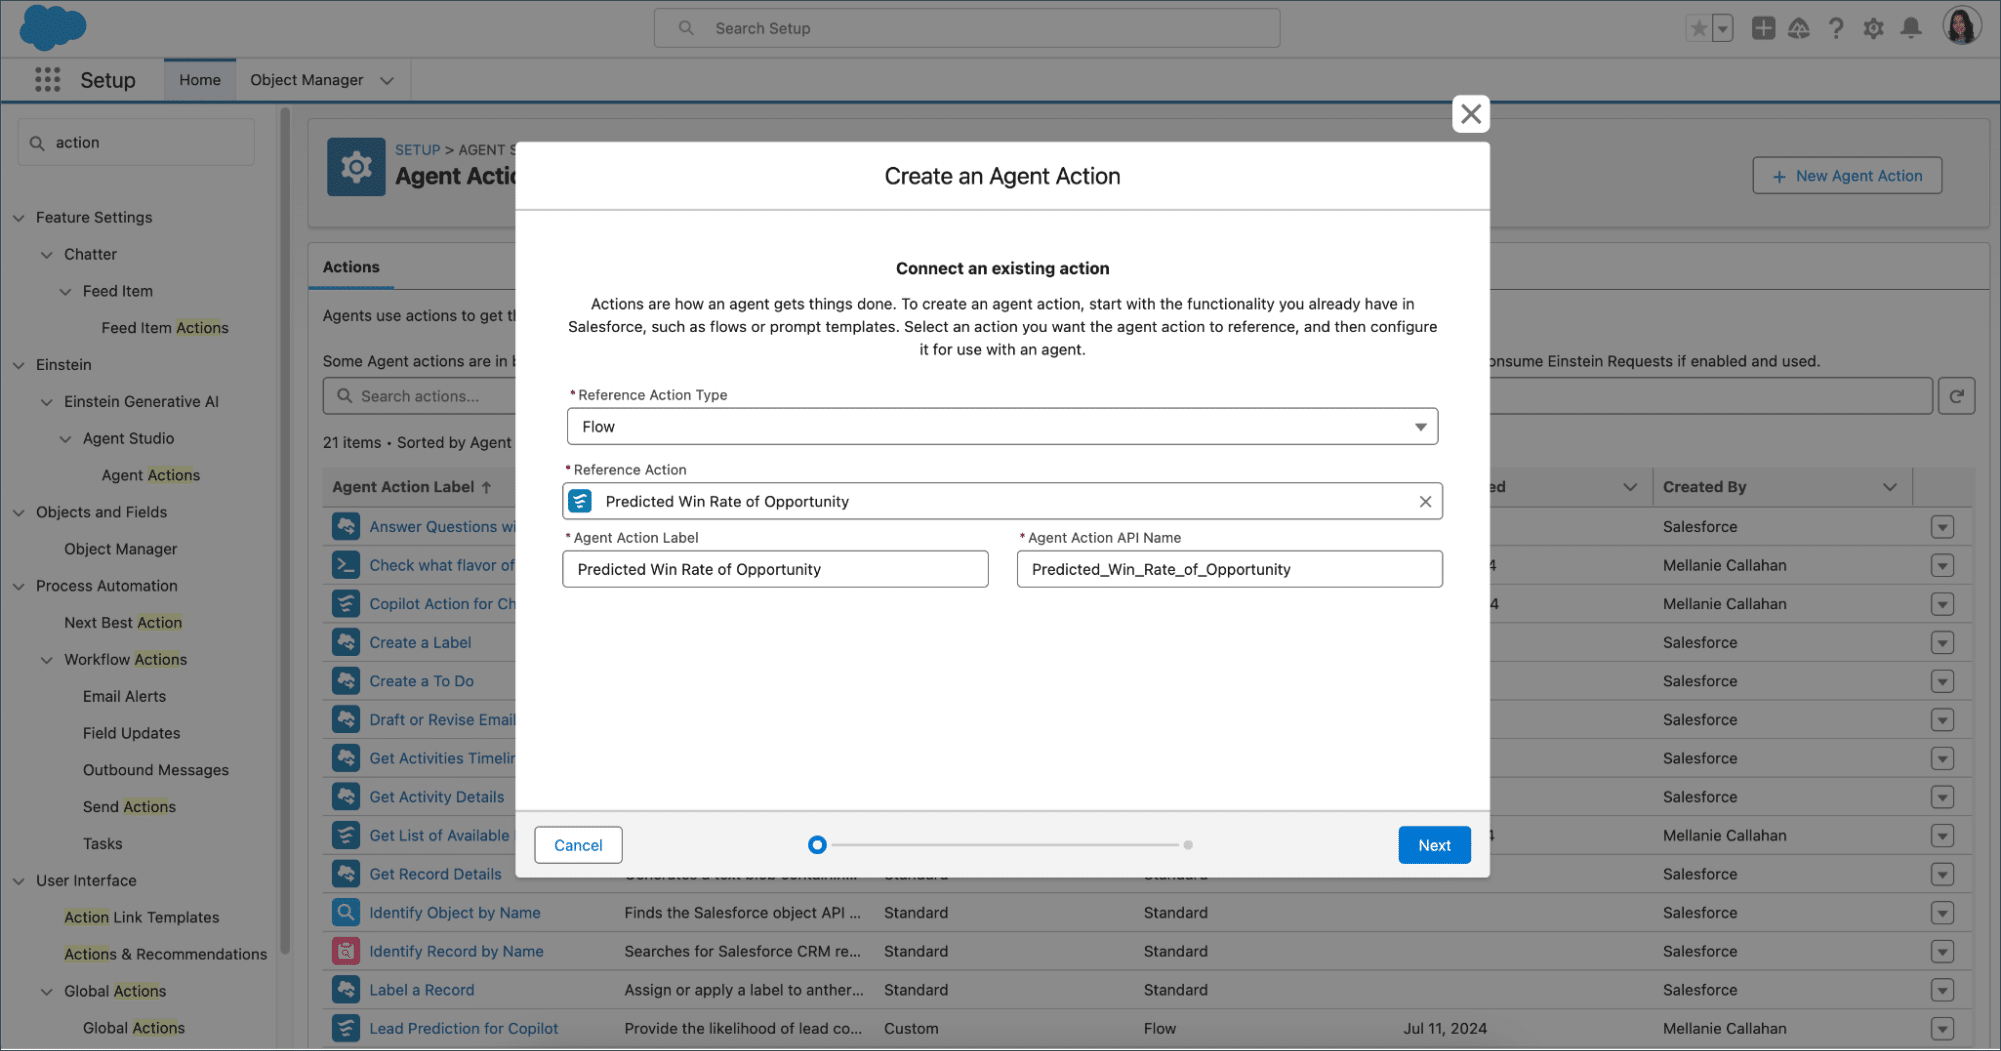
This is the last step. Go to Setup and search for “Agent Copilot Actions”. From there, create a new action.
Choose Flow as your Reference Action Type and select the name of the flow you just created.
If you populated descriptions for your flow, you’ll notice that it auto-populates your action descriptions as well, saving you extra steps. If you haven’t populated them, it’s time to populate your action descriptions here. Make sure to require input and check show in conversation for your output.

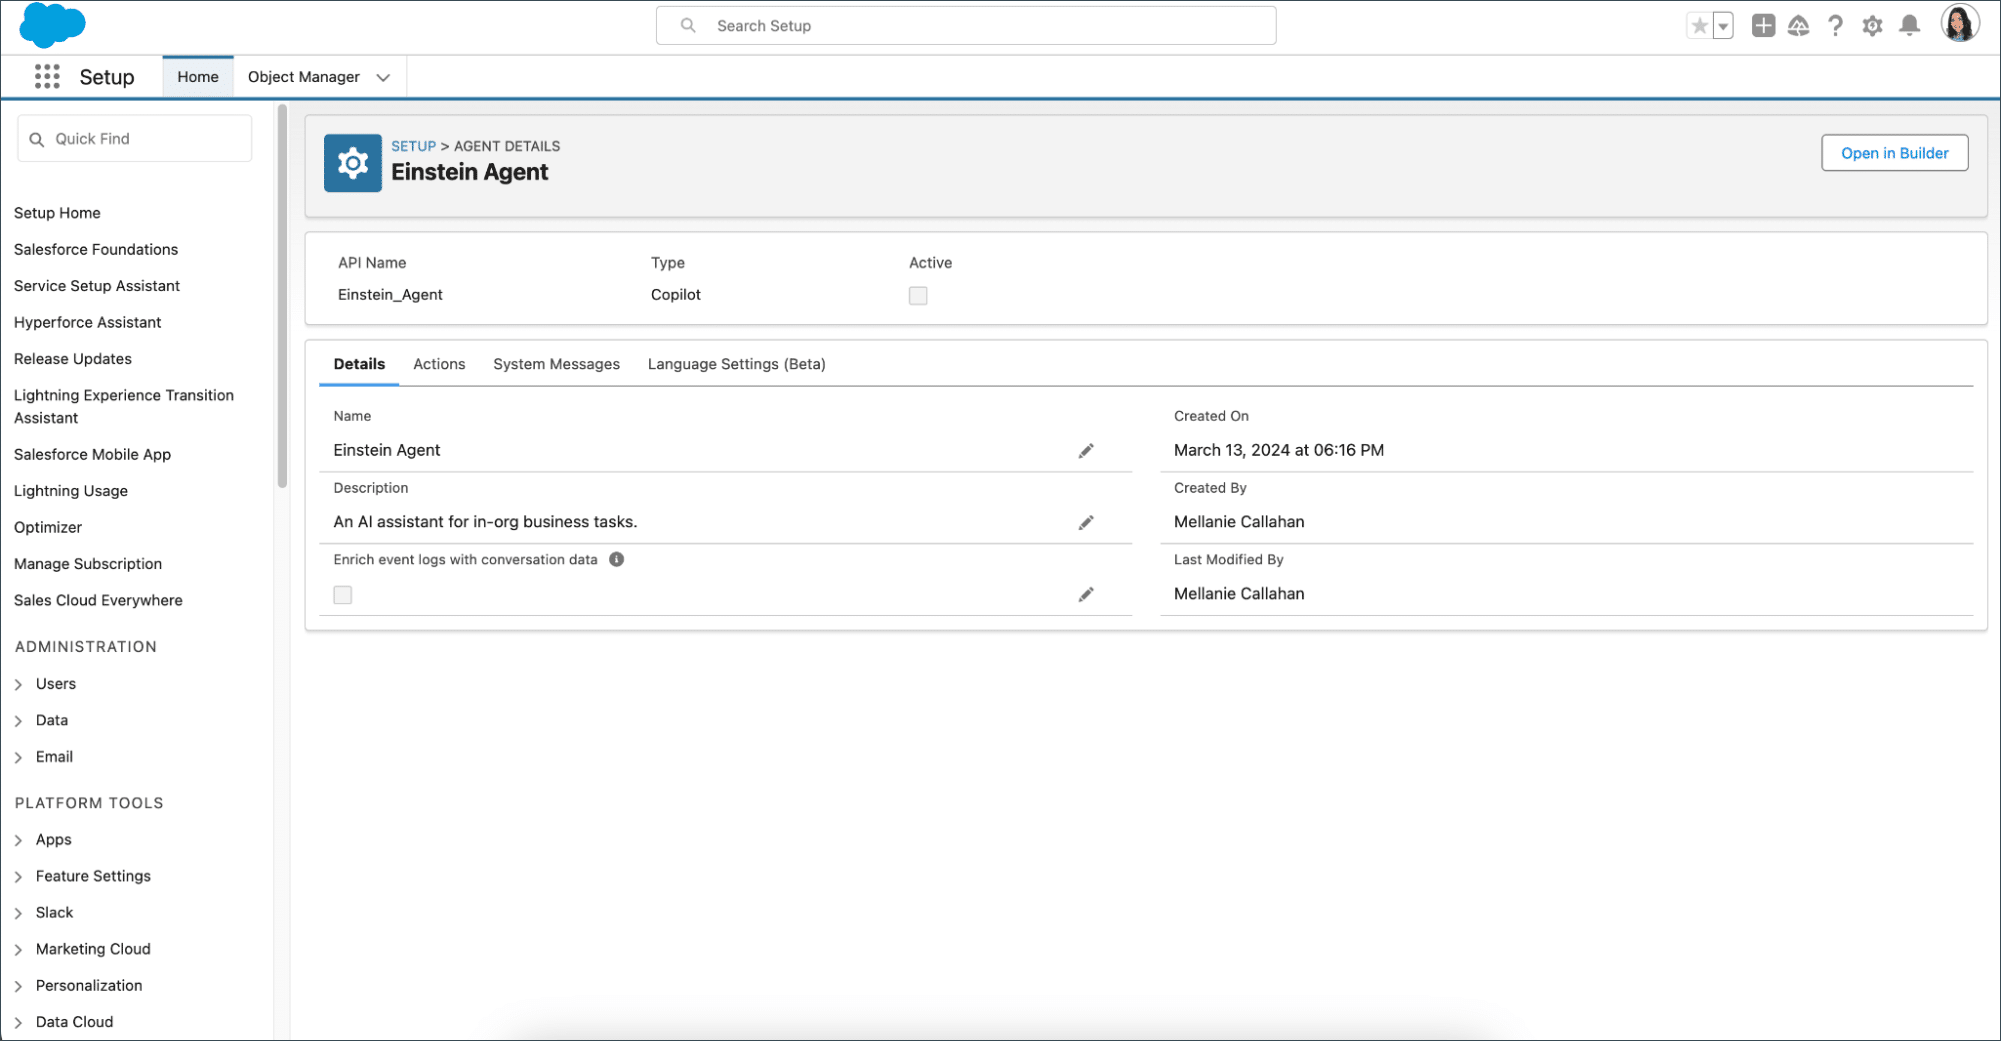
Then, navigate to Agents in Setup. Select the agent you want to assign this action to, then click Open in Builder.
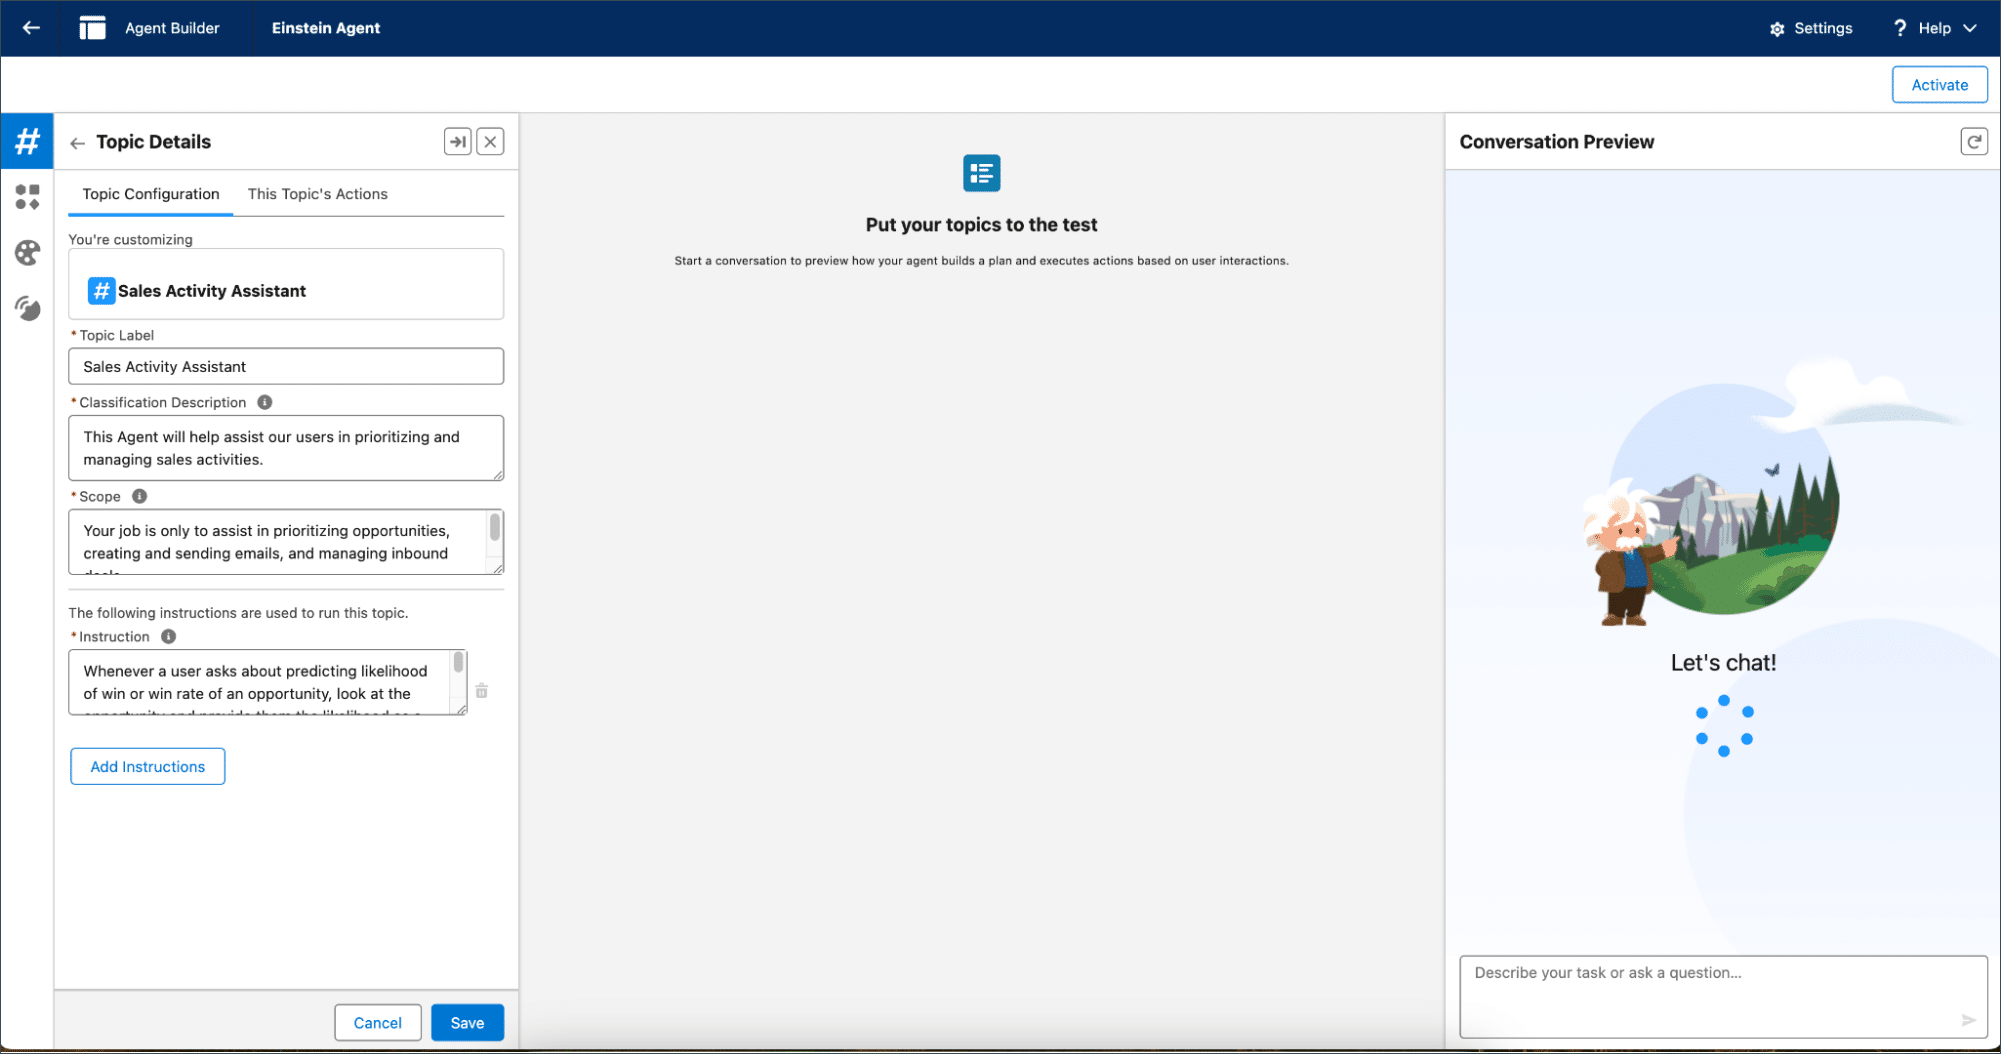
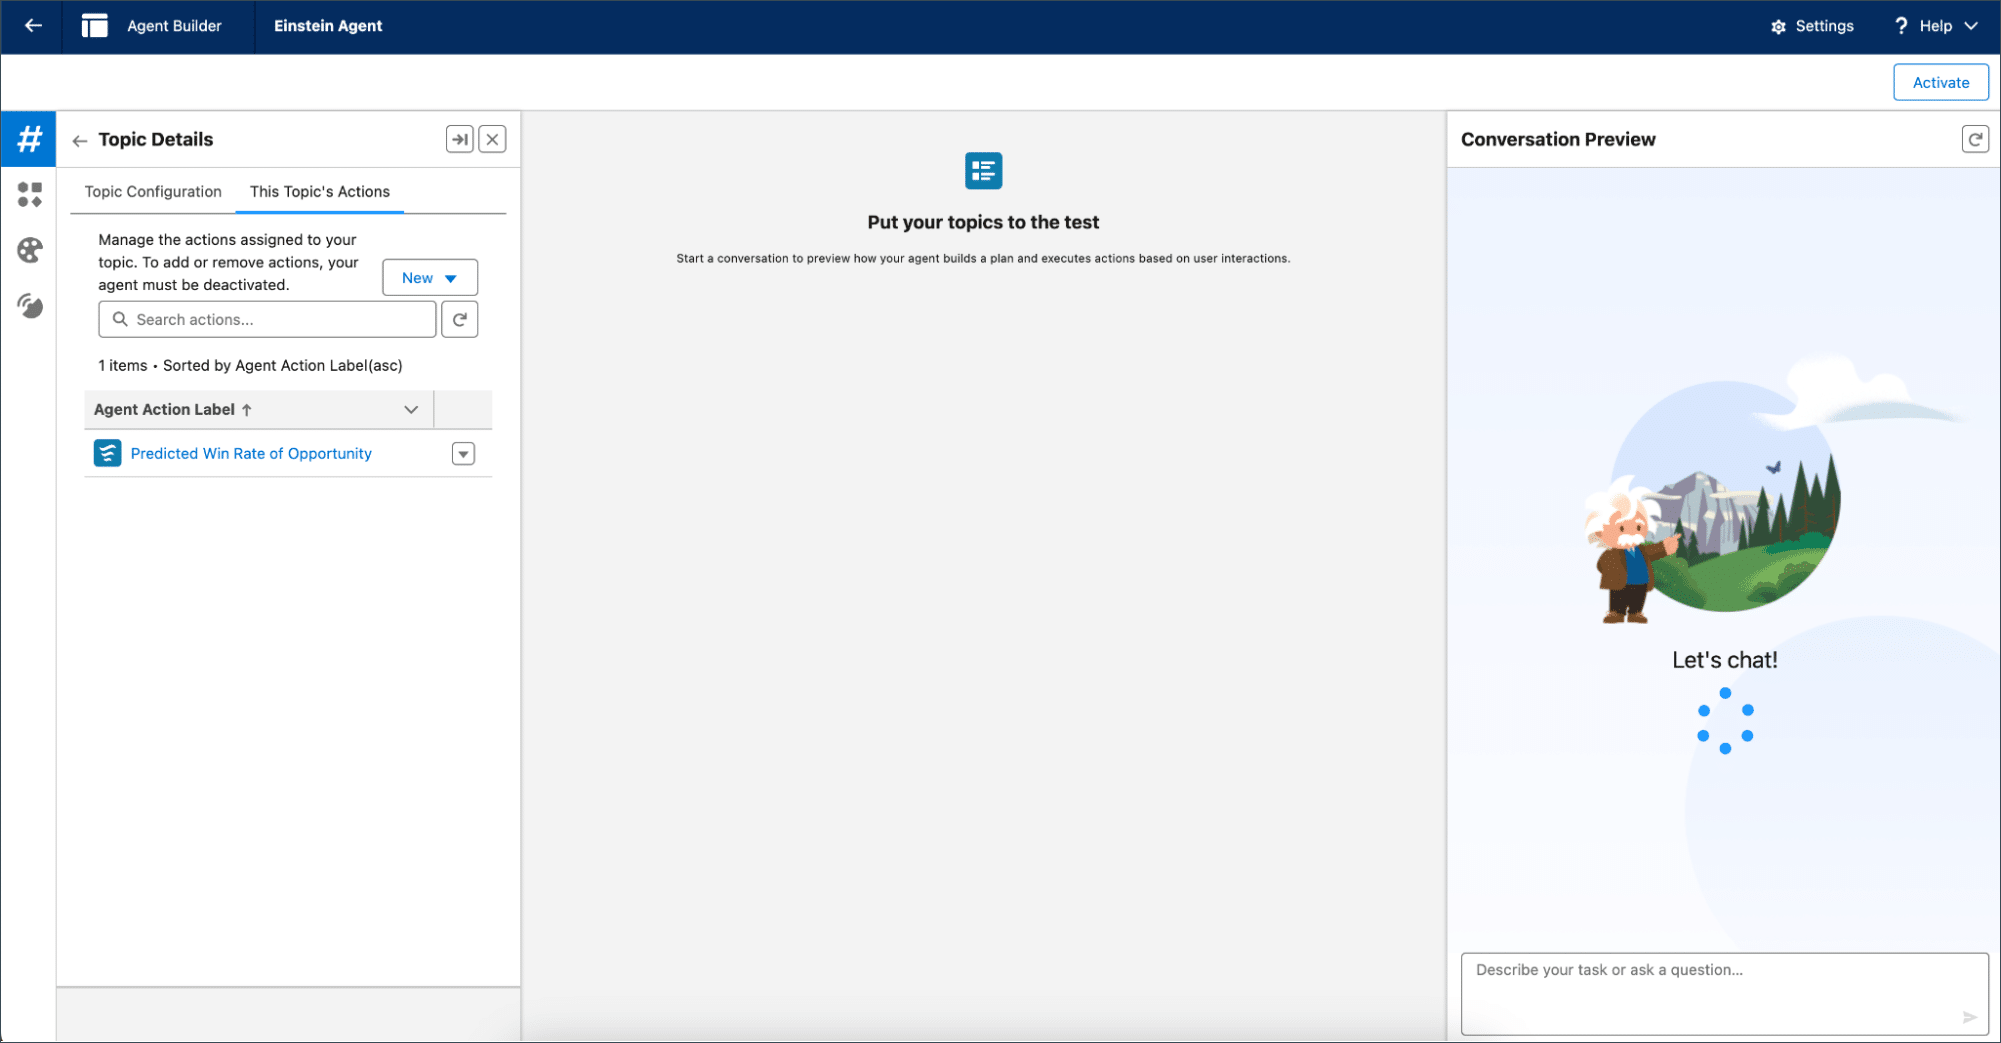
Once you are in Builder, select an existing Topic or create a new Topic you want to add this action to. Make sure to update the instructions of the topic to include this action, then click on This Topic’s Actions.
From there, click New and Add from Asset Library, then scroll to select your action. You’ll also see the other OOTB or custom actions you have available.
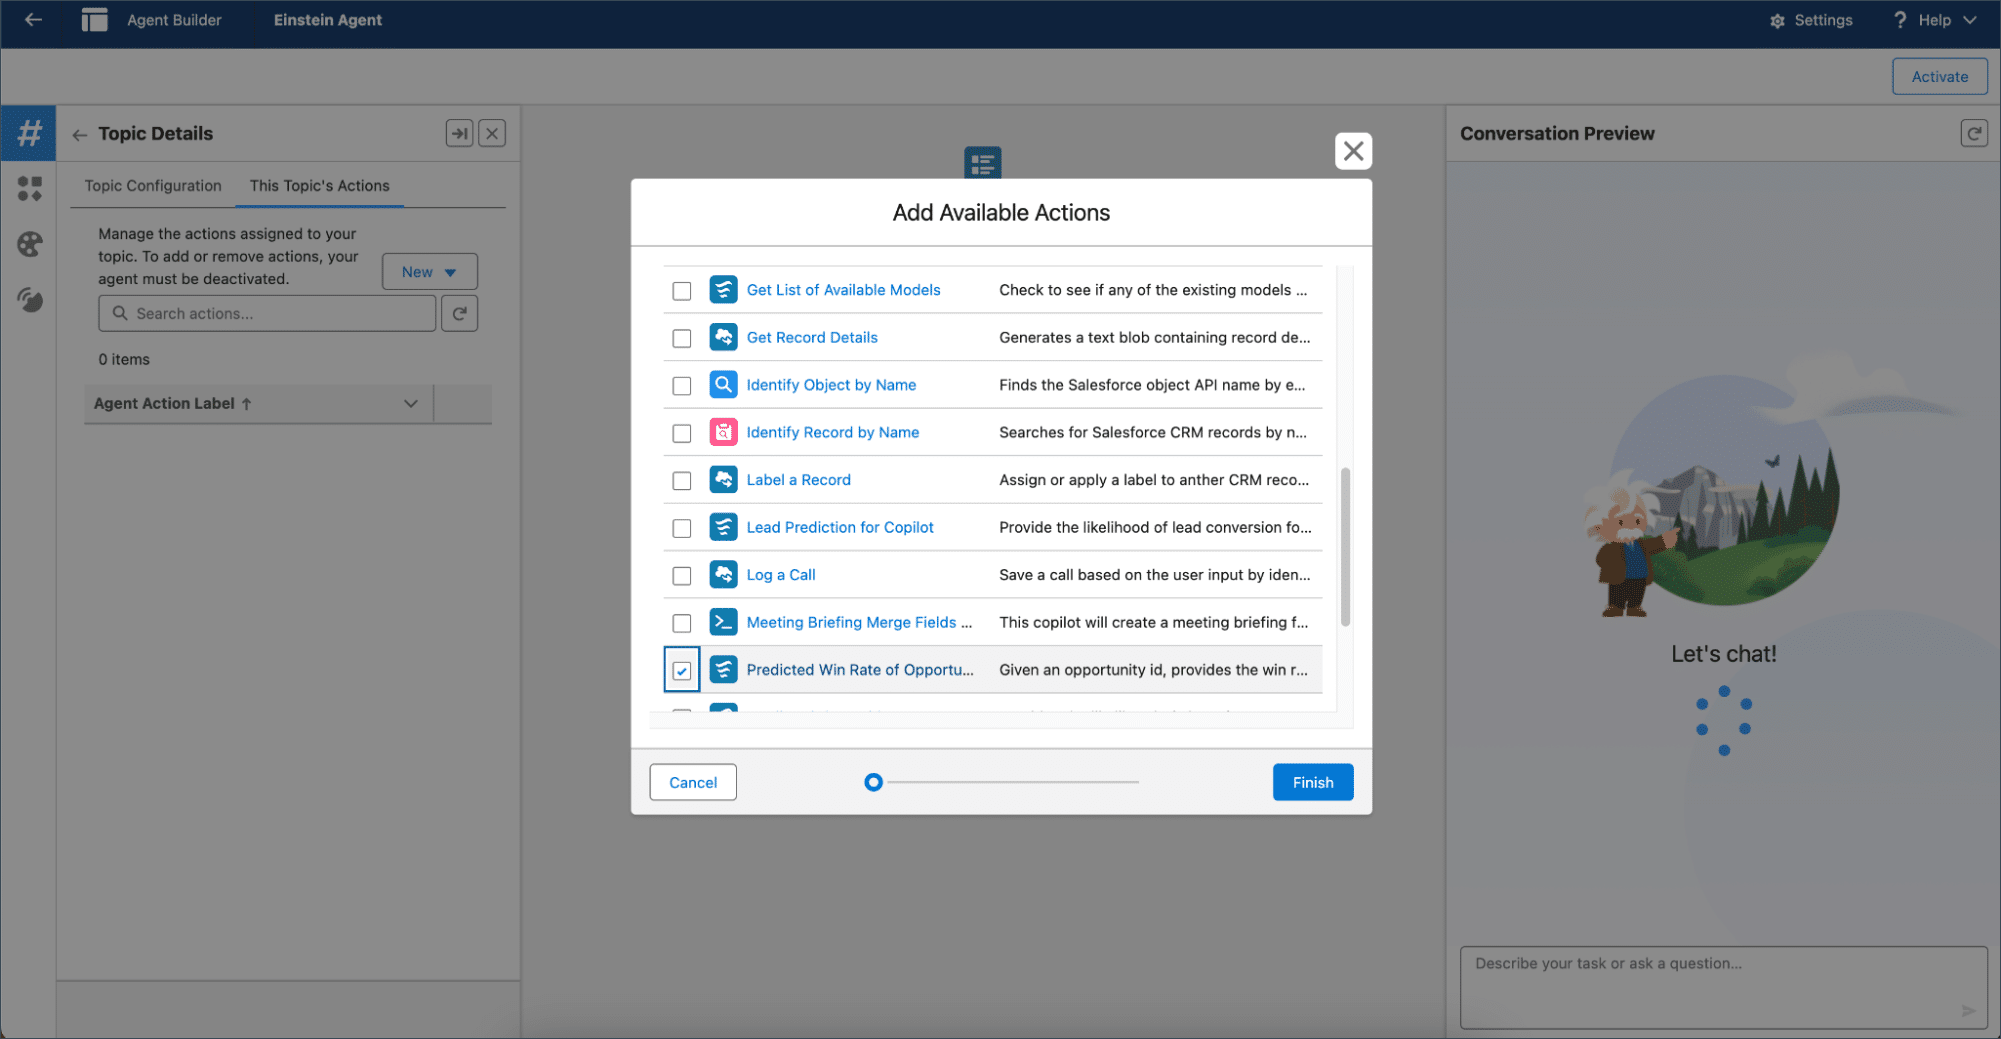
Click Finish, and you are now ready to test your action and activate your agent.
Now, your agent can provide real-time, in-context insights to you and your users.
Explore the extended possibilities
We just covered one use case today, but with all our platform tools, there are infinite possibilities for leveraging Agentforce! The more invocable actions you create, the more custom actions you can create, and the more robust your agent can be.
What will you do with Agentforce? We can’t wait to see!
Resources