Tune into the Lightning Experience Pro Tip blog series to learn about setting up Lightning Experience and how to avoid common gotchas along the way.
In the first post in this series, we looked at configuring the activity timeline in Lightning Experience to include the information needed by your sales team. Now let’s make sure that your users are set up to work effectively on their activities. You can help everyone feel at home in Lightning Experience by ensuring that the activity actions they use in Salesforce Classic are readily available. Even better, give the team a productivity boost with custom actions tailored to your business needs.
Drive Your Business with Activity Actions
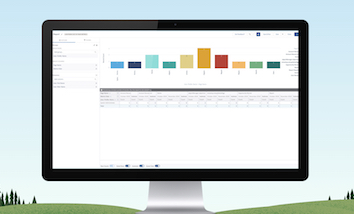
Salesforce includes default activity actions for creating tasks and events, logging calls, and sending email. In Salesforce Classic, users access these actions from the Open Activities and Activity History related lists and in the Chatter publisher on records. In Lightning Experience, it’s easier to keep up on activities because all activity actions are grouped together in a single place—the composer in the activity timeline (1).
Here’s the activity composer for an opportunity, with all the default activity actions (2) front and center.

Composing the Ideal Activity Composer
Let’s look behind the scenes to see how Lightning Experience controls actions in the activity composer and what you can do to customize the actions your users see. It’s time to head to your org’s page layouts in Setup.
Yup, your object’s page layouts determine the actions that are available in the activity composer. More specifically, it’s the Salesforce1 and Lightning Experience Actions section on a page layout that’s doing the driving here. (Remember, the activity composer and activity timeline are available on accounts, campaigns, contacts, contracts, leads, opportunities, and activity-enabled custom objects.)

Because you define actions at the page layout level, you can tailor the activity composer to give users exactly what they need for each object. Eliminate actions from objects where they’re not needed or appropriate, and organize actions in the most meaningful way for each object.
If a page layout uses the standard Salesforce1 and Lightning Experience Actions section, the activity composer for the object automatically includes all four of the default activity actions. To customize the composer, click the override the predefined actions link in the section. Then remove unwanted actions, and drag in other actions from the Salesforce1 & Lightning Actions category in the page layout editor palette.
Hint: But wait, you might be thinking, there are a lot of actions in the Salesforce1 and Lightning Experience Actions section. Are they all going to show up in the activity composer? Fear not—Lightning Experience populates the composer with activity actions only. We’ll learn more about what defines an activity action when we talk about creating custom actions.
You can control how actions are arranged in the activity composer so users are naturally focused on the most important or frequently used activities. For example, if tracking follow-up on leads is a priority, put Log a Call first on leads; if you want to drive customer emails from accounts, put Email first on accounts. The composer respects the order of activity actions in the Salesforce1 and Lightning Experience Actions section—skipping over non-activity actions, of course. So if you want Log a Call to appear first in the composer, position it before all other activity actions in the section.
To see how this all comes together, let’s look at an opportunity page layout and the resulting activity composer on an opportunity record.

But Wait, Actions Aren’t Showing Up in the Activity Composer!
Are users alerting you that they can’t see expected actions in the activity composer? The first thing to troubleshoot is the Salesforce1 and Lightning Experience Actions section on the object’s page layout.
A common reason for missing activity actions is that someone customized the Salesforce1 and Lightning Experience Actions section on the corresponding page layout, perhaps when setting things up for the Salesforce1 mobile app. If some (or all) of the default activity actions were removed from the section, they’re also removed from the activity composer. Fortunately, it’s an easy fix. Simply add the actions back to the page layout.
Hot Tip: Before diving into Setup to manually update page layouts, check out the Lightning Experience Configuration Converter. This tool’s Actions and Buttons tab automatically scans and updates page layouts to make sure that all of the standard, custom, and global actions assigned for Salesforce Classic also appear in the same places and the same order in Lightning Experience. For more details, see Lightning Experience Configuration Converter in Salesforce Help.
If the missing actions are in the Salesforce1 and Lightning Experience Actions section already, verify that the affected users have permission to create new tasks and events, log calls, and send email.
If you’re using record types for tasks or events, other factors can lead to missing-in-action activity actions. We’ll look at those issues in a little bit.
Create Your Own Activity Actions
The default activity actions in Lightning Experience are a great starting point for your sales team. But you can crank productivity up to 11 by creating custom activity actions that tackle specific requirements or steps in your business processes. Including custom actions in the activity composer helps users fly through routine work and ensures that your org’s activities records include all the necessary details.
You can replace the default activity actions, or augment them with other actions that address unique use cases. For example, reduce the time your Leads Follow-Up team spends writing emails by creating a custom email action that fills in the From field with the team’s email address, attaches the team’s signature, and populates the email body with your boilerplate content. You’ll definitely want to add this time-saver to the activity composer for leads!
You can create global custom actions (which generate activity records that don’t have a relationship to other records) or object-specific custom actions (which result in activity records that are related to the record where the action was performed).
| For global custom activity actions: |
To create object-specific activity actions: |
| From Setup, enter Actions in the Quick Find box, then select Global Actions | New Action. |
From Setup, on the Object Manager tab, select an object, then select Buttons, Links, and Actions | New Action. |

- Action Type field: To be classified an activity action and be eligible to appear in the activity composer, an action must be one of these types:
- Log a Call
- Send Email
- Create a Record
- Update a Record
- Target Object field: For create and update actions, select Event or Task.
- Standard Label field: Pick the label to use for the name of the action.
After saving the activity action, set up the fields that users see when kicking off the action. You can also decide which fields are required and set predefined values for fields so users have less data input to deal with.

When you’re finished creating your custom activity action, remember to add it to the desired page layouts, as we covered earlier.
Got Mobile Users?
If your org uses the Salesforce1 mobile app, there are a few other details to consider when customizing the Lightning Experience activity composer. As the name implies, the Salesforce1 and Lightning Experience Actions section on page layouts defines actions for Salesforce1 as well as Lightning Experience. So you want to keep your mobile use cases in mind when you modify page layouts for the activity composer.
Are you using Mobile Smart Actions in the Salesforce1 and Lightning Experience Actions section to populate actions in Salesforce1? Remember that this item generates a unique set of predefined actions for each object, including some or all of the default activity actions. For example, accounts get the Log a Call and New Task actions, contacts get all of those plus the New Event action, and so on.
You can’t modify the actions in the Mobile Smart Actions bundle. So if you’re replacing default activity actions with your own custom versions and you don’t want Salesforce1 users to continue seeing the default actions, remove Mobile Smart Actions from your page layouts. And make sure that the other predefined actions generated by Mobile Smart Actions are included in the Salesforce1 and Lightning Experience Actions section so your mobile users don’t inadvertently lose access to them.
Examples are always best, so let’s look at one. Here’s the Salesforce1 and Lightning Experience Actions section on a contact page layout.

And here’s how actions appear in the Salesforce1 action bar and action menu when viewing a contact in the mobile app.

Got Record Types?
Record types for tasks or events add some complexity when configuring the activity composer. If expected actions are missing from the activity composer and your org has record types, use these pointers to troubleshoot the problem. After confirming that the missing actions were correctly added to the Salesforce1 and Lightning Experience Actions section on your page layouts, that is!
The default activity actions are missing. The likely explanation is that the actions are assigned to the Master record type, which isn’t accessible to most profiles. To remedy the problem, edit the default versions of New Task, Log a Call, and New Event and reassign them to a record type other than Master.

Note: You don’t usually run into this issue with custom activity actions because you can assign them to an appropriate record type during the creation process. Just don’t select the Master record type or your custom action won’t appear in the composer.
Only some users are missing some of the activity actions. Users don’t see actions that are assigned to record types they can’t access. To fix this issue, you can assign the record types in question to the affected users’ profiles. Or reassign the action to a record type that’s available to all your users.
Actions are missing from all but one record type. You’ve probably noticed that you can assign only one record type per action. So what to do if you have multiple records types for tasks or events and you want all of them to have the same action? You need to create multiple versions of the action, one for each record type. And remember to add all versions of the action to all page layouts used by your record types.
Tip: Use a consistent naming convention for all versions of the same action to easily identify which is which in the page layout editor.
Putting It All Together
Wow, that was a lot of techy talk! Let’s make it real by exploring a real-life example, one that might even apply to your org.
Say you have two record types for tasks—one for opportunity tasks and one for lead follow-up tasks. When creating tasks from opportunities, sales reps should use the opportunity task record type. When creating tasks from leads, they should use the lead follow-up task record type. When reps create tasks, you want them to include a few more details than is allowed with the default New Task action. So you decide to create a custom action that includes a place to add comments. You also want reps to track status and prioritize lead follow-up tasks. Here’s how you make this happen.
Create the Custom New Task Actions
You need two versions of your custom New Task action—one to assign to the opportunity task record type and the other for the lead follow-up task record type. Do these steps twice to create both actions.
-
- From Setup, enter global in the Quick Find box, then click Global Actions.
- Click New Action.

Use these settings for the custom New Task action for opportunities.

Use these settings for the custom New Task action for leads.
In the Record Type field, assign each custom action to the appropriate task record type.
In the Name field, notice that we’re using a consistent naming convention for the actions and we’re referencing the object where we want each action to appear. As you’ll see in a sec, this makes it easy to know which action is which in the page layout editor.
-
- Customize the fields for each action

Add the Comments field for the New Task action for opportunities.

Add the Comments, Status, and Priority fields for the New Task action for leads.
Pretty cool, right? With separate New Task actions for opportunities and leads, you can tailor each action to just what’s important in the context where it’s available. So when reps create tasks for opportunities, they aren’t bogged down with the status and priority details that are important for lead follow-up tasks.
Add the Custom Actions to Page Layouts
-
- From Setup, click the Object Manager tab.
- Click Opportunity, then click Page Layouts.
- Edit each opportunity page layout that’s assigned to the opportunity task record type.
- Select Salesforce1 & Lightning Actions in the page layout editor’s palette. Your new custom actions appear here.
- Drag the New Task action that’s assigned to the opportunity task record type into the Salesforce1 and Lightning Experience Actions section. The action’s location in this section determines where the action appears in the activity composer.

- After saving the opportunity page layout changes, click Lead in the Object Manager, then click Page Layouts. Repeat step 3 to add the New Task action that’s assigned to the lead task record type to lead page layouts.
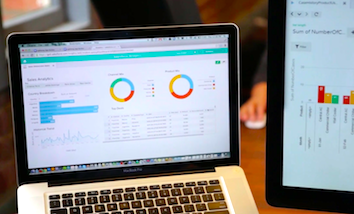
When you’re finished, here’s what sales users see.

The Bearable Lightness of Productivity
Look at that activity timeline, kitted out with all the actions and details that your sales team needs! Your users are going to love how much more efficient they are managing activities in Lightning Experience.
Additional Resources
And check out other tips for setting up and customizing Lightning Experience by following the Pro Tip series: