Welcome to a new series on the Salesforce Admins blog called “How I Solved This.” In this series, we will do a deep dive into a specific business problem, and share how one #AwesomeAdmin chose to solve it. Once you learn how they solved their specific problem, you will be inspired to try their solution yourself! Let’s take a look at how Michael Kolodner was able to highlight key fields on Lightning Record Pages to bring the most important information right where his users need to see it.
Key business problem
I want my users to quickly see key information on a record without having to scroll down or click through endless screens of fields.
How I solved it
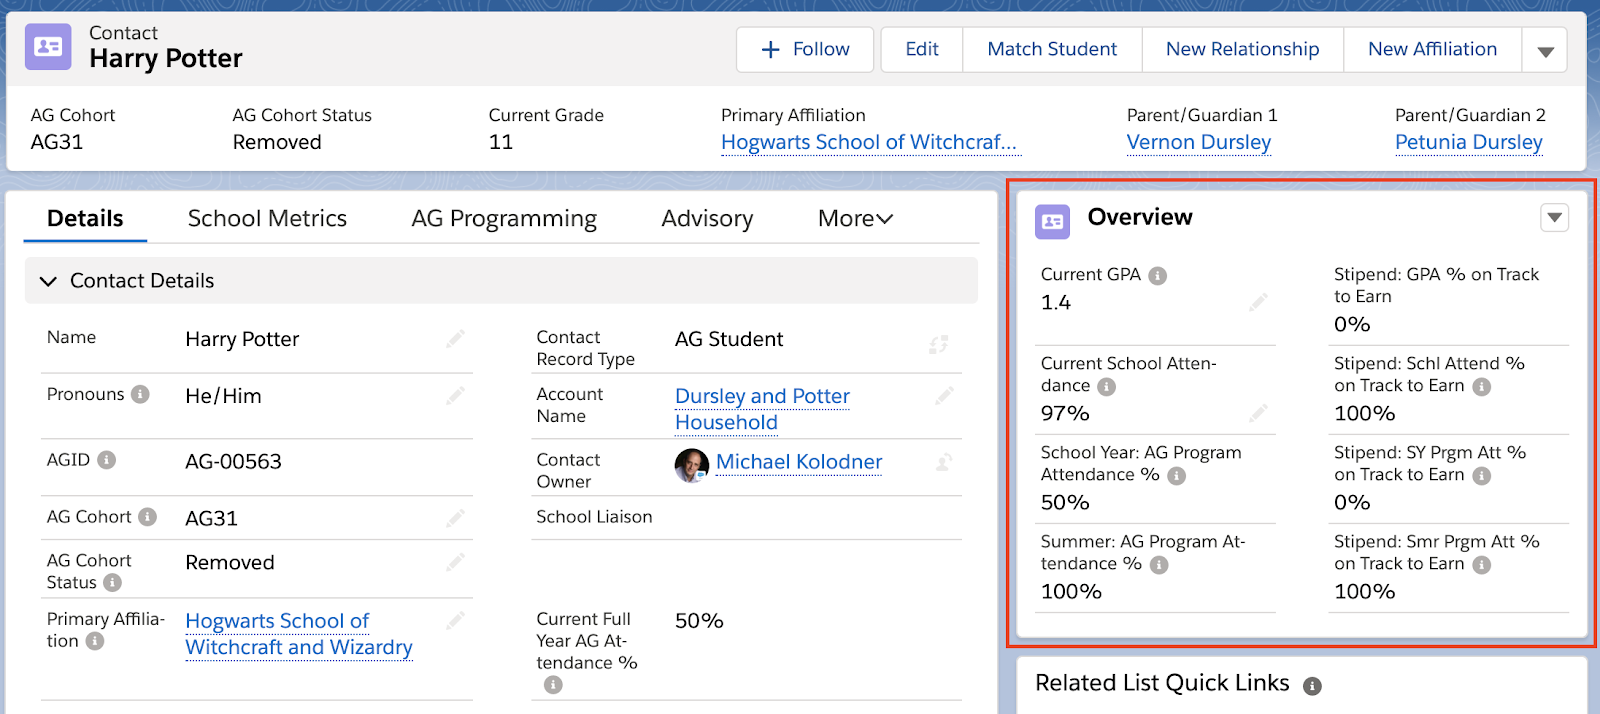
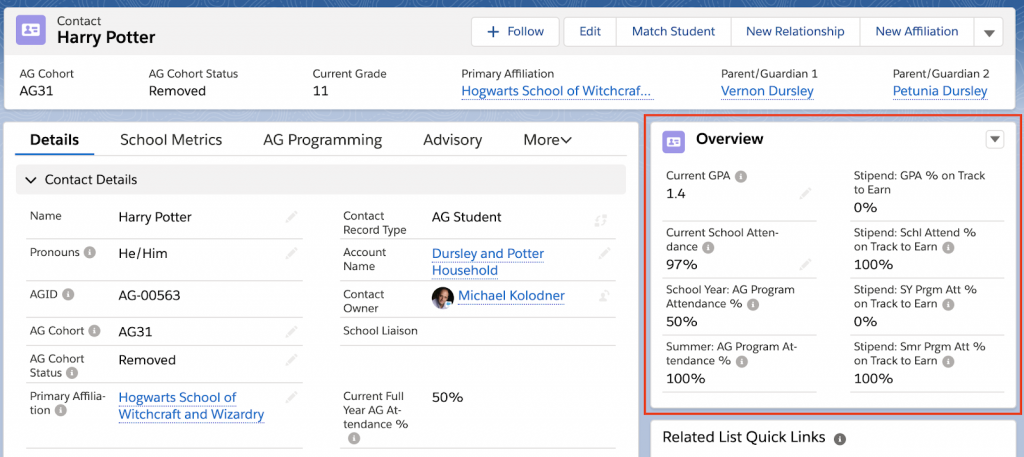
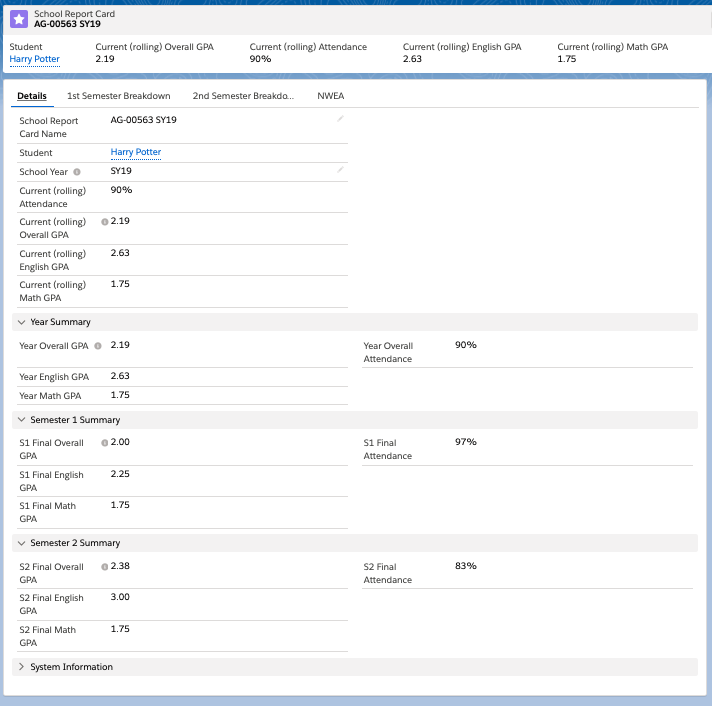
I created an Action on the Object that shows critical information that I want my users to pay close attention to and added it to the Lightning Record Page. Let’s see how this looks for my “Harry Potter” student contact where I’d like to highlight school performance:
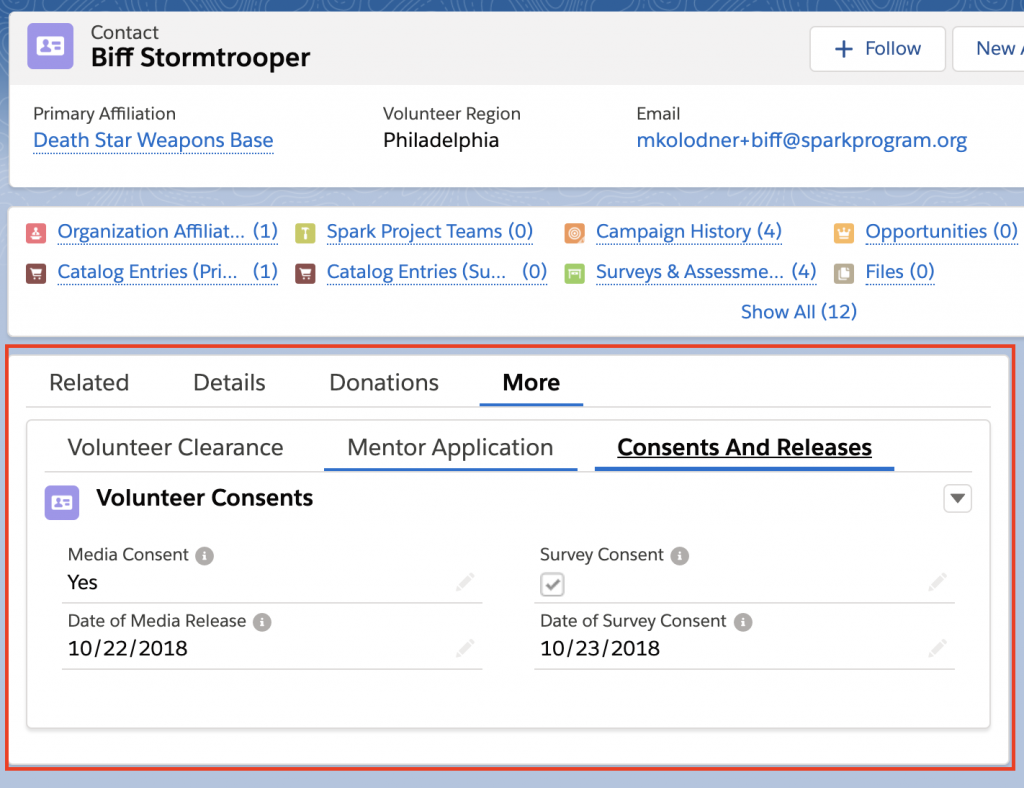
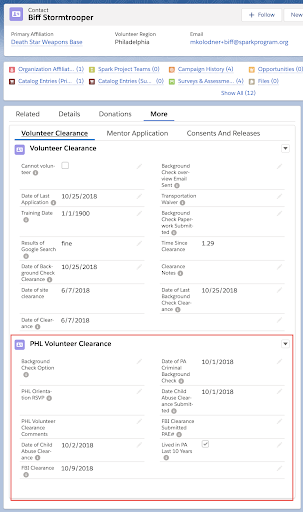
Here is the same technique used on a volunteer contact record where I put the volunteer release information in a custom tab:
In the image below, I am conditionally displaying fields for a volunteer in Pennsylvania, which has different clearance requirements than other states. If I changed his volunteer region, those fields would not display.
How did I build it?
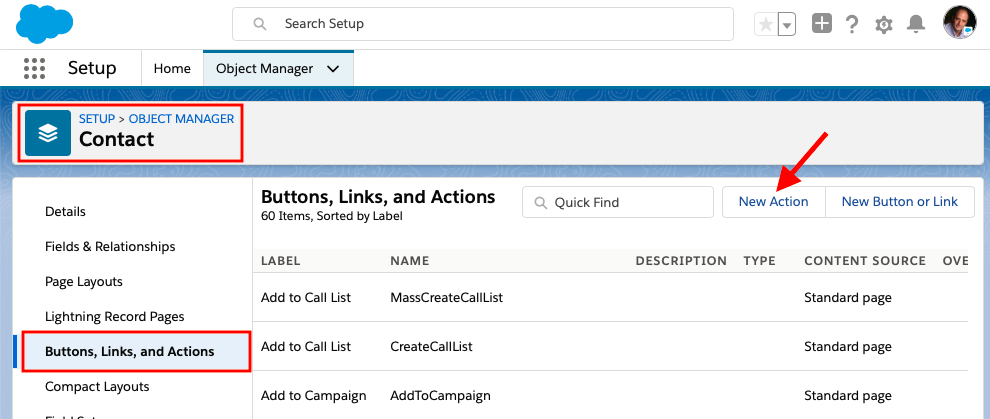
1. Create an Update Records Action on the object you want to highlight key fields on.
Go the Object Manager, find your desired object, and choose Buttons, Links, and Actions > New Action.
Action Type: Update a Record
Label: Give your action a name
Name: Give your action an API name
Description: It’s always good to give a description to help those who come after you.
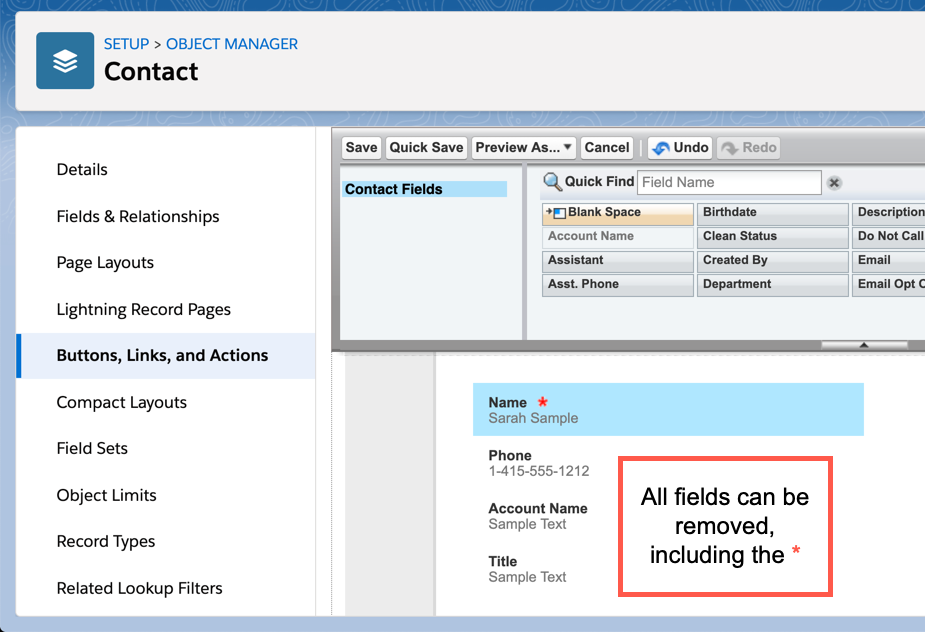
You’ll now be on the screen for your new action. Click “Edit Layout.”
This is where you’re going to put the fields you want to show. You can start by removing the fields that were automatically added by Salesforce, including the ones that appear required with the *. You probably won’t need these because of how we’re using this action. Then add the fields you’d like to display.
2. Place the Related Record Component on your Lightning Record Page
Go into the Lightning Record Page for your object and click Edit Page to start the Lightning App Builder. You’re going to add a Related Record component to the page.
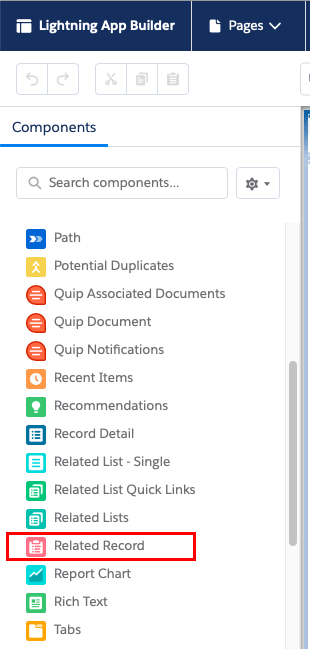
Drag that component onto the canvas wherever you’d like it. Now choose the settings for this component. You can give a Header Label to it if you’d like, which will serve as a title for your field section. Most important is that in the Update Action selector, you’re going to choose the action you just created.
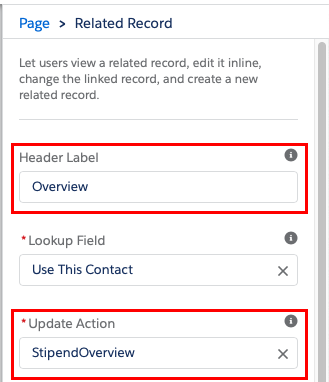
Save and activate your Lightning Record Page and voila! Your new fields display in their own section!

Business results
Now my users can see their important information at a glance with a minimum of scrolling, and in separate tabs if required.
Do try this at home
This example was real and it’s very simple. But the principle behind it could be applied in all sorts of ways. Let your imagination run wild! Here are a couple of examples to get your creative juices flowing:
Break a long details section into multiple tabs
- I have a client that collects student report card data throughout the school year. They actually collect interim grades and attendance three times during the semester and then final data at the end of the semester. Grade records collected every five weeks, roll-up onto the report card to give GPA and overall attendance. The organization wants to see the roll-ups for every five week period, so that’s a lot of fields on the parent Report Card object and it would make for a ton of scrolling. (Not to mention eyes glazing over.) But thanks to the related record trick I’ve got a Details tab that shows the total summaries for semester 1, semester 2, and the full year:
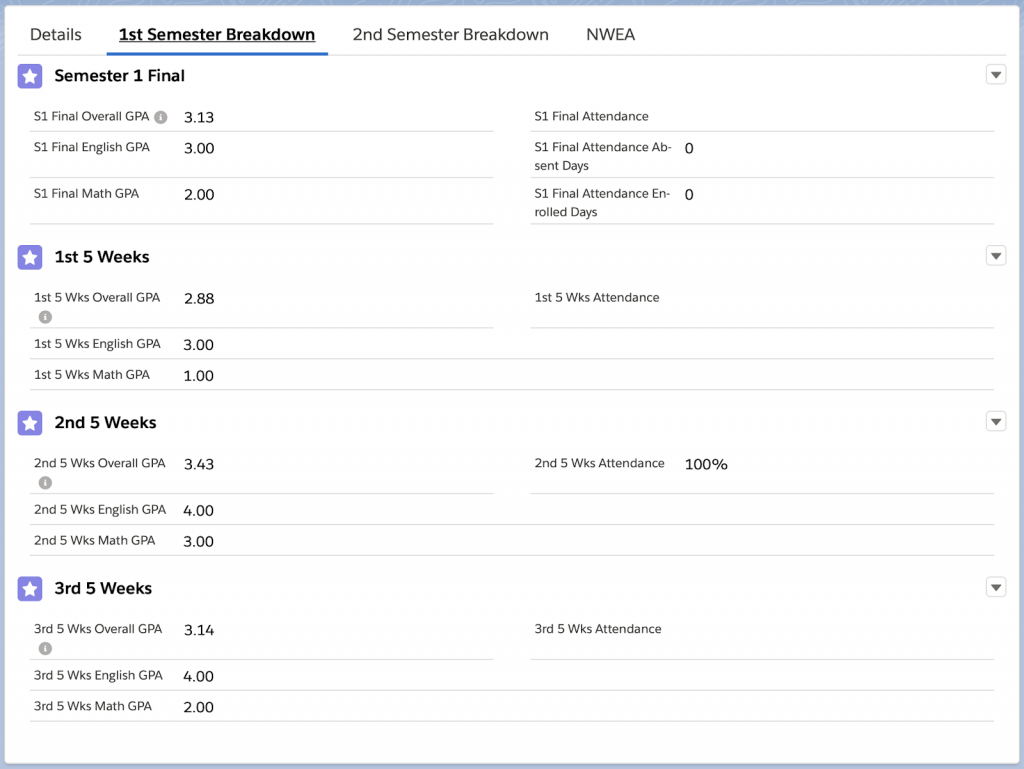
And then I’ve got tabs for each semester that show the every five week fields:
Move specialized data to a separate area
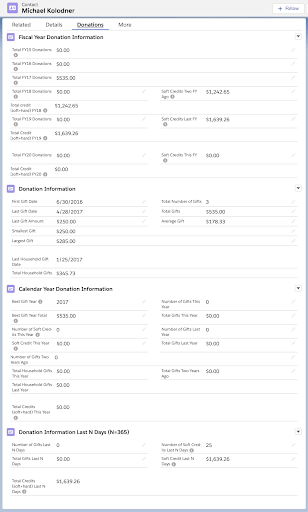
- Here’s another example. The Nonprofit Success Pack (NPSP) has dozens of different rollup fields to summarize a contact’s donation history. These are all fields that automatically roll up from opportunity records and are never meant to be manually edited. They’re also important to understanding donor history but take up a huge amount of screen real estate. So I take all those fields off the detail page layout and display them on their own tab. It’s just one click to get to the fields when you want and practically no scrolling required!
Now it’s your turn!
Go out there and make some beautiful and functional new Lightning Record Pages. Let us know what you thought of this solution, and show us how you will use it on Twitter using #AwesomeAdmin.
Resources
Trailhead badge: Lightning Experience Customization
Trailhead badge: Lightning App Builder